How do I manage the Android service account key for push notifications?
To enable an app to send push notifications to Google Play devices, you require a Firebase Cloud Messaging service account key.
There are three main steps involved in creating a service account key for your app and entering it in Swrve:
- Create or import a project in Google’s Firebase Developer Console and collect the app’s google-services.json configuration file or project’s Sender ID.
- Enter the configuration file or Sender ID when initializing the Swrve Android SDK or Swrve Unity SDK, respectively.
- Upload the project’s Service account key on the Integration Settings screen in Swrve.
After you complete the required configuration, Swrve can send push notifications to your users on your behalf. For more information about managing push notifications in Swrve, see Intro to push notifications.
Creating a project
To create a project in the Firebase Console, select Create New Project and complete the new project process.

If your application is running on a non-Google server environment, you’ll need to download a service account JSON file from your Firebase project. Firebase projects support Google service accounts, enabling you to call Firebase server APIs. If you’re developing code locally or deploying your application on-premises, use the credentials acquired through this service account to authorize server requests.
To authenticate a service account and authorize it to access Firebase services, you must generate a private key file in JSON format.
Ensuring the Firebase Cloud Messaging API (v1) is enabled
If you are using an older Firebase project, check that the Firebase Cloud Messaging API (v1) is enabled for your project. This API should already be enabled for newly created projects.
Step 1: From the Project Overview, select Project settings.

Step 2: Select the Cloud Messaging tab. If the Firebase Cloud Messaging API (V1) is disabled, click on the kebab icon and select Manage API in Google Cloud Console.
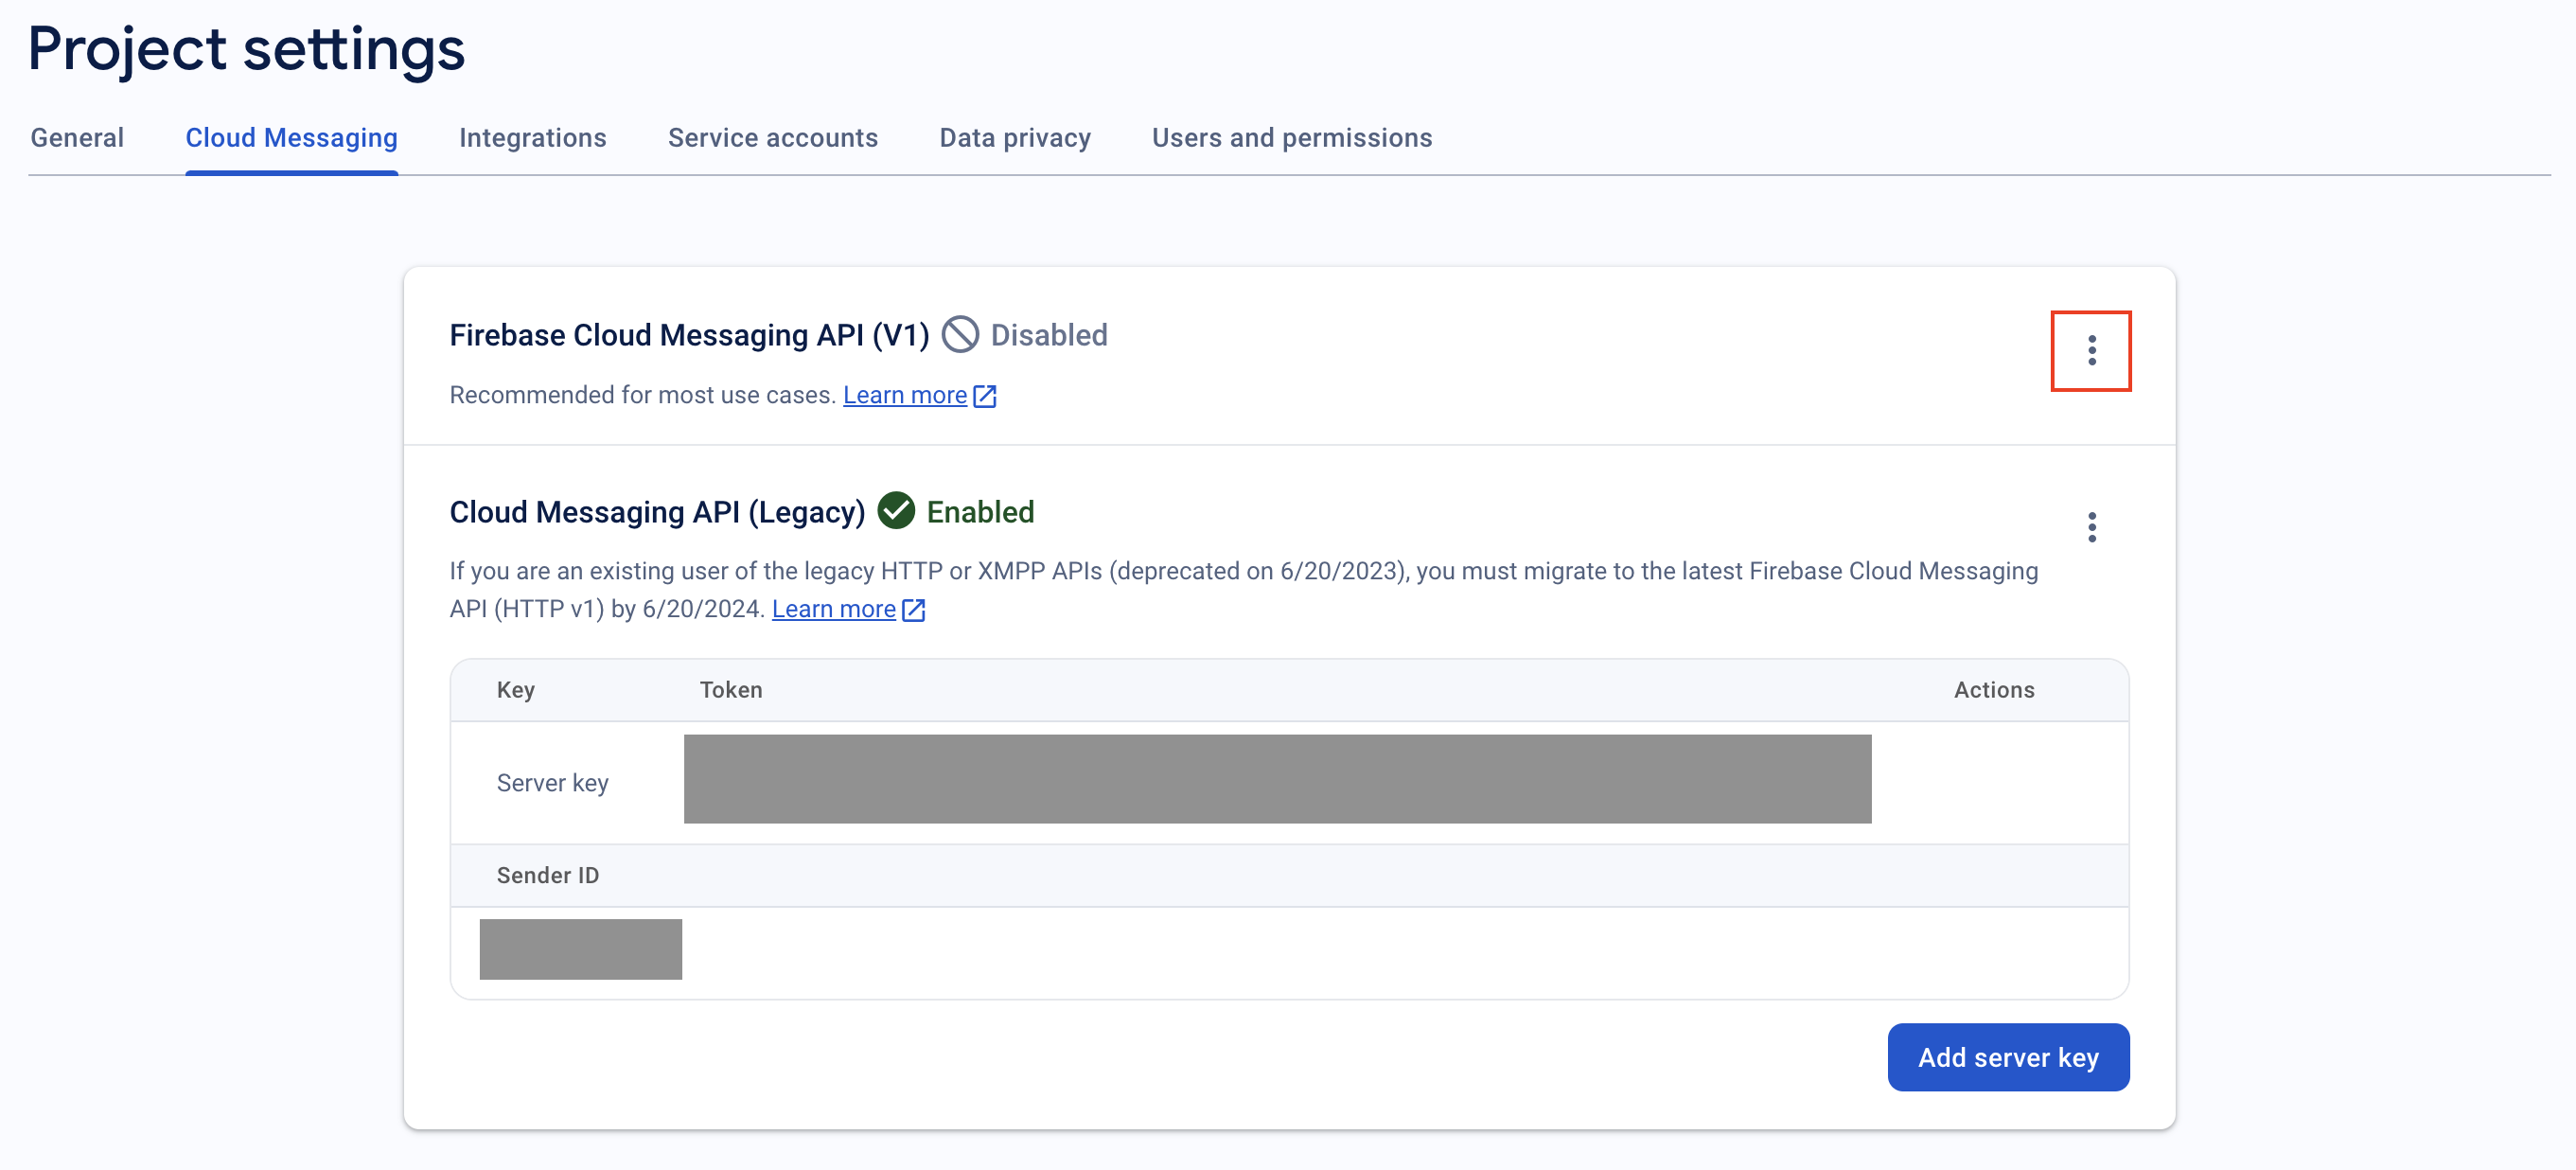
Step 3: On the Firebase Cloud Messaging API page, click Enable.

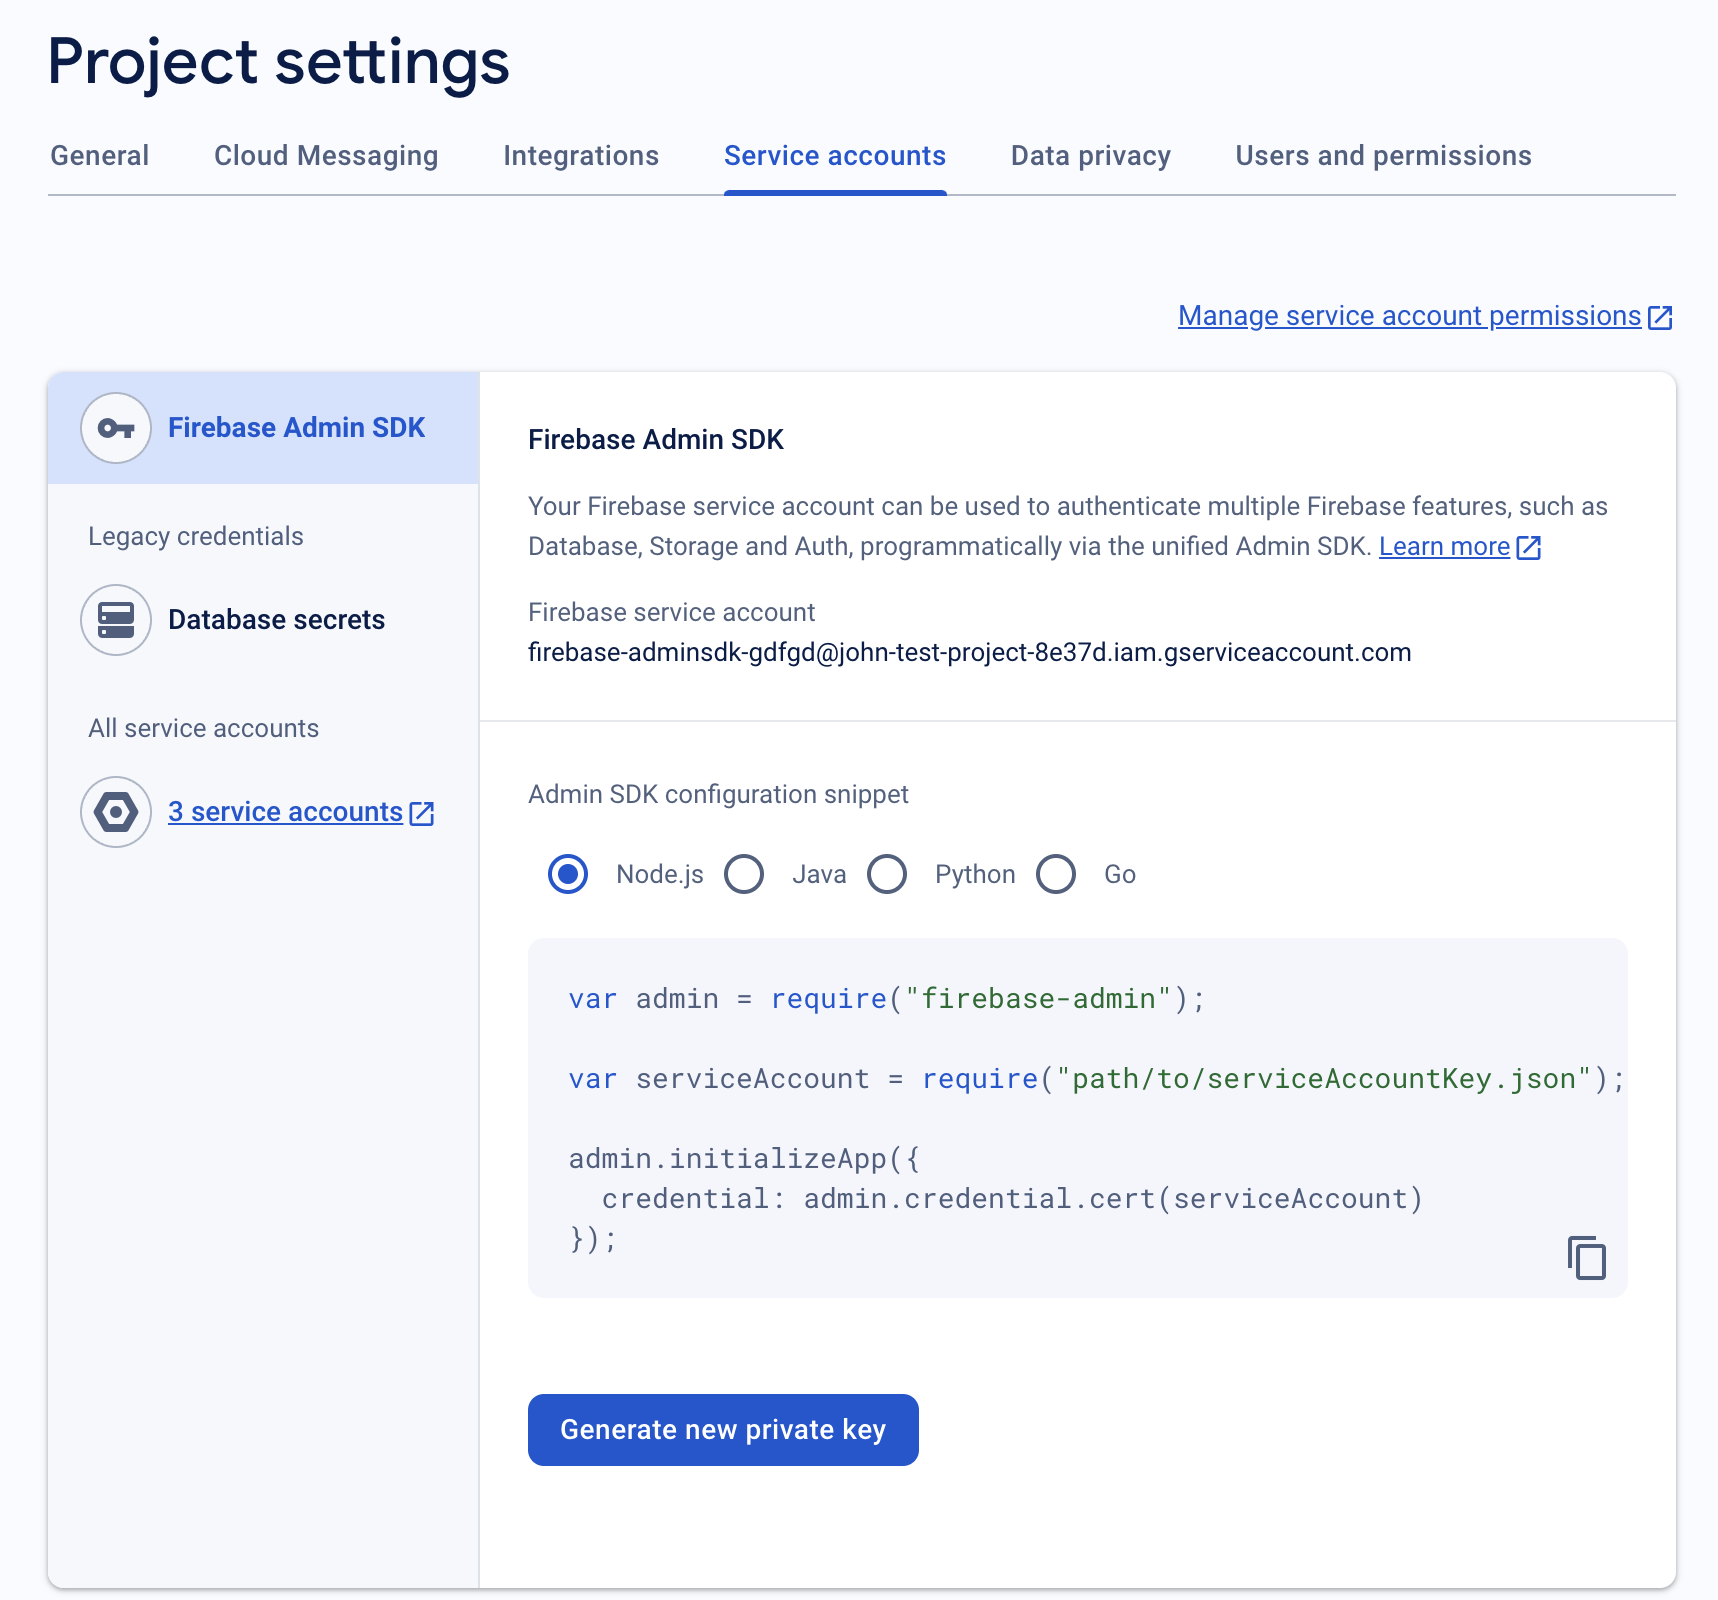
Generating the service account private key
Step 1: On the Project settings menu, select Service Accounts, then select Generate New Private Key.
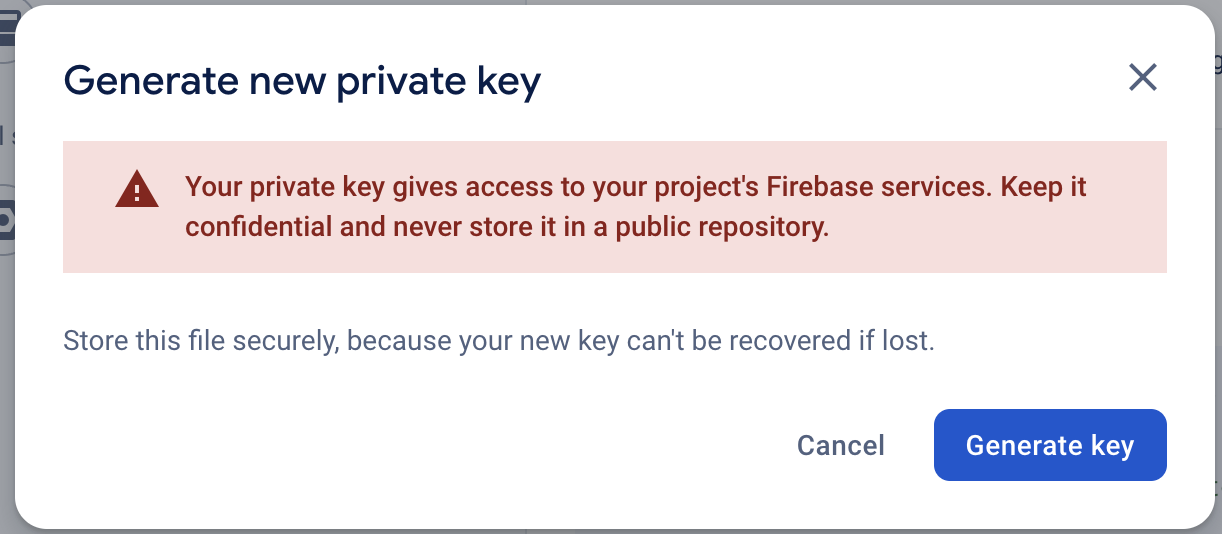
Step 2: Confirm by clicking Generate Key in the warning window.
Uploading a service account key in Swrve
During the Swrve onboarding process, you typically upload your service account key to configure the Integration Settings screen. If necessary, you can later edit the settings on this screen.
Step 1: On the Settings menu, select Integration settings. The Firebase push notification settings are under Push Notifications, in the Firebase Cloud Messaging section.
Step 2: Select Choose file and then navigate to your saved service account key. Select the service account key, and then Upload.
Step 4: Select Verify Key to check that your service account key is valid before saving.
Step 5: Once the key is successfully verified, select Save.
Step 6: To start using the service account key to authorize push notifications sent from Swrve, select the Use Service Account Key box.
Step 7: Test the service account key by sending a test push notification to one of your QA devices. To send a test push notification:
- Select your QA device from the list of available devices.
- Select Send Test Push.
Entering the server key in Swrve
Generally, you enter the server key in Swrve when configuring the Integration Settings screen as part of the Swrve onboarding process. You can edit the settings on this screen later on if required.
Step 1: On the Settings menu, select Integration settings.
Step 2: Under the Push Notifications section, in the Firebase Cloud Messaging Server Key section, enter your Server Key.
Step 3: To start using the server key to authorize push notifications sent from Swrve, de-select the Use Service Account Key box.
Step 4: Test the server key by sending a test push notification to one of your QA devices. To send a test push notification:
- Select your QA device from the list of available devices.
- Select Send Test Push.