Integrate your app
Core integration
Swrve provides the Integration Settings screen to make it easy to integrate the core functionality of Swrve for each of your app’s platform titles. If the app platform is Apple, Google, or Amazon, follow the instructions below to configure this screen. If the platform of your app is Other, you’re integrating with a platform that is not supported by an SDK and you may need to call Swrve’s REST API directly. In this instance, contact your CSM at support@swrve.com for advice on how best to perform your core integration.
To integrate the core functionality of Swrve into your app, complete the following for each of your platform titles:
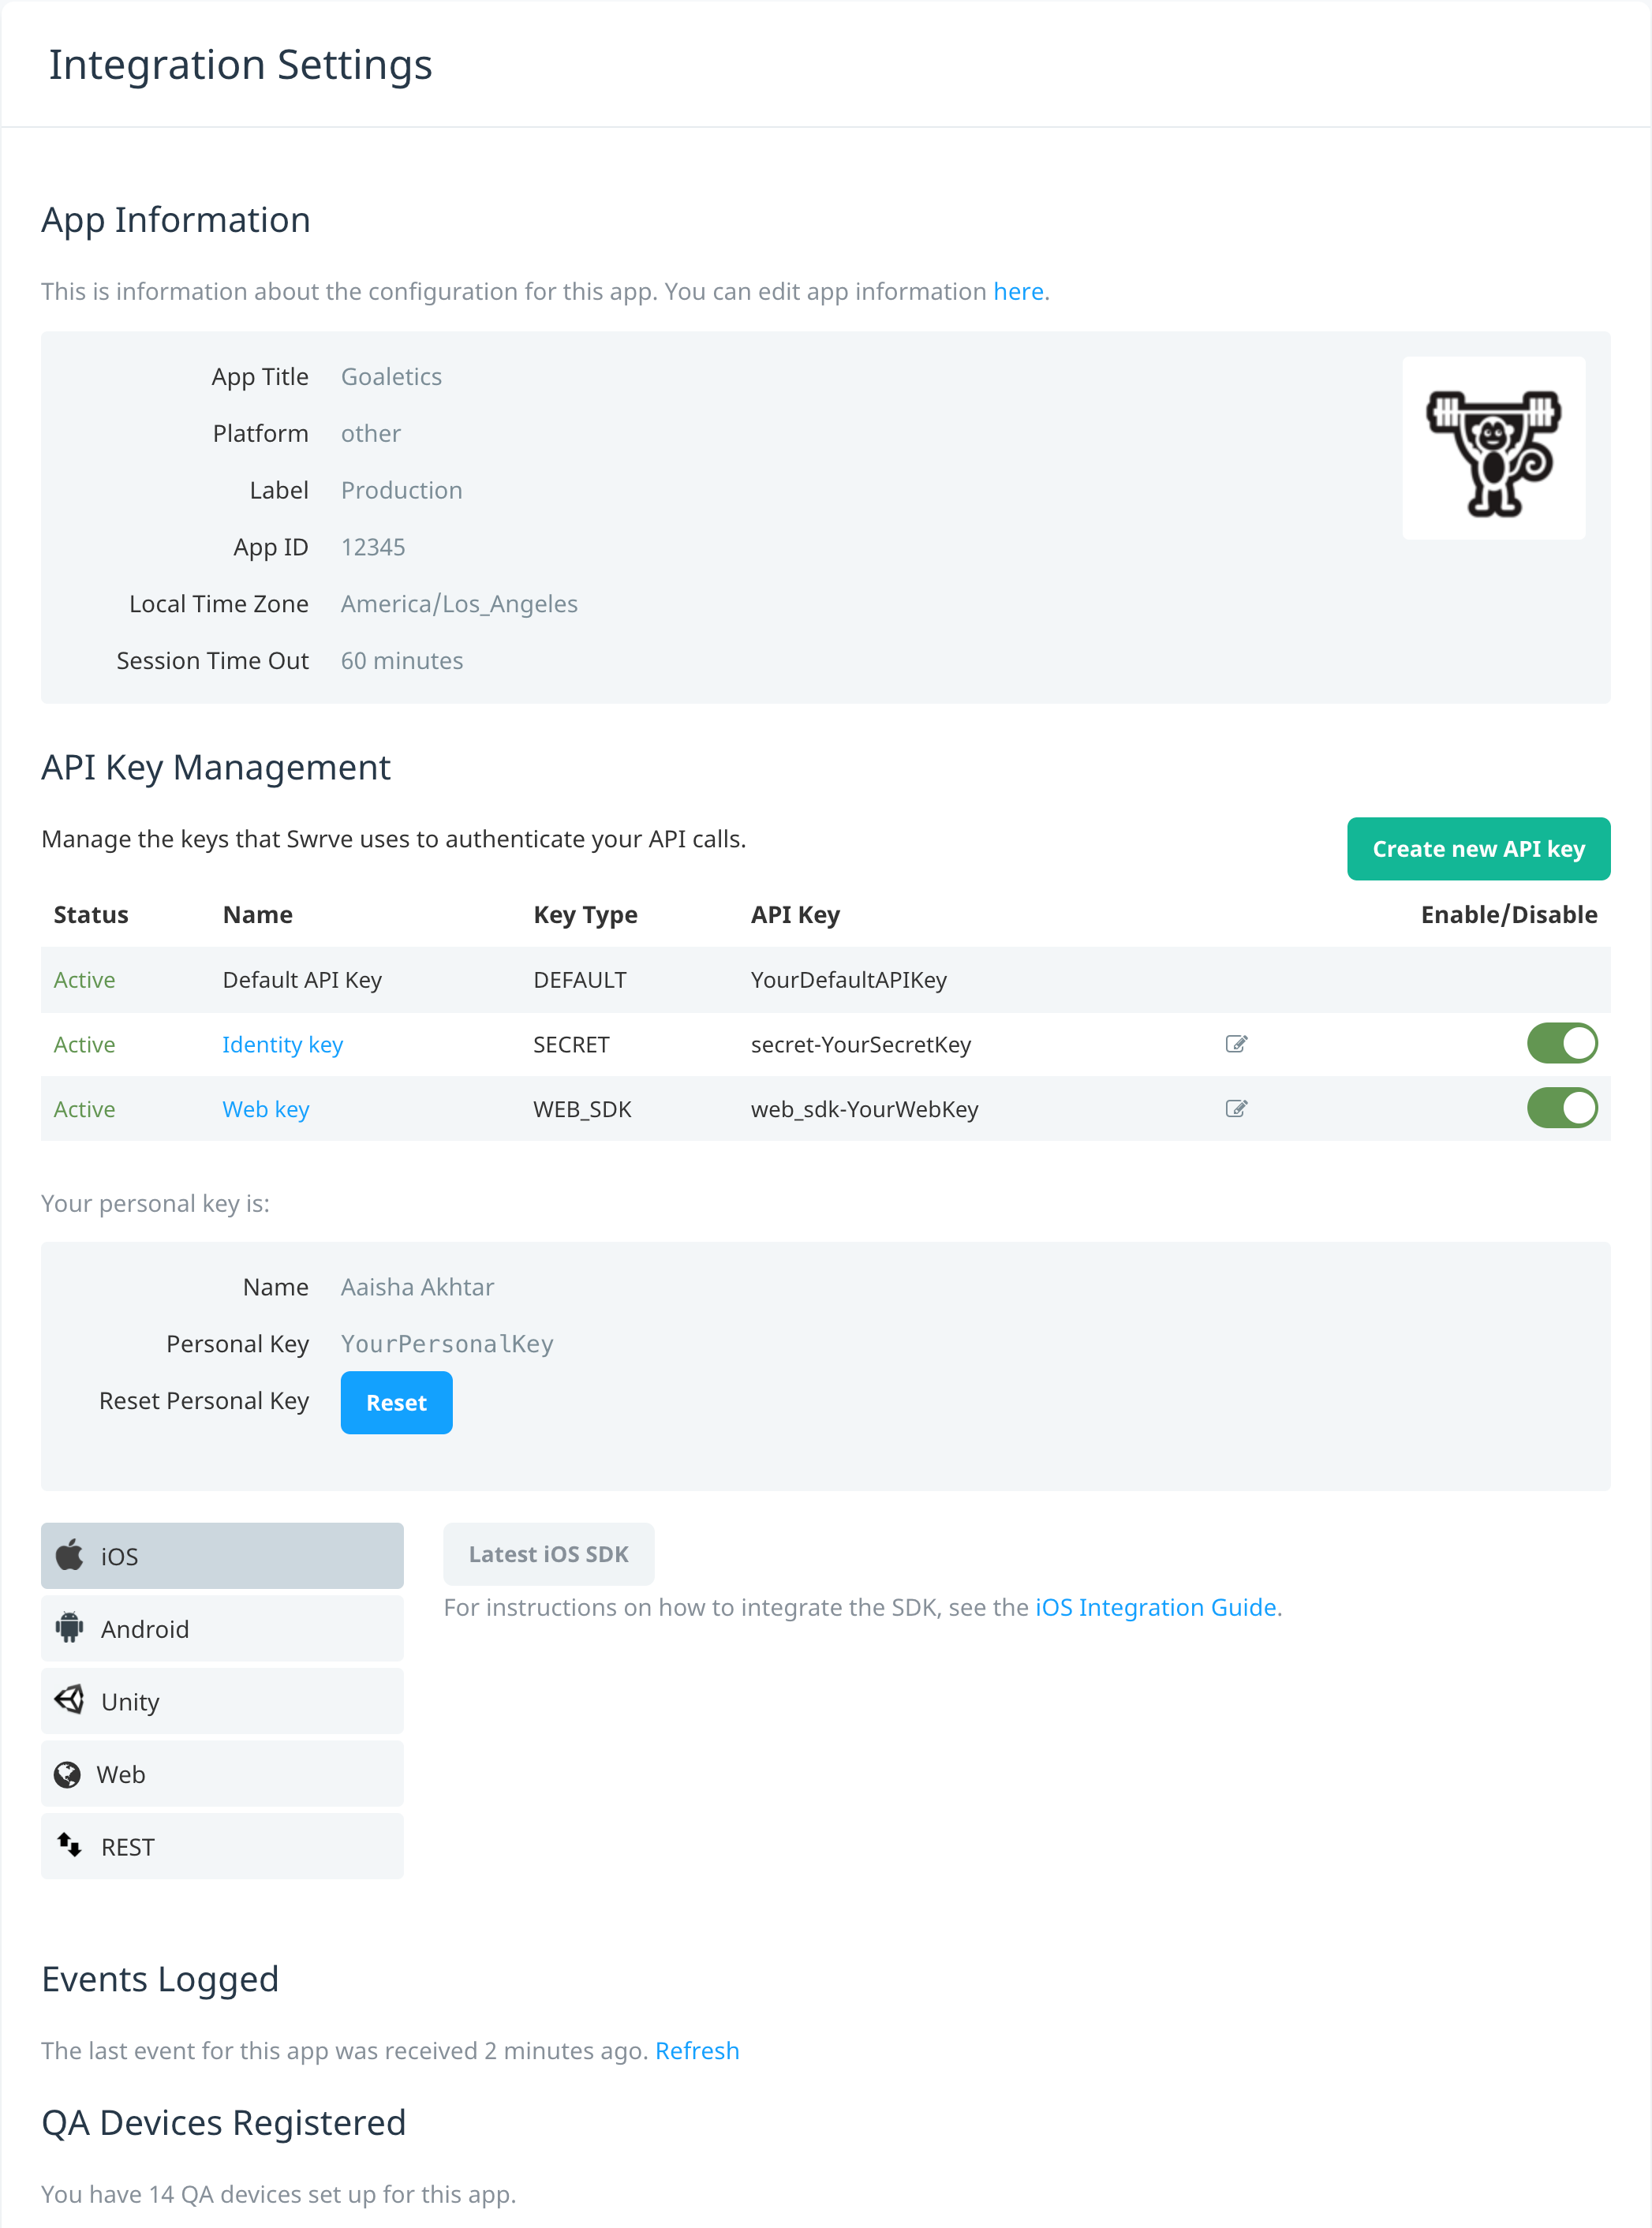
- On the Settings menu, select Integration Settings. The options that appear on the Integration Settings screen depend on the app platform.
- Download the appropriate SDK and follow the integration instructions for your platform. If you are integrating the Swrve SDK into a non-web platform, you will need the app’s Default API Key or a General key. If you are integrating the Web SDK, you need to generate a Web key (see below for more details). For detailed instructions on how to integrate the Swrve SDK, see the platform-specific Integration guide.
- Perform the following actions:
- Check your integration so far by starting your app and confirming that Swrve is sending events in the Events Logged section. Certain events, such as session start and session end events, are sent automatically and require no additional configuration on your side.
- Set up a QA device for integration testing. For more information, see How do I set up QA devices? The QA Devices Registered section provides information about the number of QA devices you have set up for your app.
- Depending on the platform of your app, complete one of the sections below:
Apple
- In the Push Notifications section, upload and test your Apple APNS (push) Certificate. This is required to enable Swrve’s push notification functionality for iOS. For detailed information about managing and uploading push certificates, see How do I manage iOS push certificates?
- In the IAP Validation section, enter your iTunes App Bundle Identifier. This enables validation of IAP receipts against your app; Swrve checks that the bundle ID included in an in-app purchase receipt corresponds to your bundle ID before calculating your revenue KPIs. For information about accessing your bundle ID and enabling receipt validation for Apple, see the iOS integration guide.
Firebase
- In the Push Notifications section, enter and test your Firebase Cloud Messaging service account key (also known as the Android server key). This is required to enable Swrve’s push notification functionality for Firebase. For detailed information about managing and inputting the Android server key, see How do I manage the Android server key?
- In the IAP Validation section, enter your Google Play Licensing Public Key for licensing and in-app billing. Swrve uses this public key to verify every purchase before calculating your revenue KPIs. For information about accessing your public key and enabling receipt validation for Google Play, see the Android integration guide.
Amazon
- In the Push Notifications section, enter and test your Amazon Device Messaging Service Client id and Client secret key. This is required to enable Swrve’s push notification functionality for Amazon Fire devices. For information about accessing your Client id and Client secret key, see the Android or Unity Integration Guide.
- For Amazon SDK integrations, any services directly related to Google Play services, such as in-app purchase validation, are not currently supported.
Huawei
- In the Push Notifications section, enter and test your App Id and App secret. This is required to enable Swrve’s push notification functionality for Huawei devices. For information about accessing your App Id and App secret, see the Huawei App Gallery.
Manage your API keys
To integrate the Swrve SDK into a non-web app, you need the app’s default API key that appears on the Integration Settings or the User Settings screen. However, you might need to create and use other types of API keys, such as in the following situations:
- You want to use different API keys for different platforms.
- You’re integrating the Web SDK.
- You want to send an external user ID when using the Event or Push APIs.
- You want to use Swrve’s Privacy API to manage your Data Subject access and erasure requests.
To generate a new API key:
- In the API Key Management section, select Create new API key.
- In the Add API Key dialog box, enter the Name for the new API key and select the Key type from the list.
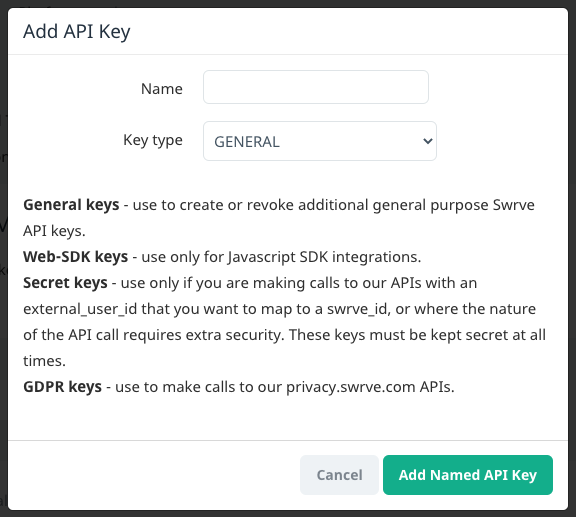 The available Key types are:
- General – Select if you want to use additional general purpose keys. For example, you might use different API keys for your iOS and Android platforms.
- WEB-SDK – Select if you are integrating Swrve into a web app.
- Secret – Select if you are using Swrve’s User Identity API to send External user IDs via the Event or Push APIs. Also used where the nature of the API call requires extra security. Note: Secret keys must remain secret—do not use a secret key in your SDK integration or expose it to end users.
- GDPR – Used to make calls to the Swrve Privacy API.
- To save the new key, select Add Named API Key.
The new API key appears under the API Key Management section and is enabled by default. Select the Enable/Disable toggle if you need to disable the key at any time, or select Edit if you need to edit the API key name.
Reset your personal key
Various Swrve APIs require either an API key or a personal key. If you need to reset your personal key—for example, as general security precaution or if it’s been compromised—select Reset. Once you reset the key, Swrve generates a new personal key and immediately invalidates the old one.
Advanced integration
Once you’re done with the core Swrve integration, start building on the basics to send custom events, access Swrve’s push notification and A/B testing functionality and to perform advanced in-app messaging configuration. It’s up to you just how sophisticated you get—our team will make sure integration for advanced A/B testing, push notifications and segmentation is as simple as possible.
For detailed information about performing advanced integration, see the platform-specific Integration guide.
Next steps
- Start using Swrve to build customized relationships with your app users. For more information, see Understand and engage your users.