Editing Conversations
In the Conversations workflow, the WYSIWYG editor provides several tools to help you add to and edit the content of your Conversations. Select a predefined page template or build your own pages using any combination of text, images, videos, and survey questions to create a rich media and engaging experience for your target audience.
This article explains how to use the various options available in the content editor. For more information about the Conversation workflow, see Creating Conversations. For information about Conversation templates, see About Conversation templates.
Page templates
When you add a new page to your Conversation, you are prompted to select a template. Page-level templates are similar to those available when you first add content to your campaign, but only consist of a single page. There is also an additional template for creating custom 3-button pages.
Depending on the template you select, the preview displays a selection of sample content that you can edit and add to as needed.
Adding new content
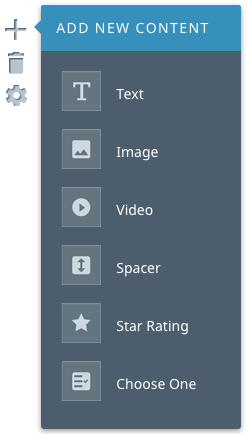
To add additional content, select the + Add New Content icon on the right side of the page. The Add New Content dialog is displayed and enables you to include different types of content on your page.
Select an option to add the content to the page. The types of content are:
- Text – adds a text box to the page.
- Image – adds a section to the page for an image.
- Video – adds a section to the page for embedding a video (YouTube only).
- Spacer – adds a section to the page for creating a space between elements.
- Star Rating – adds a section to the page for including a single star rating survey with five stars.
- Choose One – adds a section to the page for including a single question survey with multiple responses.
Deleting pages
To delete a page from your Conversation, select Delete Page to the right of the preview (just below the Add New Content icon).
 Editing content settings
To access the settings for a section of content, select that section and then select Settings . A content-specific dialog box is displayed and enables you to edit the settings as required.
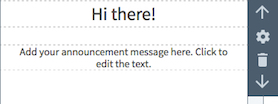
Rearranging or removing content
To move a section of content up or down, select the section and then the Up ↑ or Down ↓ arrow. To remove the section completely, select Delete .
Content validation
The Conversations workflow includes a validation function that alerts you to missing or incomplete content. If you don’t replace the default content in a text, image, video, or survey question box, and then select Continue or try to navigate to another screen, a warning message is displayed and a warning icon highlights the relevant area or page.
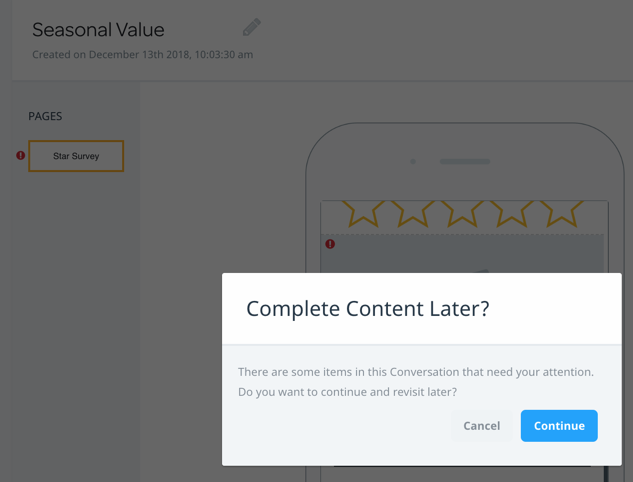
You can dismiss the message and continue working, however an icon is displayed next to the page name and you cannot launch the Conversation until you resolve the issue. For image, video, or survey question boxes, replace the default image or text with your own content. For the text element, it’s possible to remove the content and use the element as a spacer between boxes.
The following sections explain how to customize each type of content.
 Text editor
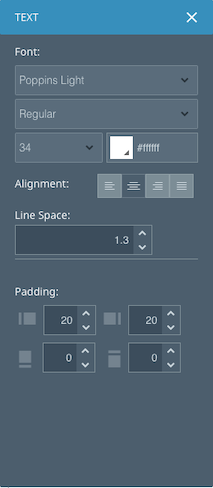
The Text editor now includes options to select custom fonts and to apply inline styles, such as font type, size, and color, to a block of text. You can also set the text alignment, line height, and padding. To access the Text editor, select the text box you want to edit and then select Settings .
The Text editor includes the following formatting options:
- Font – Select the font style, weight, size, and color. For a style to be available in the list, you must first upload it on the Message Style Defaults screen. For more information on uploading custom fonts, see Intro to Conversations.
- Alignment – Select the text alignment.
- Line space – Set the space you would like to have above and below the text.
- Padding – Set the space between the border of the text box and the text inside.
Swrve also supports using emoji in your Conversations content. For more information, see How Do I Include Emojis in Conversations?
Inline font styles
It is also possible to apply basic styles (bold, italic) to individual selections of text within a text box. If you select the text you want to format, the inline style tool is displayed.

 Images
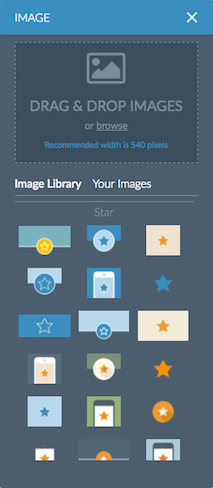
To add an image, select the image placeholder and then Settings to display the Image dialog box.
On the Image Library tab, Swrve provides a library of image files that you are free to include in your Conversations. If you can’t find an appropriate image file, you can upload your own images that are then available on the Your Images tab. Any images you upload for a Conversation are available from that moment on in any other Conversation you create.
There are two ways to upload a new image:
- Drag the image from your desktop to the Drag & Drop Images area.
- Select browse, navigate to and select the image, and then select Open.
Once uploaded, the image appears on the Your Images tab. Select the image thumbnail to add it to the page.
 Videos
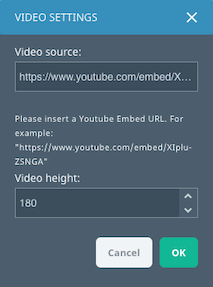
Swrve’s Conversations feature only supports the use of YouTube videos. To use a video in your Conversation, it must be set to public on YouTube. To edit the video URL and height, on the video placeholder, select the Video Settings tab, and then Settings .
To edit video settings:
- In the Video source field, enter the embed URL for your video. For example: https://www.youtube.com/embed/D9J5MPKNwiY
- In the Video height field, enter the height (in pixels). The recommended maximum height is 800 pixels. The Video height field is highlighted in red if you exceed this height.
- Select OK to save the settings.
If there is an issue with the YouTube embed URL, an error message is displayed alerting you to an invalid URL. Double check your URL and make sure it conforms to the example above.
Spacers
To edit the height of a spacer, select the space, and then Settings to display the Spacer dialog box. In the Spacer height field, enter the height (in pixels). The recommended maximum height is 120 pixels. A warning message displays if you exceed this height.
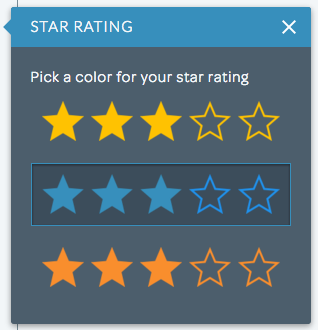
Star rating survey
To edit the color of the star rating, select the stars, and then Settings to display the Star Rating dialog box. Select the desired color from the available options:
 Survey questions
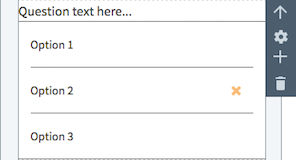
In the Add New Content dialog, use the Choose One option to add a multiple choice question to your page.
- To edit the survey text, select the question or response.
- To edit the text font style, select the question or response and then Settings .
- To add another response, select Add +.
- To remove a response, hover your mouse over the response button and select the orange X to delete it.
Buttons
The Conversation editor enables you to change the label text on buttons and configure the button action.
Button labels and text
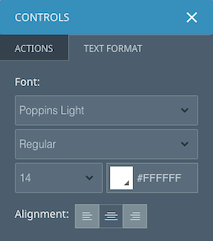
To edit the button label, select the button and edit the text as needed. Custom font options are also available for button text. Select the button text and then in the Controls dialog, select the Text Format tab. Use the available options to set the text font style and alignment.
Button actions
To configure the button action, select the button and select an option from the list on the Actions tab. The available button actions are:
| Action | Description | Example |
|---|---|---|
| Continue Conversation | Takes the user to a new page in the Conversation. | Select this option to add additional pages to the Conversation. If selected, a new page is automatically added and you are prompted to select the new page type. |
| Call a Number | Prompts the user to call a specific phone number. | Select this option to prompt the user to call a number, for example, a support line. Enter the number in the Number to call field and select OK. When the user taps the button, the phone number is passed to the default device dialler, prompting for confirmation. |
| Go to a Web Page | Directs the user to a URL in their default device browser. | Select this option to transfer the user to a web page, for example to promote a sale or featured item. Enter the site URL in the Web address field and select OK. When the user taps the button, the web page automatically opens in their default device browser. |
| Go to Deeplink | Directs the user to a deeplink within the app. | Select this option to transfer the user to another location within the app (or another app). Enter the deeplink URL in the Deeplink address field and select OK. When the user taps the button, they are taken to that location. Your development team must configure deeplinks during the integration process. For more information, see the platform-specific Integration guide. |
| Request Device Permission (iOS only) | Prompts the user to authorize permission for push notifications; or to grant access to Contacts, Photos, Camera and Location. | Select this option to encourage the user to make better use of certain features of your app by authorizing permission to receive push notifications or grant access to applicable functions of their device. Select an option from the list and select OK. |
| End Conversation | Ends the Conversation and returns the user to the app. | Select this option to end the Conversation and return the user back to the app. The activity is logged and reported on as part of the campaign. |
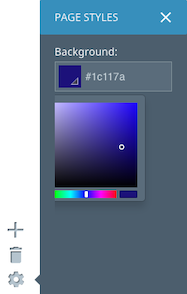
Page background color
It is now possible to customize the page background color of individual pages in your Conversation. To change the background color, select the Settings icon next to the page, and in the Background field, enter the Hex value or select the color swatch to use the color picker tool.
Next steps
- QA test your Conversation. For more information, see QA testing Conversations.
- View the Conversation and its report details on the individual Conversation screen. For more information, see Managing Conversations.
- Change the status of your Conversation using the buttons on the individual message screen. For example, you can edit, launch, pause, or finish a Conversation depending on its current status. For more information, see Managing Conversations.