Add your app
There are four main steps to set up a new app or platform title in Swrve:
- Add a new app title or platform.
- Define the title properties.
- Define the in-app currency names.
- Specify the lead developer who is responsible for integrating Swrve for this particular platform title.
Adding a new app title
To add a new app title or platform, on the Apps Overview screen select one of the following options:
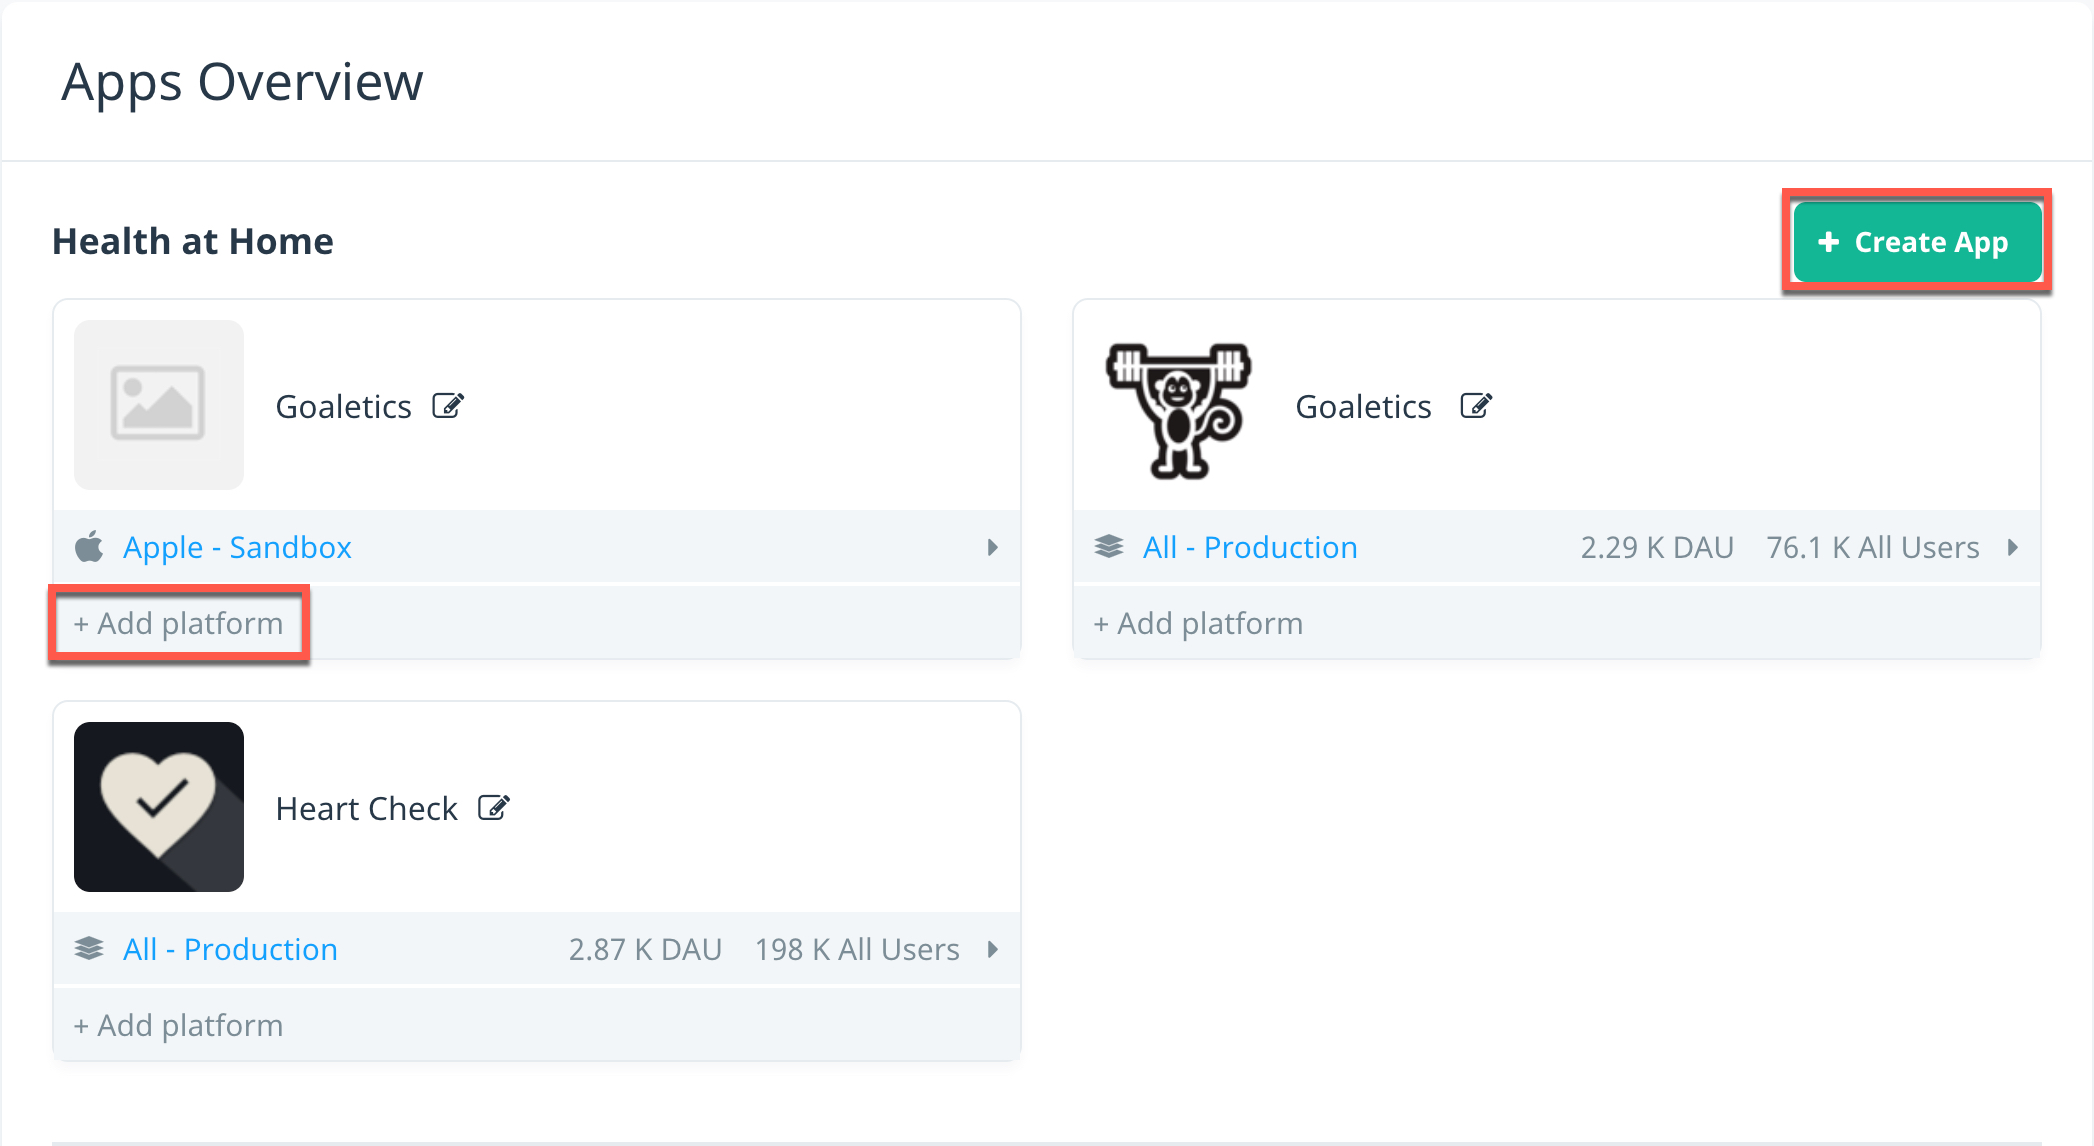
- To add a platform title for an app that has not yet been set up in Swrve, select Create App.
- To add a new platform title to an existing app, select Add platform below the app.
Defining title properties
After you create your app, use the options on the Add Platform Title screen to define the title properties:
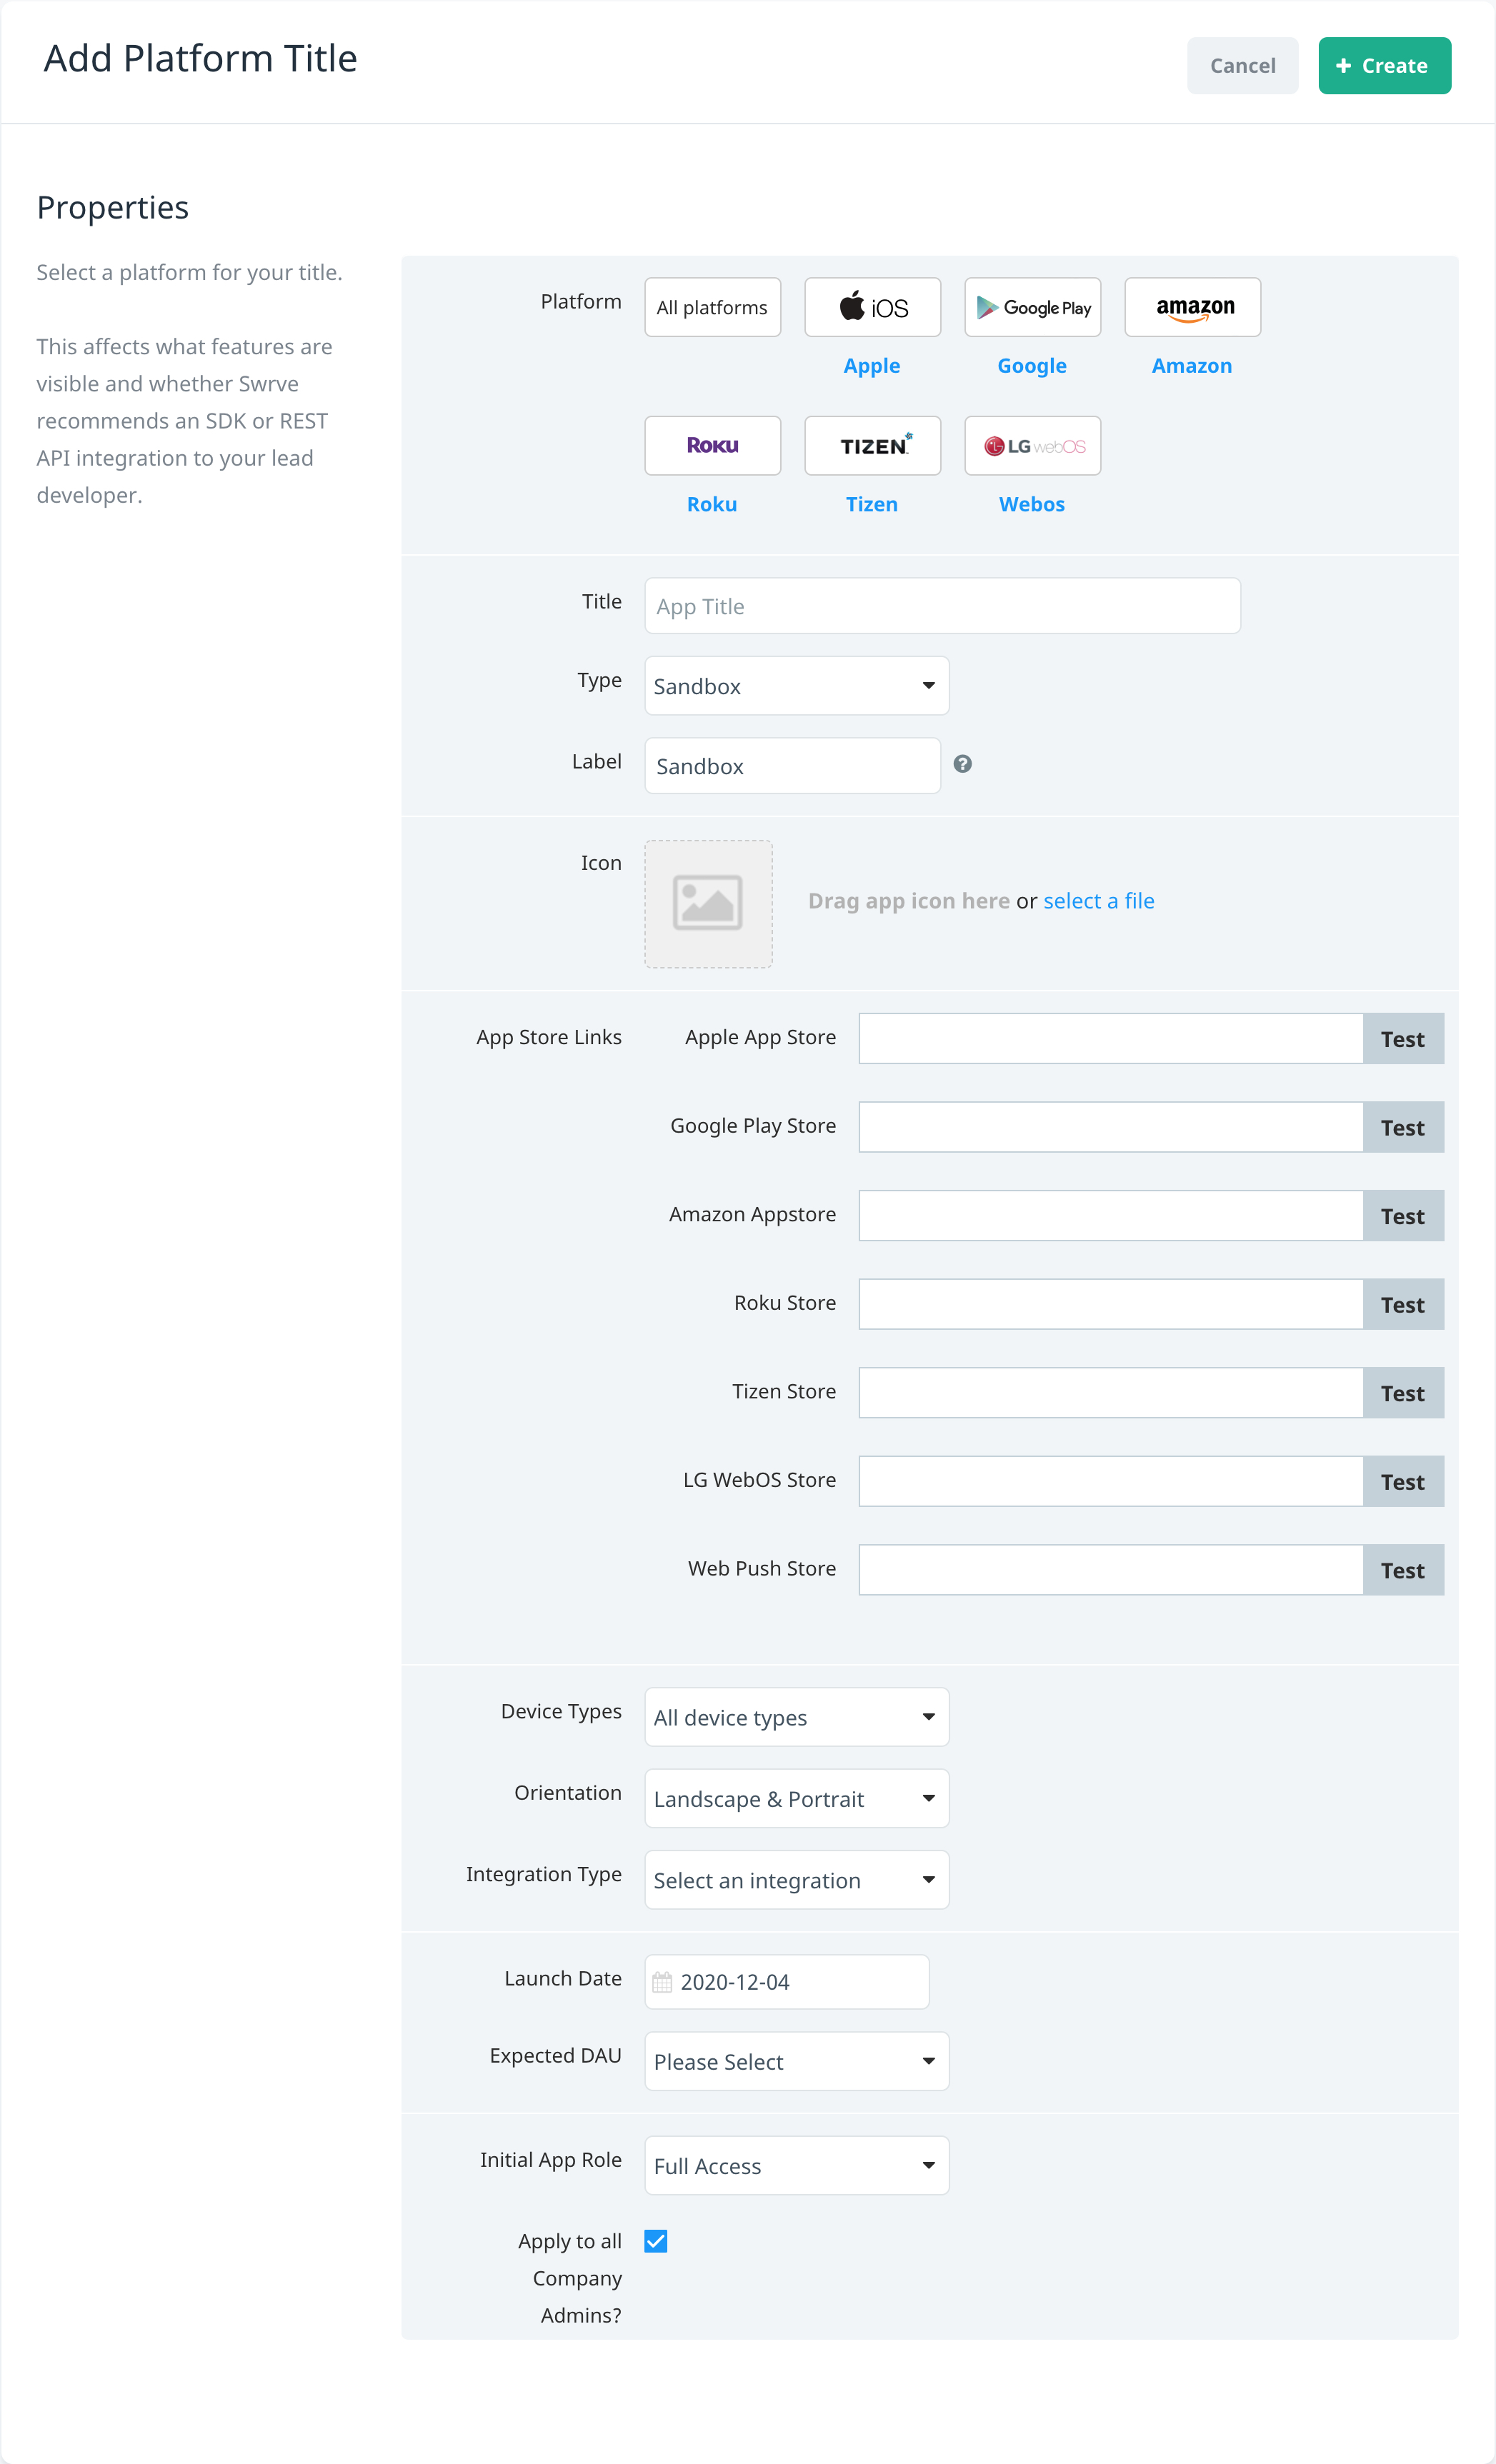
- Complete the following app properties, as required.
- Platform – select the relevant platform for your title. For a cross-platform integration (that is, one that combines your platforms into one Swrve dashboard), select All platforms.
- Title – enter the title of your app.
- Type – select the platform type:
- Sandbox – the platform title is the sandbox version. We recommend using a sandbox for initial testing of your Swrve app integration.
- Production – the platform title is the production version.
- Label – enter a label for your platform title. This helps to distinguish apps that share the same title.
- Icon – upload or drag an icon image for your app.
- App Store Links – (optional) configure any app store links that you want to use to enable cross-promotional in-app messages. To add app store links for the relevant app platform(s):
- Enter the URL for the app store.
- Select Test to test the URL.
- Device Types – select the devices your app will support. The options are Mobile, TV, or All device types.
- Orientation – select the type of device orientation your app will support. The options are Landscape, Portrait, or Landscape & Portrait.
- Integration Type – select the type of integration to inform Swrve how the SDK was integrated. For cross-platform integrations, select Multiple.
- Launch Date – enter the launch date of your app.
- Expected DAU – select the estimated maximum amount of daily active users (DAU).
- Initial App Role – select the user role you want to assign to all Company Admins for the app. If you only want the role to apply to yourself, clear the Apply to all Company Admins? check box.
- To save your settings and display the App Currencies and Lead Developer sections, select Create.
Defining app currencies
Once you create your new app, define any in-app currencies that customers use to purchase virtual items in your app.
In the App Currencies section, complete the following:
- To add a new currency, select Add Currency.
- Name – enter the exact name of the currency.
- Description – enter a description of the currency.
- To save your changes, select Add Currency.
Specifying the lead developer
In the Lead Developer section, select the user that you want to specify as the lead developer and then select Assign. If the developer that you want to nominate is not already set up as a user in Swrve, perform the following actions:
- Select Create User.
- Name – enter the developer’s name.
- Email – enter the developer’s email address.
- To save the developer’s details, select Create User. You are redirected to the Roles Assignment screen.
- On the Assign Roles By User tab, select the role you want to assign to the user for this app and then select Save Roles. If needed, update the app role for any other users that need to access the app. For more information about assigning and managing user roles, see Managing Swrve user roles and permissions
Swrve sends an email to your nominated lead developer that provides them with the information they need to get started with your integration process. When they have completed the required integration, you’ll be ready to start using Swrve.
Next steps
- Integrate the Swrve SDK into your app. For more information, see Integrate your app.