iOS
The Swrve native iOS SDK enables your app to use all of these features. This guide contains all the information you need to integrate the SDK into your app.
Requirements
- The Swrve iOS SDK supports iOS 12 and later but is able to handle older OS versions with a dummy SDK.
- OTT – The Swrve iOS SDK includes support for tvOS. There are no additional integration steps, however if you use Carthage or manually install the SDK, you must specify the platform. For more information, see the relevant section under Installing the SDK.
- Ensure you have the latest version of Xcode. Swrve iOS SDK version 10+ requires Xcode 15+ to build.
- If you’re developing your app in Swift, we recommend upgrading to the latest SDK version to prevent compatibility issues.
- The App ID and API Key for your app. This information is available in Swrve on the Integration Settings screen (on the Settings menu, select Integration settings).
Frameworks
The Swrve SDK references the following frameworks:
- CFNetwork.framework
- StoreKit.framework
- Security.framework
- QuartzCore.framework
- CoreTelephony.framework
- UIKit.framework
- MessageUI.framework
- CoreLocation.framework
- AVFoundation.framework
- CoreText.framework
- UserNotificationsUI.framework
- UserNotifications.framework
If you want to exclude the push notification feature, you can remove the following frameworks by adding an associated preprocessor macro (for more information, see How do I exclude optional iOS frameworks?):
- UserNotificationsUI.framework
- UserNotifications.framework
Automatic Reference Counting
If your Xcode project does not use Automatic Reference Counting (ARC), and you’re manually installing the SDK (that is, not using CocoaPods), you must enable ARC for each file in the Swrve SDK.
Install the SDK
Swrve provides several methods for installing the iOS SDK.
CocoaPods
Step 1: In your project’s Podfile, add the following dependency:
pod 'SwrveSDK'
Step 2: Run the following command to install the new dependency:
pod repo update
pod install
Carthage
Step 1: In your project’s Cartfile, add the following dependencies (the SDK requires SDWebImage to support using animated GIFs as your in-app message images and buttons):
github "Swrve/swrve-ios-sdk"
github "SDWebImage" "~> 5.0"
Step 2: Run the following command to install the new dependencies:
carthage update
Compile for tvOS
If you are compiling for tvOS, ensure that you’re running version 0.37.0 of Carthage or above and specify the platform as follows:
carthage update --platform tvOS
Swift Package Manager
Step 1: In your Xcode project, go to File > Swift Packages > Add Package Dependency.
Step 2: In the Choose Package Repository window, enter the package repository URL: https://github.com/Swrve/swrve-ios-sdk and then select Next.
Step 3: Once the package is uploaded, select the package products and targets (SwrveSDK, SwrveSDKCommon) and then select Finish.
Initialize the SDK
Step 1: To initialize the SDK, in your App Delegate source file (usually named AppDelegate.m), add the following code snippet to the didFinishLaunchingWithOptions method. Replace <app_id> and <api_key> with your app ID and API key.
Swift
import SwrveSDK

func application(_ application: UIApplication, didFinishLaunchingWithOptions launchOptions: [UIApplicationLaunchOptionsKey: Any]?) -> Bool {

    let config = SwrveConfig()

    // To use the EU stack, include this in your config.
    // config.stack = .eu

    #if DEBUG
        SwrveSDK.sharedInstance(withAppID: <sandbox_app_id>,
            apiKey: "<sandbox_api_key>",
            config: config)
    #else
        SwrveSDK.sharedInstance(withAppID: <production_app_id>,
            apiKey: "<production_api_key>",
            config: config)
    #endif

    return true
}
Objective-C
@import SwrveSDK;

- (BOOL) application:(UIApplication *)application didFinishLaunchingWithOptions:(NSDictionary *)launchOptions {
    SwrveConfig* config = [[SwrveConfig alloc] init];

    // To use the EU stack, include this in your config.
    // config.stack = SwrveStackEu;

#if DEBUG
    [SwrveSDK sharedInstanceWithAppID:<sandbox_app_id>
        apiKey:@"<sandbox_api_key>"
        config:config];
#else
    [SwrveSDK sharedInstanceWithAppID:<production_app_id>
        apiKey:@"<production_api_key>"
        config:config];
#endif
}
Step 2 (Optional): As of iOS 9, by default all communications between the app and its backend or the web should use HTTPS. (See the App Transport Security section in Apple’s What’s New in iOS 9.0 guide.) Swrve’s API URL endpoints are now all HTTPS-capable and the API calls default to HTTPS.
Step 3 (Optional): If you are planning to use or ask for location tracking permission, add the following keys to your <App>-Info.plist if not already there. Use the value to explain to your users why your app requires the various location permission. For example, “Goaletics uses your location to inform you about deals and events in your area.”
NSLocationAlwaysUsageDescription– explains why the app requires access to the user’s location at all times (for apps supporting iOS 10 and earlier).NSLocationWhenInUseUsageDescription– explains why the app requires the user’s location information when running in the foreground.NSLocationAlwaysAndWhenInUseUsageDescription– explains why the app requires access to the user’s location at all times.
The project is now ready to compile and run in the iOS simulator.
Manage how you track user behavior
Swrve provides the following APIs to help you manage how you track user activity across app sessions and multiple devices.
- Identify – Makes a call to Swrve to determine if the current user has an existing Swrve user ID, by checking to see if the external user ID they provide is already linked to a known user ID in Swrve.
- Stop tracking – Stops all tracking of the current user’s activity. After this call is made, the SDK runs silently in the background and does not track user activity again until you call the
identifyorstartAPI. - Start – Resumes tracking user activity after you call the
stopTrackingAPI.
This section explains how to use these APIs to manage how you track anonymous users, known users (that is, a user logs in and the SDK identifies them based on an external user ID), and users for whom you want to stop tracking activity (for example, a user logs out). For more information on how to identify users and then track and target them safely across multiple devices, platforms, and channels, see Tracking your users with Swrve User Identity.
External user ID
The external user ID is a non-discoverable key that identifies your user across multiple channels and platforms. To ensure app security, Swrve does not accept email or other personally identifiable information (PIIs) as the external user ID and rejects them on the server side. Before you implement the Identify service, please consult with your CSM at support@messagegears.com for some guidance on best practices to follow in your integration.
The external user ID should always be unique to each user. Using a shared external user ID across users may have adverse consequences on user segmentation, reporting, audiences, and QA device behavior.
Identify pre-existing users
Use the identify API to find pre-existing user identities that an app has logged, either on a single device or multiple devices. To use the identify API, initialize the Swrve SDK as normal in the AppDelegate:
Swift
SwrveSDK.sharedInstance(withAppId:<app_id> apiKey:@"<api_key>")
Objective-C
[SwrveSDK sharedInstanceWithAppID:<app_id> apiKey:@"<api_key>"]
When you are ready, call the identify API with your external user ID:
Swift
SwrveSDK.identify("<external_user_id>", onSuccess: { (status, swrveUserId) in
    // Success, continue with your logic
        }) { (httpCode, errorMessage) in
            // Error should be handled
 }
Objective-C
[SwrveSDK identify:@"<external_user_id>" onSuccess:^(NSString *status, NSString *swrveUserId) {
    // Success, continue with your logic
 } onError:^(NSInteger httpCode, NSString *errorMessage){
    // Error should be handled
 }];
If the call fails, the user’s activity is not linked to an existing user ID in Swrve’s backend system, which might affect reporting and audiences where the user is logging in on multiple devices. We recommend not queuing or sending events until the identify call completes.
Delay tracking activity until user is identified
By default, once the SDK initializes it automatically starts tracking user activity. If you use the identify API on its own, when a user first installs the app, Swrve tracks any activity that takes place prior to calling the identify API as anonymous. For subsequent sessions, it attributes activity to the last known user.
To delay tracking until you’ve identified the user, use the autoStartLastUser configuration property. If you set autoStartLastUser to false, the SDK does not start tracking until you identify the user. Use this option if you do not want to track any anonymous user activity.
Swift
// In the didFinishLaunchingWithOptions method of AppDelegate class
    let config = SwrveConfig()
    config.autoStartLastUser = false
    SwrveSDK.sharedInstance(withAppID: <app_id>, apiKey: "<API_KEY>", config: config)

// Later at a certain point in your app - but not in the didFinishLaunchingWithOptions method
    SwrveSDK.identify("<external_user_id>")
Objective-C
// In the didFinishLaunchingWithOptions method of AppDelegate class
SwrveConfig* config = [[SwrveConfig alloc] init];
config.autoStartLastUser = false;
[SwrveSDK sharedInstanceWithAppID:<app_id> apiKey:@"<API_KEY>" config:config];
// Later at a certain point in your app - but not in the didFinishLaunchingWithOptions method
[SwrveSDK identify:@"<external_user_id>"];
If you set the autoStartLastUser configuration property to false, the SDK:
- Only tracks user activity once you call the
identifyAPI. - Does not automatically start tracking user activity if the app cannot call the
stopTrackingAPI for some reason (for example, if the user hard-closes the app before thestopTrackingAPI call is complete). - Does not display in-app message campaigns that are linked to a push notification.
- Attributes push notification engagement metrics to the last user the SDK was tracking.
To check if the SDK is started before calling regular APIs when autoStartLastUser is false, use the [SwrveSDK started] API.
Stop tracking user activity
As of iOS SDK version 7.1.0, it is possible to stop the SDK from tracking user activity and logging events. To stop tracking the current user’s activity, call the stopTracking API:
Swift
SwrveSDK.stopTracking()
Objective-C
[SwrveSDK stopTracking];
After you call the stopTracking API, the SDK:
- Disables most APIs and returns empty strings or null objects as defaults.
- Does not start tracking user behavior again until you call the
startoridentifyAPI. - Continues to display push notifications, except those you restrict to display only for identified users. The SDK attributes engagement metrics to the last user the SDK was tracking.
- Does not display in-app message campaigns, including those that are linked to a push notification.
- Continues to process background app updates.
Resume tracking user activity
To resume tracking after you call the Stop API, call the start or identify API:
Swift
SwrveSDK.start()
Objective-C
[SwrveSDK start];
If you call the start API, by default the SDK resumes tracking against the last known user ID. If you don’t want to assume it’s the same user, call the identify API.
Custom Swrve user ID
If your integration uses a custom Swrve user ID, there are additional steps you need to take to manage the SDK intitialization and user activity tracking. For more information, contact your CSM at support@messagegears.com.
Push notifications
Use Swrve’s push notification campaigns to send personalized messages to your app users while they’re outside of your app or send silent background app updates. For more information, see Intro to push notifications.
This section covers how to integrate basic Swrve push notifications. To include rich media content and custom buttons in your push notifications, you must also complete the steps outlined in the Notification service extensions section.
Push notifications are disabled by default. To enable them, set SwrveConfig.pushEnabled to YES. This action defines the SwrveSDK as the delegate for the UNUserNotificationCenter. To receive the associated delegate callbacks, refer to the instructions on setting the SwrvePushResponseDelegate below.
For Actionable Notifications on iOS 10+, you must use the notification categories in UNNotificationCategory.
Your app must also handle the following two situations:
- The app is launched from a push notification.
- The app receives the push notification while running.
Swift
func application(_ application: UIApplication, didFinishLaunchingWithOptions launchOptions: [UIApplicationLaunchOptionsKey: Any]?) -> Bool {

    let config = SwrveConfig()
    // Set the response delegate before Swrve is initialized
    config.pushResponseDelegate = self
    config.pushEnabled = true

    if #available(iOS 10.0, *) {
        config.notificationCategories = <SET_OF_UNNOTIFICATIONCATEGORIES> as! Set<UNNotificationCategory>
    }
    SwrveSDK.sharedInstance(withAppID: <app_id>, apiKey: "<api_key>", config: config)
    return true
}

func applicationWillEnterForeground(_ application: UIApplication) {
    // OPTIONAL: Set Application badge number to 0
    UIApplication.shared.applicationIconBadgeNumber = 0
}

//MARK: notification response handling

/** SwrvePushResponseDelegate Functions **/
@available(iOS 10.0, *)
func didReceive(_ response: UNNotificationResponse!, withCompletionHandler completionHandler: (() -> Void)!) {
    print("Got iOS 10 Notification with Identifier - (response.actionIdentifier)")
    // Called when the push is interacted with. (pressed, button or dismiss)
    completionHandler()
}

@available(iOS 10.0, *)
func willPresent(_ notification: UNNotification!, withCompletionHandler completionHandler: ((UNNotificationPresentationOptions) -> Void)!) {
    // Called when a push is received when the app is in the foreground.
    completionHandler([])
}

/** Background update processing **/
func application(_ application: UIApplication, didReceiveRemoteNotification userInfo: [AnyHashable : Any], fetchCompletionHandler completionHandler: @escaping (UIBackgroundFetchResult) -> Void) {

    let handled = SwrveSDK.didReceiveRemoteNotification(userInfo, withBackgroundCompletionHandler: { fetchResult, swrvePayload in
            // NOTE: Do not call the Swrve SDK from this context
            // Your code here to process a Swrve remote push and payload
            completionHandler(fetchResult)
        })

    if(!handled){
        // Your code here, it is either a non-background push received in the background or a non-Swrve remote push
        // You’ll have to process the payload on your own and call the completionHandler as normal
    }
}
Objective-C
- (BOOL)application:(UIApplication *)application didFinishLaunchingWithOptions:(NSDictionary *)launchOptions {

    SwrveConfig* config = [[SwrveConfig alloc] init];

    // Set the response delegate before Swrve is initialized
    config.pushResponseDelegate = self;
    config.pushEnabled = YES;

    config.notificationCategories = <SET_OF_UNNOTIFICATIONCATEGORIES>

    [SwrveSDK sharedInstanceWithAppID:<app_id>
              apiKey:@"<api_key>"
              config:config];
    return YES;
}

- (void)applicationWillEnterForeground:(UIApplication *)application {
    // OPTIONAL: Set Application badge number to 0
    [UIApplication sharedApplication].applicationIconBadgeNumber = 0;
}

#pragma mark - notification response handling

/** SwrvePushResponseDelegate Methods **/

- (void) didReceiveNotificationResponse:(UNNotificationResponse *)response withCompletionHandler:(void (^)())completionHandler {
    NSLog(@"Got iOS 10 Notification with Identifier - %@", response.actionIdentifier);

    // Called when the push is interacted with. (pressed, button or dismiss)
    if(completionHandler) {
        completionHandler();
    }
}

- (void) willPresentNotification:(UNNotification *)notification withCompletionHandler:(void (^)(UNNotificationPresentationOptions))completionHandler {
    // Called when a push is received when the app is in the foreground.
    if(completionHandler) {
        completionHandler(UNNotificationPresentationOptionNone);
    }
}

/** Background update Push Processing **/
-(void)application:(UIApplication *)application didReceiveRemoteNotification:(NSDictionary *)userInfo fetchCompletionHandler:(void (^)(UIBackgroundFetchResult))completionHandler
{
    // Inform the Swrve SDK
    BOOL handled = [SwrveSDK didReceiveRemoteNotification:userInfo withBackgroundCompletionHandler:^ (UIBackgroundFetchResult fetchResult, NSDictionary* swrvePayload) {
        // NOTE: Do not call the Swrve SDK from this context

        // Your code here to process a Swrve remote push and payload

        completionHandler(fetchResult);
    }];

    if (!handled) {
        // Your code here, it is either a non-background push received in the background or a non-Swrve remote push
        // You’ll have to process the payload on your own and call the completionHandler as normal
    }
}
The remainder of the initialization process depends on how you want to request permission from the user to accept push notifications.
When a user first installs a push-enabled app, the SDK does not automatically request push notification permission. Swrve has built-in functionality to manage the timing of this request. There are two options:
- Start of the first session – To request push permission upon install then please set
Swrve.session.startin theSwrveconfig.pushNotificationPermissionsEventsAPI - When one of a list of events is triggered – To request permission when certain events are triggered, add the event names to
SwrveConfig.PushNotificationPermissionEventswhen you initialize the SDK. For example:
Swift
// Initialize Swrve with custom events that will trigger the push notification dialog
let config = SwrveConfig()
config.pushEnabled = true
config.pushNotificationPermissionEvents = Set(["tutorial.complete", "subscribe"])
SwrveSDK.sharedInstance(withAppID: <app_id>, apiKey: "<api_key>", config: config)
Objective-C
// Initialize Swrve with custom events that will trigger the push notification dialog
SwrveConfig* config = [[SwrveConfig alloc] init];
config.pushEnabled = YES;
config.pushNotificationPermissionEvents = [[NSSet alloc] initWithArray:@[@"tutorial.complete", @"subscribe"]];
[SwrveSDK sharedInstanceWithAppID:<app_id>
          apiKey:@"<api_key>"
          config:config];
For more information about uploading device tokens, see How do I upload push device tokens?
In iOS 12, Apple added a feature for provisional authorization of push notifications. This feature enables you to send push notifications as soon as a user opens your app for the first time, without requiring the user to opt-in. The notification is delivered directly to the device’s Notification Center and when the user views the notification, the message automatically includes a built-in prompt asking if they want to continue to receive notifications.
By default, the Swrve SDK requests full push permission the first time the user launches your app. To implement provisional authorization, set different events for both the provisional and full authorization in your SDK configuration.
Swift
config.pushNotificationEvents = Set(["full_permission_button_clicked"])
config.provisionalPushNotificationEvents = Set(["Swrve.session.start"])
Objective-C
config.pushNotificationEvents = [NSSet setWithObject:@"full_permission_button_clicked"];
config.provisionalPushNotificationEvents = [NSSet setWithObject:@"Swrve.session.start"]; // Ask for provisional push permission on app launch
QA test push notification authorization
Apple only asks for permission to receive push notifications once per app, under normal circumstances. As a result, when you want to test your push notification integration on a QA device, you must reset the iOS push permissions to test the different timing configurations for push permissions outlined above. For more information, see How do I reset iOS permissions?
Configure silent notifications
To enable silent push notifications in your app, complete the following:
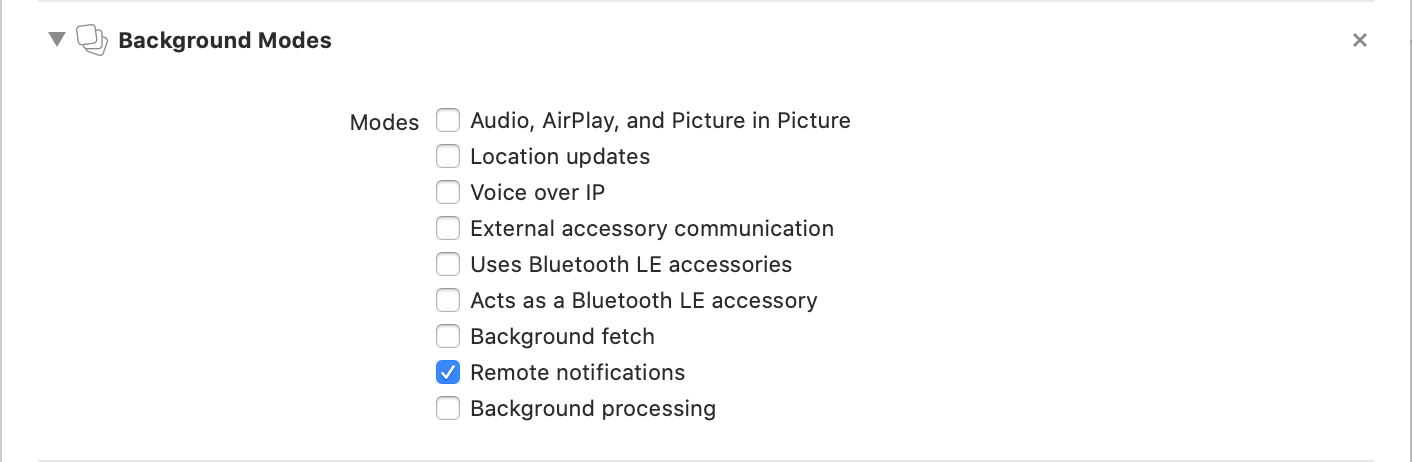
Step 1: Modify your .plist, or on the Capabilities tab, under Background Modes, enable the Remote notifications background mode.
Step 2: Call the Swrve SDK from the following method in your AppDelegate.m:
Swift
func application(_ application: UIApplication, didReceiveRemoteNotification userInfo: [AnyHashable : Any], fetchCompletionHandler completionHandler: @escaping (UIBackgroundFetchResult) -> Void) {

    let handled = SwrveSDK.didReceiveRemoteNotification(userInfo, withBackgroundCompletionHandler: { fetchResult, swrvePayload in
        // NOTE: Do not call the Swrve SDK from this context
        // Your code here to process a Swrve remote push and payload
        completionHandler(fetchResult)
    })

    if(!handled){
        // Your code here, it is either a non-background push received in the background or a non-Swrve remote push
        // You’ll have to process the payload on your own and call the completionHandler as normal
    }
}
Objective-C
-(void)application:(UIApplication *)application didReceiveRemoteNotification:(NSDictionary *)userInfo fetchCompletionHandler:(void (^)(UIBackgroundFetchResult))completionHandler
{
    // Inform the Swrve SDK
     BOOL handled = [SwrveSDK didReceiveRemoteNotification:userInfo withBackgroundCompletionHandler:^ (UIBackgroundFetchResult fetchResult, NSDictionary* swrvePayload) {
        // NOTE: Do not call the Swrve SDK from this context

        // Your code here to process a Swrve remote push and payload

        completionHandler(fetchResult);
    }];

    if (!handled) {
        // Your code here, it is either a non-background push received in the background or a non-Swrve remote push
        // You’ll have to process the payload on your own and call the completionHandler as normal
    }
}
Note: When a silent notification is delivered to the user’s device, iOS gives your app up to 30 seconds to run. Ensure you initiate any download operations needed to fetch new data within that 30 second window.
Step 3: Add code to your app to remove the badge number notification, for example, in the applicationWillEnterForeground callback:
[UIApplication sharedApplication].applicationIconBadgeNumber = 0;
Process custom payloads
If you want to capture any custom key/value pairs passed with the push notification, capture the notification data in your application’s didFinishLaunchingWithOptions and use the delegate methods provided by SwrvePushResponseDelegate.
Note: You must define the delegate class before you initialize Swrve.
Swift
func application(_ application: UIApplication, didFinishLaunchingWithOptions launchOptions: [UIApplicationLaunchOptionsKey: Any]?) -> Bool {
    // Capture the notification data that opened the app
    let remoteNotification = launchOptions?[UIApplicationLaunchOptionsKey.remoteNotification]
    if remoteNotification != nil {
        // Do something with remoteNotification
    }
}

/** SwrvePushResponseDelegate Methods **/

@available(iOS 10.0, *)
func didReceive(_ response: UNNotificationResponse, withCompletionHandler completionHandler: (() -> Void)) {
   print("Got iOS 10 Notification with Identifier - (response.actionIdentifier)")
   // Include your own code in here
   completionHandler()
}

@available(iOS 10.0, *)
func willPresent(_ notification: UNNotification, withCompletionHandler completionHandler: ((UNNotificationPresentationOptions) -> Void)) {
   // Include your own code in here
   completionHandler([])
}
Objective-C
- (BOOL) application:(UIApplication *)application didFinishLaunchingWithOptions:(NSDictionary *)launchOptions {
    // Capture the notification data that opened the app
    NSDictionary * remoteNotification = [launchOptions objectForKey:UIApplicationLaunchOptionsRemoteNotificationKey];
    if (remoteNotification) {
        // Do something with remoteNotification
    }
}

/** SwrvePushResponseDelegate Methods **/

- (void) didReceiveNotificationResponse:(UNNotificationResponse *)response withCompletionHandler:(void (^)(void))completionHandler {
    NSLog(@"Got iOS 10 Notification with Identifier - %@", response.actionIdentifier);

    // Include your own code in here
    if(completionHandler) {
        completionHandler();
    }
}

- (void) willPresentNotification:(UNNotification *)notification withCompletionHandler:(void (^)(UNNotificationPresentationOptions))completionHandler {

    // Include your own code in here
    if(completionHandler) {
        completionHandler(UNNotificationPresentationOptionNone);
    }
}
The method above enables you to specify any launch parameters that you want to capture and take action on.
Disable push notification method swizzling
To reduce the number of code changes required to implement push notifications using the Swrve SDK, by default method swizzling is used around the iOS push notification methods.
In some cases, especially where custom handling of push notification methods is required, it is necessary to disable the Swrve SDKs push notification method swizzling. Use the following code if you want to disable method swizzling:
Swift
func application(_ application: UIApplication, didFinishLaunchingWithOptions launchOptions: [UIApplicationLaunchOptionsKey: Any]?) -> Bool {

    let config = SwrveConfig()
    // Set the response delegate before Swrve is initialized
    config.pushResponseDelegate = self
    // Set the app group if you want influence to be tracked
    config.autoCollectDeviceToken = false;
    config.pushEnabled = true

    SwrveSDK.sharedInstance(withAppID: <app_id>, apiKey: "<api_key>", config: config)

    return true
}

func application(_ application: UIApplication, didRegisterForRemoteNotificationsWithDeviceToken deviceToken: Data) {
    SwrveSDK.setDeviceToken(deviceToken)
}
Objective-C
- (BOOL)application:(UIApplication *)application didFinishLaunchingWithOptions:(NSDictionary *)launchOptions {
    SwrveConfig* config = [[SwrveConfig alloc] init];
    config.pushEnabled = YES;
    config.autoCollectDeviceToken = NO;
    [SwrveSDK initWithAppID:<app_id>
              apiKey:@"<api_key>"
              config:config];
}

- (void)application:(UIApplication *)application didRegisterForRemoteNotificationsWithDeviceToken:(NSData *)deviceToken {
    [SwrveSDK setDeviceToken:deviceToken];
}
Create and upload your iOS certificate
To enable your app to send push notifications to iOS devices, you require a push certificate. A push certificate authorizes an app to receive push notifications and authorizes a service to send push notifications to an app. For more information, see How do I manage iOS push certificates?
Provision your app
Each time your app is published for distribution, you must provision it against the push certificate that has been created for the app.
Notification service extensions
To display rich push notifications in your app and track the delivery of those push notifications, iOS uses a notification service app extension. You must add a notification service extension to make use of the following SDK features:
- Rich media options, including custom response buttons. Rich push notifications are available in iOS SDK versions 4.11 and above.
- Push notification delivery. As of version 6.4, the Swrve iOS SDK automatically tracks and logs when a push notification is delivered to the device.
This section describes how to add a service extension to your app. It also covers how to add an app group to handle tracking delivery and influenced users of rich push notifications and how to process notification responses, if required.
For examples of how to integrate rich push notifications in the Swrve iOS SDK, see the Swrve iOS SDK samples folder on GitHub.
Create a notification service extension
Step 1: In Xcode, add a service extension to your project:
- Select New > Target to add a new target to your project.
- In the iOS > Application Extension section, select the Notification Service Extension target and then select Next.
- Specify the name and other details for your app extension and then select Finish.
Note: When naming the service extension, it’s important that the start of the Bundle identifier for the service extension is the same the main app’s. For example:
Main App: YourCompany.YourApp
Service extension: YourCompany.YourApp.YourAppServiceExtension - When prompted, select Activate to activate the extension.
Step 2: Since service extensions were only introduced in iOS 10, change the Deployment Target of the service extension to 10.0 to maximize compatibility with iOS 10+ versions of the app. (The Deployment Target of the app can be lower than iOS 10.)
Step 3: In CocoaPods, add a new target block with the same name as your service extension and only include the latest SwrveSDKCommon pod (that is, from the same version of the SDK that your main app uses). For example:
target 'YourAppServiceExtension' do
  pod 'SwrveSDKCommon'
end
Do not include the SwrveSDK pod. It is not required for a service extension and, as certain features in the SwrveSDK pod are not permitted in a service extension, will cause compilation errors.
Step 4: For both the service extension and your main app, on the Signing & Capabilities tab, ensure Push Notifications are enabled:
![]()
Step 5: Run a pod install.
Step 6: Import Swrve Push and add the following to the service extension NotificationService class:
Swift
import UserNotifications
import SwrveSDKCommon

class NotificationService: UNNotificationServiceExtension {

    var contentHandler: ((UNNotificationContent) -> Void)?
    var bestAttemptContent: UNMutableNotificationContent?

    override func didReceive(_ request: UNNotificationRequest, withContentHandler contentHandler: @escaping (UNNotificationContent) -> Void) {
        self.contentHandler = contentHandler

        SwrvePush.handle(request.content, withAppGroupIdentifier: "group.swrve.RichPushSample") {(content) in
            self.bestAttemptContent = content;
            contentHandler(self.bestAttemptContent!)
        }

    }

    override func serviceExtensionTimeWillExpire() {
        if let contentHandler = contentHandler, let bestAttemptContent = bestAttemptContent {
            contentHandler(bestAttemptContent)
        }
    }

}
Objective-C
#import "NotificationService.h"
@import SwrveSDKCommon;

@interface NotificationService ()

@property (nonatomic, strong) void (^contentHandler)(UNNotificationContent *contentToDeliver);
@property (nonatomic, strong) UNMutableNotificationContent *bestAttemptContent;

@end

@implementation NotificationService

- (void)didReceiveNotificationRequest:(UNNotificationRequest *)request withContentHandler:(void (^)(UNNotificationContent * _Nonnull))contentHandler {
    self.contentHandler = contentHandler;
    [SwrvePush handleNotificationContent:[request content] withAppGroupIdentifier:@"group.swrve.RichPushSample" withCompletedContentCallback:^(UNMutableNotificationContent * content) {
        self.bestAttemptContent = content;
        self.contentHandler(self.bestAttemptContent);
    }];

}

- (void)serviceExtensionTimeWillExpire {
    self.contentHandler(self.bestAttemptContent);
}

@end
Step 7: For debugging, set the Executable of your service extension target to your main app.
On iOS 10, there is an intermittent issue with notification service extensions where, in some debugging instances, the rich media attachment is not displayed. This is a common issue that has been raised with Apple, but should not affect the production version.
Step 8: Start your application and ensure that it’s registered for push notifications.
Step 9: To verify the service extension has been set up correctly, send a rich push notification to your QA device.
If you experience any issues, in your main app check that the service extension is added to the Embedded Binaries (this should be done automatically by Xcode).
Add an app group to your service extension
Complete the steps in this section to make use of the following SDK features:
- Influenced metrics for rich notifications and background (silent) updates. Influenced reporting is useful for seeing how many of your users who didn’t interact directly with a push notification later opened the app in a certain window after receiving the notification. Influenced reporting is available in iOS SDK versions 4.10 and above.
- Push notification delivery. As of Swrve iOS SDK version 6.4, Swrve automatically tracks and logs when a push notification is delivered to the device.
To track delivery of and influence from rich media push notifications or background (silent) updates, the application needs to share stored information with the service extension. An app group enables the service extension to save and load the delivered and influenced data to a shared container that the main app can access on startup.
Add an app group
Step 1: In the Apple Developer portal, create a new App Group. Enter the description and name as group.BundleID.
Step 2: On the portal, go to your app ID for your main app, add the App Group capability and select your new App Group in the checkbox provided.
When you check the Application Services on the portal, App Groups should be enabled.

Step 3: Repeat the above step for the app extension.
Step 4: If your provisioning profiles are not handled by Xcode, you will need to regenerate them as adding an app groups will make them invalid. For example:

Select the profile, select Edit and then select Generate. It is not necessary to make a new provisioning profile, as the status will change to Valid after you select Generate.
Step 5: In Xcode, for both the app and app extension, go to the Capabilities tab, enable App Groups, and select your App Group.
A notification window should appear with the message, “iOS Test App Service Extension Development profile is out of date. Download an updated version from the developer website.” Select Update.
Select the App Group for both targets.
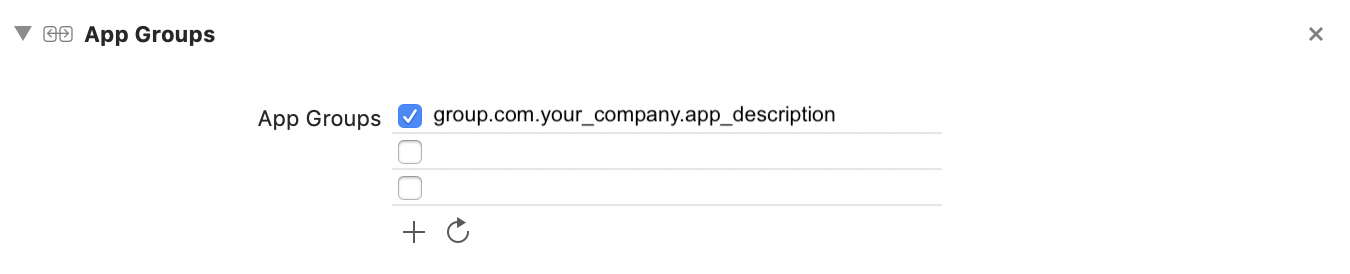
Step 6: In your SwrveConfig, add the same identifier for your app group to the appGroupIdentifier property:
config.appGroupIdentifier = @"group.com.your.group.name"
Step 7: In the service extension, where you call the function handleNotificationContent, include the same appGroupIdentifier.
Step 8: Compile and run the app.
Send a rich push notification to your QA device, do not interact with it but open the app directly and you should see influenced events coming in to your reporting.
Process notification responses
With the addition of custom buttons to the push campaign workflow, if desired, you can also manage the expected response of notifications for the following scenarios:
- How the notification is displayed when the app is running in the foreground.
- How the user engages with the notification.
If you don’t need to do anything with the push notification response, no other steps are needed. Swrve automatically tracks and reports on engagement in the push campaign report. If you want to add any additional work, complete the following:
Step 1: Set the class in which you initialize Swrve to be a SwrvePushResponseDelegate and add the following to the SwrveConfig:
Swift
let config = SwrveConfig()
config.pushResponseDelegate = self
config.pushEnabled = true

SwrveSDK.sharedInstance(withAppID: <app_id>,
                     apiKey: "<api_key>",
                     config: config)
Objective-C
SwrveConfig* config = [[SwrveConfig alloc] init];
//Set the response delegate before Swrve is intialized
config.pushResponseDelegate = self;
config.pushEnabled = YES;

[SwrveSDK sharedInstanceWithAppID:<app_id>
          apiKey:@"<api_key>"
          config:config];
This should be done before Swrve is initialized. Otherwise, there’s a chance the delegate will not be attached to our push processing at the time a user engages with a notification or button.
Step 2: Add the SwrvePushResponseDelegate methods to the class you’ve set as the pushResponseDelegate:
didReceiveNotificationResponse– used for processing when the user interacts with the notification. Once this is fired, we’ve already processed the userInfo and events so it’s up to you if you want to include any additional actions. Ensure you call thecompletionHandler()at the end.Swift
func didReceive(_ response: UNNotificationResponse, withCompletionHandler completionHandler: (() -> Void)) {
    print("Got iOS 10 Notification with Identifier - (response.actionIdentifier)")
    // Include your own code in here
    completionHandler()
}
Objective-C
- (void) didReceiveNotificationResponse:(UNNotificationResponse *)response withCompletionHandler:(void (^)())completionHandler { NSLog(@"Got iOS 10 Notification with Identifier - %@", response.actionIdentifier); // Include your own code here if(completionHandler) { completionHandler(); } }willPresentNotification– used when the app is running in the foreground. Inside the function, you can choose to display an alternative UI or even the push itself if you pass any of the UNNotificationPresentationOptions values into thecompletionHandleras shown below.
Swift
func willPresent(_ notification: UNNotification, withCompletionHandler completionHandler: ((UNNotificationPresentationOptions) -> Void)) {
    // Include your own code in here
    completionHandler([])
}
Objective-C
- (void) willPresentNotification:(UNNotification *)notification withCompletionHandler:(void (^)(UNNotificationPresentationOptions))completionHandler { // Include your own code here if(completionHandler) { completionHandler(UNNotificationPresentationOptionNone); } }openSettingsForNotification– used to support custom push notifications UI settings. To receive this callback, use the following:config.providesAppNotificationSettings = true
Swift
func openSettings(for notification: UNNotification) {
    // Implementation goes here
}
Objective-C
- (void)openSettingsForNotification:(UNNotification *)notification {
        // Implementation goes here
}
Step 3: If you are configuring your own notification categories for given instances, we have provided a SwrveConfig property to fill before initializing Swrve. This is notificationCategories for Apple’s iOS 10 Push Notification Framework (UNNotificationCategory). We recommend adding to SwrveConfig as follows:
Swift
if #available(iOS 10.0, *) {
    config.notificationCategories = <SET_OF_YOUR_OWN_UN_CATEGORIES>
}
Objective-C
if(([[[UIDevice currentDevice] systemVersion] floatValue] >= 10.0)){
    config.notificationCategories = <NS_SET_OF_YOUR_OWN_UN_CATEGORIES>
}
In-app messages
Swrve’s in-app messages campaigns are available by default and require no additional integration steps. These features enable you to send personalized messages to your app users while they’re using your app. For more information, see Intro to in-app messages.
To test in-app messages in your app, you need to first create the campaign in Swrve. For more information, see Creating in-app messages.
If you want to display an in-app message as soon as your view is ready, you must trigger the display event when the view controller is in the viewDidAppear state and not in viewDidLoad state.
In-app message deeplinks
When creating in-app messages in Swrve, you can configure message buttons to direct users to perform a custom action when clicked. For example, you might configure a button to direct the app user straight to the app store to provide a rating.
Swrve’s default deeplink behavior for in-app messages is to treat deeplinks as URLs, so you can use your existing custom URL scheme. If you have not already registered a custom URL scheme, you’ll need to do this before using deeplinks from in-app messages.
In-app message delegate interactions
SwrveInAppMessageDelegate receives callbacks for the following in-app message interactions:
- In-app message impression
- Custom button action
- Dismiss button action
- Copy to clipboard button action
The SwrveInAppMessageDelegate may be called multiple times, such as for the initial impression and subsequent button actions like Dismiss, Custom, or CopyToClipboard. It is important to manage each case in the callback logic.
If a deeplink is present on a custom action or from a push message, the SwrveSDK will attempt to open the deeplink using openUrl. To override this behaviour, implement the SwrveDeeplinkDelegate.
To receive added in-app message interactions, implement the SwrveInAppMessageDelegate like this:
Swift
let config = SwrveConfig()
let inAppConfig = SwrveInAppMessageConfig()
inAppConfig.inAppMessageDelegate = self // or some other class
config.inAppMessageConfig = inAppConfig
SwrveSDK.sharedInstanceWithAppID(-1, apiKey: "", config: config)


// In your delegate class that implements the SwrveInAppMessageDelegate protocol:
func onAction(_ messageAction: SwrveMessageAction, messageDetails: SwrveMessageDetails?, selectedButton: SwrveMessageButtonDetails?) {

  // See messageDetails object for campaign meta data available
  // See selectedButton object for button meta data available
  // Note: selectedButton will be nil for SwrveImpression callback.

  switch messageAction {
  case .impression:
    // process impression callback

case .custom:
    // process custom button action callback
    guard let url = URL(string: selectedButton.actionString]) else {
         return
    }

    UIApplication.shared.open(url, options: [:], completionHandler: nil)

  case .dismiss:
    // process dismiss button action callback

  case .clipboard:
    // process copy to clipboard button action callback

  default:
    break
  }
}
Objective-C
SwrveConfig *config = [SwrveConfig new];
SwrveInAppMessageConfig *inAppConfig = [SwrveInAppMessageConfig new];
inAppConfig.inAppMessageDelegate = self; // or some other class
config.inAppMessageConfig = inAppConfig;
[SwrveSDK sharedInstanceWithAppID:-1 apiKey:@"" config:config];

// In your delegate class that implements the  protocol:
- (void)onAction:(SwrveMessageAction)messageAction messageDetails:(SwrveMessageDetails *)messageDetails selectedButton:(SwrveMessageButtonDetails *)selectedButton {

     // See messageDetails object for campaign meta data available
     // See selectedButton object for button meta data available
     // Note: selectedButton will be nil for SwrveImpression callback.

    switch (messageAction) {

        case SwrveMessageActionImpression: {
            // process impression callback
        }
            break;
        case SwrveMessageActionCustom: {
            // process custom button action callback
            // SwrveSDK will handle deeplinks internally with openUrl
            // To override this behaviour you can implement the SwrveDeeplinkDelegate
        }
            break;
        case SwrveMessageActionDismiss: {
            // process dismiss button action callback
        }
            break;
        case SwrveMessageActionClipboard: {
	    // process copy to clipboard button action callback
        }
            break;
        default:
            break;
    }
}
For in-app messages, it is possible to override this behavior of treating custom actions as URL deeplinks and integrate custom actions to direct users to a sale, website or other target when they click an in-app message. For example, to send Swrve events using custom actions, implement the SwrveInAppMessageDelegate like this:
Swift
let config = SwrveConfig()
let inAppConfig = SwrveInAppMessageConfig()
inAppConfig.inAppMessageDelegate = self // or some other class
config.inAppMessageConfig = inAppConfig
SwrveSDK.sharedInstanceWithAppID(-1, apiKey: "", config: config)


// In your delegate class that implements the SwrveInAppMessageDelegate protocol:
func onAction(_ messageAction: SwrveMessageAction, messageDetails: SwrveMessageDetails?, selectedButton: SwrveMessageButtonDetails?) {
  if messageAction == .custom {
    if let actionString = selectedButton?.actionString,
      let url = URL(string: actionString) {
      DispatchQueue.main.asyncAfter(deadline: .now() + 0.25) {
        if url.scheme == "swrve" {
          if let query = url.query {
            let pairs = query.components(separatedBy: "&")
            for pair in pairs {
              let components = pair.components(separatedBy: "=")
              if let key = components.first, let value = components.last, key == "event" {
                SwrveSDK.event(value)
              }
            }
          }
          SwrveSDK.sendQueuedEvents()
        }
      }
    }
  }
}
Objective-C
SwrveConfig *config = [SwrveConfig new];
SwrveInAppMessageConfig *inAppConfig = [SwrveInAppMessageConfig new];
inAppConfig.inAppMessageDelegate = self; // or some other class
config.inAppMessageConfig = inAppConfig;
[SwrveSDK sharedInstanceWithAppID:-1 apiKey:@"" config:config];

- (void)onAction:(SwrveMessageAction)messageAction messageDetails:(SwrveMessageDetails *)messageDetails selectedButton:(SwrveMessageButtonDetails *)selectedButton {

  if (messageAction == SwrveMessageActionCustom) {
    NSString *actionString = selectedButton.actionString;
    NSURL *url = [NSURL URLWithString:actionString];
    double delayInSeconds = 0.25;
    dispatch_time_t popTime = dispatch_time(DISPATCH_TIME_NOW, delayInSeconds * NSEC_PER_SEC);
    dispatch_after(popTime, dispatch_get_main_queue(), ^(void) {
     if ([url.scheme isEqualToString:@"swrve"]) {
      NSArray *pairs = [url.query componentsSeparatedByString:@"&"];
      for(NSString *pair in pairs) {
       NSString *key = [[pair componentsSeparatedByString:@"="] objectAtIndex:0];
       NSString *value = [[pair componentsSeparatedByString:@"="] objectAtIndex:1];
       if ([key isEqualToString:@"event"]) {
        [SwrveSDK event:value];
       }
      }
      [SwrveSDK sendQueuedEvents];
     }
    });
  }
}
Note: You must define this configuration before you initialize Swrve.
Request device permissions
Request certain device permissions from your users, such as camera, contacts, location, or photo library access, using in-app message actions.
Permission requests via in-app message
To initiate a permission request using an in-app message action, you must implement the SwrveInAppCapabilitiesDelegate delegate and set it in your SwrveConfig object, as the following example for camera permissions demonstrates.
Swift
let config = SwrveConfig()
// Set the capabilities delegate before Swrve is intialized
let inAppConfig = SwrveInAppMessageConfig()
inAppConfig.inAppCapabilitiesDelegate = self
config.inAppMessageConfig = inAppConfig
SwrveSDK.sharedInstance(withAppID:<app_id>
          apiKey:@"<api_key>"
          config:config
)

func canRequestCapability(capabilityName: String) -> Bool {
    if (capabilityName == "swrve.camera") {
        let authStatus: AVAuthorizationStatus = AVCaptureDevice.authorizationStatus(for: .video)
        return authStatus == .notDetermined
    }
    return false
}

func requestCapability(capabilityName: String, _ callback: @escaping (_ processed: Bool) -> Void) {
    if (capabilityName == "swrve.camera") {
        AVCaptureDevice.requestAccess(for: .video, completionHandler: { granted in
            DispatchQueue.main.async(execute: {
                callback(true)
            })
        })
    }
}
Objective-C
SwrveConfig* config = [[SwrveConfig alloc] init];
// Set the capabilities delegate before Swrve is intialized
SwrveInAppMessageConfig *inAppConfig = [SwrveInAppMessageConfig new];
inAppConfig.inAppCapabilitiesDelegate = self;
config.inAppMessageConfig = inAppConfig;

[SwrveSDK sharedInstanceWithAppID:<app_id>
          apiKey:@"<api_key>"
          config:config
];

- (BOOL)canRequestCapability:(NSString *)capabilityName {
    if ([capabilityName isEqualToString:@"swrve.camera"]) {

        AVAuthorizationStatus authStatus = [AVCaptureDevice authorizationStatusForMediaType:AVMediaTypeVideo];
        return authStatus == AVAuthorizationStatusNotDetermined;

    }

    return NO;
}

- (void)requestCapability:(NSString *)capabilityName completionHandler:(void (^)(BOOL success))completion {
    if ([capabilityName isEqualToString:@"swrve.camera"]) {

        [AVCaptureDevice requestAccessForMediaType:AVMediaTypeVideo completionHandler:^(BOOL granted) {
            dispatch_async(dispatch_get_main_queue(), ^{
                completion(TRUE);
            });
        }];

    }
}
Tracking permission states
To enable tracking various permission states you must implement the SwrvePermissionsDelegate delegate and set it in your SwrveConfig object, as the following example for camera permissions demonstrates.
Swift
func cameraPermissionState() -> SwrvePermissionState {
    let authStatus: AVAuthorizationStatus = AVCaptureDevice.authorizationStatus(for: .video)
    switch authStatus {
        case .authorized:
            return SwrvePermissionStateAuthorized
        case .denied, .restricted:
            return SwrvePermissionStateDenied
        case .notDetermined:
            return SwrvePermissionStateUnknown
        default:
            break
    }
    return SwrvePermissionStateUnsupported
}
Objective-C
SwrveConfig* config = [[SwrveConfig alloc] init];
//Set the permission delegate before Swrve is intialized
config.permissionsDelegate = self;

[SwrveSDK sharedInstanceWithAppID:<app_id>
          apiKey:@"<api_key>"
          config:config
];

/*! Status of the Camera permission.
*
* returns SwrvePermissionState State of the camera permission.
*/
- (SwrvePermissionState)cameraPermissionState {
    AVAuthorizationStatus authStatus = [AVCaptureDevice authorizationStatusForMediaType:AVMediaTypeVideo];
    switch (authStatus) {
        case AVAuthorizationStatusAuthorized:
            return SwrvePermissionStateAuthorized;
        case AVAuthorizationStatusDenied:
        case AVAuthorizationStatusRestricted:
            return SwrvePermissionStateDenied;
        case AVAuthorizationStatusNotDetermined:
            return SwrvePermissionStateUnknown;
    }
    return SwrvePermissionStateUnsupported;
}
In-app message text
If required, set the default color of the font, background, and text of your buttons and text boxes via the Swrve Config. In the absence of these settings, the SDK defaults to a transparent background, black text color, and default system font of the OS. Currently, this styling applies to all text that’s displayed.
Swift
let inAppConfig = SwrveInAppMessageConfig()
    inAppConfig.personalizationFont = UIFont.init(name: "Papyrus", size: 1)
    inAppConfig.personalizationBackgroundColor = UIColor.black;
    inAppConfig.personalizationForegroundColor = UIColor.red;
    inAppConfig.backgroundColor = [UIColor.greenColor colorWithAlphaComponent:0.3];
    config.inAppMessageConfig = inAppConfig;
Objective-C
SwrveInAppMessageConfig *inAppConfig = [SwrveInAppMessageConfig new];
    inAppConfig.personalisationFont = [UIFont fontWithName:@"Papyrus" size:1];
    inAppConfig.personalisationBackgroundColor = [UIColor blackColor];
    inAppConfig.personalisationForegroundColor = [UIColor redColor];
    inAppConfig.backgroundColor = [UIColor.greenColor colorWithAlphaComponent:0.3];
    config.inAppMessageConfig = inAppConfig;
In-app message Stories
Customize the dismiss button for in-app Story messages using bundle image assets, as shown below:
Swift
let inAppConfig = SwrveInAppMessageConfig()
    inAppConfig.storyDismissButton = UIImage(named: "dismiss_button_normal")
    inAppConfig.storyDismissButtonHighlighted = UIImage(named: "dismiss_button_highlighted")
    config.inAppMessageConfig = inAppConfig
Objective-C
SwrveInAppMessageConfig *inAppConfig = [SwrveInAppMessageConfig new];
    inAppConfig.storyDismissButton = [UIImage imageNamed:@"dismiss_button_normal"];
    inAppConfig.storyDismissButtonHighlighted = [UIImage imageNamed:@"dismiss_button_highlighted"];
    config.inAppMessageConfig = inAppConfig;
You can use any image type supported by the iOS version that is loaded into the UIImage object.
Note: The color values assigned to a Story dismiss button in the dashboard are still applied. However, if your app utilizes custom images, it is advisable, when configuring a new Story campaign in the dashboard, to employ fully transparent colors for the dismiss button states.
Embedded campaigns
Swrve’s embedded campaigns give you complete control over how you deliver, handle, and display content in your app, while still using Swrve’s audience targeting, event triggering, and goal tracking. Instead of Swrve rendering the UI, the SDK returns JSON to your app and you render it in your own UI components.
You can use embedded campaigns in two ways:
- Event‑triggered embedded campaigns – the campaign is triggered by an event and delivered through the
SwrveEmbeddedCallback. - Message Center embedded campaigns – the campaign is retrieved from the Message Center and you decide when and where to show it.
For full working examples, see the SwrveEmbeddedSample app in the iOS SDK samples folder on GitHub.
Event‑triggered embedded campaigns
For event‑triggered embedded campaigns, the SDK invokes your embedded callback whenever a matching campaign is triggered. The callback receives the embedded payload and the latest realtime user properties so you can personalize and render the content. Configure the embedded callback before initializing the SDK:
Swift
let embeddedConfig = SwrveEmbeddedMessageConfig()
embeddedConfig.embeddedCallback = { (message: SwrveEmbeddedMessage, personalizationProperties: [String: String], isControl: Bool) in

    if isControl {
        // This campaign should not be shown to the user. Send an impression event for reporting.
        SwrveSDK.embeddedControlMessageImpressionEvent(message)
        return
    }

    // Personalize the embedded JSON for this user
    guard let personalizedData = SwrveSDK.personalizeEmbeddedMessageData(message, withPersonalization: personalizationProperties) else {
        return
    }

    // When you actually show the content, record the impression:
    SwrveSDK.embeddedMessageWasShown(toUser: message!)
}
config.embeddedMessageConfig = embeddedConfig
SwrveSDK.sharedInstance(withAppID: <app_id>, apiKey: "<api_key>", config: config)
Objective-C
SwrveEmbeddedMessageConfig *embeddedConfig = [SwrveEmbeddedMessageConfig new];
[embeddedConfig setEmbeddedCallback:^(SwrveEmbeddedMessage *message, NSDictionary *personalizationProperties, bool isControl) {

    if (isControl) {
        // This campaign should not be shown to the user. Send an impression event for reporting.
        [SwrveSDK embeddedControlMessageImpressionEvent:message];
        return;
    }

    // Personalize the embedded JSON for this user
    NSString *personalizedData = [SwrveSDK personalizeEmbeddedMessageData:message withPersonalization:personalizationProperties];
    if (!personalizedData) {
        return;
    }

    // When you actually show the content, record the impression:
    [SwrveSDK embeddedMessageWasShownToUser:message];
}];
config.embeddedMessageConfig = embeddedConfig;
[SwrveSDK sharedInstanceWithAppID:<app_id> apiKey:@"<api_key>" config:config];
Trigger your embedded campaigns with normal events:
// Example: trigger an embedded banner campaign
SwrveSDK.event("banner")
If your embedded content has interactive elements (for example, a CTA button), you should send click events when the user interacts:
// Called when the user taps a CTA in your custom UI
fun onEmbeddedCtaClicked(message: SwrveEmbeddedMessage, buttonId: String) {
    SwrveSDK.embeddedButtonWasPressed(embeddedMessage, buttonName: "buttonName")
}
This lets you use Swrve’s tracking, holdout groups, and personalization while retaining full control over how the embedded content looks and behaves.
Message Center embedded campaigns
Message Center embedded campaigns are not delivered via the embedded callback. Instead, you fetch them from the Message Center and decide where and when to render them (for example, a carousel on your home screen).
To retrieve Message Center embedded campaigns for a carousel:
func loadEmbeddedFromMessageCenter() -> [SwrveEmbeddedMessage] {
    // Returns all eligible embedded Message Center campaigns for the current user
    let embeddedMessages = SwrveSDK.embeddedMessageCenterCampaigns()

    // Optionally filter by type or other metadata in your JSON payload, eg: type == "carousel"
    return embeddedMessages.filter { message in
        // Must be JSON embedded data
        guard message.type == .json else {
            return false
        }
        guard let dataString = message.data, !dataString.isEmpty,
            let jsonData = dataString.data(using: .utf8),
            let jsonObject = try? JSONSerialization.jsonObject(with: jsonData, options: []),
            let dict = jsonObject as? [String: Any],
            let type = dict["type"] as? String
        else {
            return false
        }
        return type.lowercased() == "carousel"
    }
}
You then parse the embedded payload and render it in your carousel UI:
// pseudo code
struct CarouselItem {
    let title: String?
    let body: String?
    let imageUrl: String?
}


func parseCarouselItem(from message: SwrveEmbeddedMessage) -> CarouselItem? {
    // Only JSON embedded messages are expected to contain this payload
    guard message.type == .json else {
        return nil
    }

    guard
        let dataString = message.data,
        let jsonData = dataString.data(using: .utf8),
        let jsonObject = try? JSONSerialization.jsonObject(with: jsonData, options: []),
        let dict = jsonObject as? [String: Any]
    else {
        return nil
    }

    // type must be "carousel"
    guard let type = (dict["type"] as? String)?.lowercased(), type == "carousel" else {
        return nil
    }

    let title = dict["title"] as? String
    let body = dict["body"] as? String
    let imageUrl = dict["image"] as? String
    return CarouselItem(title: title, body: body, imageUrl: imageUrl)
}
When a carousel card is actually visible to the user, record an impression; when the user interacts (for example, taps a card or a CTA), record a click:
// Called when a specific carousel item becomes visible
func onCarouselItemShown(message: SwrveEmbeddedMessage) {
    SwrveSDK.embeddedMessageWasShown(toUser: message)
}

// Called when the user taps a carousel CTA
func onCarouselCtaClicked(message: SwrveEmbeddedMessage, buttonId: String) {
    SwrveSDK.embeddedButtonWasPressed(message, buttonName: buttonId)
}
Sending events
The Swrve SDK automatically sends certain events and also enables you to track user behavior by sending custom events. (For a list of default Swrve events, see Segment audience filters, Events.) In turn, you can use app-generated events to trigger in-app messages, while both app- and server-generated events help you define segments and perform in-depth analysis.
Custom events
To send a custom event, include the below example in a method where you want to send an event to Swrve.
Swift
SwrveSDK.event("custom.event_name")
Objective-C
[SwrveSDK event:@"custom.event_name"];
Requirements for sending custom events:
- Do not send the same named event with different case. For example, if you send
tutorial.start, then ensure you never sendTutorial.Start. - Use a period (.) in your event names to organize their layout in the Swrve dashboard. Each ‘.’ creates a new branch in the Event name column of the Events report, and groups your events so they are easy to locate.
- Do not send more than 1000 unique named events.
- Do not add unique identifiers to event names. For example,
Tutorial.Start.ServerID-ABDCEFG - Do not add timestamps to event names. For example,
Tutorial.Start.1454458885
- Do not add unique identifiers to event names. For example,
- Do not use the
swrve.*orSwrve.*namespace for your own events. This is reserved for Swrve use only. Custom event names beginning withSwrve.are restricted and cannot be sent.
Event payloads
You can add and send an event payload with every event. This allows for more detailed reporting around events and funnels.
Notes on associated payloads:
- The associated payload should be a dictionary of key/value pairs; it is restricted to string and integer keys and values.
- There is a maximum cardinality of 500 key-value pairs for this payload per event. This parameter is optional, but only the first 500 payloads are displayed in the dashboard. The data is still available in raw event logs and for audience filtering.
- If you want to use event payloads to target your campaign audiences, you can configure up to 10 custom events with a maximum of 20 payloads per event for audience filtering purposes. For more information, see Targeting your audience by event payloads.
Swift
SwrveSDK.event("custom.event_name", payload: ["key1": "value1", "key2": "value2"])
Objective-C
[SwrveSDK event:@"custom.event_name" payload:@{
    @"key1":@"value1",
    @"key2":@"value2"
}];
For example, if you want to track when a user starts the tutorial experience, it might make sense to send an event named tutorial.start and add a payload time that captures how much time it took the user to complete the tutorial.
Swift
SwrveSDK.event("tutorial.start", payload: ["time": "100", "step": "5"])
Objective-C
[SwrveSDK event:@"tutorial.start" payload:@{
    @"time":@"100",
    @"step":@"5"
}];
Custom user properties
The Swrve SDK sends certain user properties by default and also enables you to assign custom properties to update the user’s status. (For a full list of the default user properties, see Assigning user properties.)
For example, you could create a custom user property called premium, and then target non-premium users and premium users in your campaigns.
When configuring custom properties for iOS, you can use a variety of data types (integers, boolean, strings) that the SDK then converts to an integer (for number-based values) or string (in the case of boolean, “true/false”) before sending the data to Swrve. When creating segments or campaign audiences, depending on which data type the property is converted to, you must then select the correct operator (equals for numbers, is for strings) for the property to be properly returned.
Example of group of user properties
Swift
SwrveSDK.userUpdate(["premium": "true", "level":"12", "balance": "999"])
Objective-C
[SwrveSDK userUpdate:@{
    @"premium": @"true",
    @"level": @"12",
    @"balance": @"999"
}];
Example of single date-typed user property
Use the NSDate object to send a DateTime user property; for example, the current date at the time of a user purchase:
Swift
SwrveSDK.userUpdate("last_purchase", with: Date.init())
Objective-C
[SwrveSDK userUpdate:@"last_purchase" withDate:[NSDate date]];
Virtual economy events
To ensure virtual currency events are not ignored by the server, make sure the currency name configured in your app matches exactly the Currency Name you enter in the App Currencies section on the App Settings screen (including case-sensitive). If there is any difference, or if you haven’t added the currency in Swrve, the server will ignore the event and return an error event called Swrve.error.invalid_currency. Additionally, the ignored events are not included in your KPI reports. For more information, see Add your app.
If your app has a virtual economy, send the purchase event when users purchase in-app items with virtual currency.
Swift
SwrveSDK.purchaseItem("gold_card_pack", currency: "gold", cost: 50, quantity: 1)
Objective-C
[SwrveSDK purchaseItem:@"gold_card_pack"
          currency:@"gold"
          cost:50
          quantity:1];
Send the currency given event when you give users virtual currency. Examples include initial currency balances, retention bonuses and level-complete rewards.
Swift
SwrveSDK.currency(given: "coins", givenAmount: 25)
Objective-C
[SwrveSDK currencyGiven:@"coins" givenAmount:25];
In-app purchase events and validation
If your app has in-app purchases (IAPs), send the IAP event when a user purchases something with real money.
Notify Swrve when an in-app purchase occurs as follows:
Swift
func onTransactionProcessed(transaction: SKPaymentTransaction, product: SKProduct) -> Void {
    let rewards = SwrveIAPRewards.init()

    // You can track the purchase of virtual items
    rewards.addItem("com.myapp.item.sku", withQuantity: 1)
    // Or virtual currency or both.
    rewards.addCurrency("coins", withAmount: 100)

    // Send the IAP event to Swrve.
    SwrveSDK.iap(transaction, product: product, rewards: rewards)
}
Objective-C
- (void) onTransactionProcessed:(SKPaymentTransaction*) transaction productBought:(SKProduct*) product {
    // Tell Swrve what was purchased.
    SwrveIAPRewards* rewards = [[SwrveIAPRewards alloc] init];

    // You can track the purchase of virtual items
    [rewards addItem:@"com.myapp.item_sku" withQuantity:1];
    // Or virtual currency or both.
    [rewards addCurrency:@"coins" withAmount:100];

    // Send the IAP event to Swrve.
    [SwrveSDK iap:transaction product:product rewards:rewards];
}
Enabling IAP receipt validation
Swrve automatically validates iOS in-app purchases and ignores any events that are considered fraudulent as per Apple guidelines.
To enable validation of IAP receipts against your app:
Step 1: On the Settings menu, select Integration Settings.
Step 2: Under IAP Validation, in the iTunes App Bundle Identifier section, enter your Apple Bundle Id.
Step 3: Select Save.
Although Swrve can validate IAP receipts without this identifier, providing it enables Swrve to verify a receipt against the app itself for greater precision during validation. Swrve checks that the bundle ID included in an in-app purchase receipt corresponds to your bundle ID before calculating your revenue KPIs. This ensures that your revenue figures are as accurate as possible (ignoring pirates and cheaters).
Generally, you enter the Apple bundle ID when configuring the Integration Settings screen as part of the Swrve onboarding process. You can edit the settings on this screen at any time.
To access your bundle ID, access the information property list file (<App>-Info.plist) in your Xcode project.
Verifying IAP receipt validation
Use the following events to monitor the success of IAP receipt validation:
swrve.valid_iap– fired if receipt verification is successful and the receipt is valid.swrve.invalid_iap– fired if receipt verification is successful and the receipt is invalid.
Unvalidated IAP
If you want to build revenue reports for your app but don’t have or want the receipt to be validated by our servers, use the function below. This might be required for any purchases in the app that are not made via Apple—this revenue should be validated before this function is called, as any revenue sent by this event is automatically counted in the Swrve dashboard.
Swift
// Tell Swrve what was purchased.
let rewards = SwrveIAPRewards.init()
// You can track the purchase of virtual items
rewards.addItem("com.myapp.item_sku", withQuantity: 1)
// Or virtual currency or both.
rewards.addCurrency("coins", withAmount: 100)
// Send the IAP event to Swrve. Won’t be validated in our servers.
SwrveSDK.unvalidatedIap(rewards, localCost: 10, localCurrency: "USD", productId: "sword", productIdQuantity: 1)
Objective-C
// Tell Swrve what was purchased.
SwrveIAPRewards* rewards = [[SwrveIAPRewards alloc] init];

// You can track the purchase of virtual items
[rewards addItem:@"com.myapp.item_sku" withQuantity:1];
// Or virtual currency or both.
[rewards addCurrency:@"coins" withAmount:100];

// Send the IAP event to Swrve. Won’t be validated in our servers.
[SwrveSDK unvalidatedIap:rewards
          localCost:10
          localCurrency:@"USD"
          productId:@"sword"
          productIdQuantity:1]
Live activities
Live activities present real-time information from your app, enabling users to monitor event or task progress. For more information, see the Apple developer documentation on Displaying live data with Live Activities. The SwrveSDK provides a single tracking API: registerLiveActivity which tracks push token updates and changes to live activity statuses.
NSSupportsLiveActivities property is set to ‘YES’ for your main app target.NSSupportsLiveActivitiesFrequentUpdates to ‘YES’ for your main app target.Your ActivityAttributes should conform to our SwrveLiveActivityAttributes protocol. This allows for associating an activity Id with the push token and an optional stale date. This covers two scenarios:
- Live Activities started locally from within the App.
- Live Activities started remotely from a Push Notification (from iOS 17.2+). To start a Live Activity form a push notification, see our Live Activity API.
public protocol SwrveLiveActivityAttributes: ActivityAttributes {

var activityId: String { get set}
var staleDate: Double? { get set }

}
activityId is a mandatory property and allows you to associate a custom string with the activity’s push token. Swrve supports mapping the activityId to all associated tokens when a request is made to Swrve’s Live Activity API, which facilitates starting, updating and ending Live Activities.staleDate tells the system when the Live Activity content becomes outdates.registerLiveActivity(ofType attributesType: T.Type)
Starts the tracking of a specified activity.
Parameters include:
-
attributesType: An attributes type of Activity which must conform to SwrveLiveActivityAttributes
Step 1: Ensure your Attributes conforms to the SwrveLiveActivityAttributes
import SwrveSDK

struct MyAttributes: SwrveLiveActivityAttributes {

    public struct ContentState: Codable, Hashable {
        // Dynamic stateful properties
        var someDynamicProperty:String
    }

    // Fixed non-changing properties
    var someFixedProperty: String
    var activityId: String
    var staleDate: Double?
}
Step 2: Initialize SwrveSDK and register your live activity attributes as soon as app launches
import SwrveSDK

SwrveSDK.sharedInstance(withAppID: appId, apiKey: appKey, config: config)

SwrveSDK.registerLiveActivity(ofType: MyAttributes.self)
Resource A/B testing
Integrating Swrve’s resource A/B testing functionality enables you to use Swrve to test how users respond to changes to the native app content. For more information about resource A/B testing, see Intro to resource A/B testing.
To get the latest version of a resource from Swrve using the Resource Manager, use the following:
Swift
let resourceManager = SwrveSDK.resourceManager()
let welcomeString = resourceManager?.attribute(as: "welcome_string", fromResourceWithId: "new_app_config", withDefault: "Welcome!")
Objective-C
// Get the SwrveResourceManager that holds all resources
SwrveResourceManager* resourceManager = [SwrveSDK resourceManager];

// Then, wherever you need to use a resource, pull it from SwrveResourceManager.
// For example:
NSString *welcome_string = [resourceManager attributeAsString:@"welcome_string"
                                            fromResourceWithId:@"new_app_config"
                                            withDefault:@"Welcome!"];
If you want to be notified whenever resources change, you can add a callback function as follows:
Swift
let config = SwrveConfig()
config.resourcesUpdatedCallback = { _ in

    // Callback functionality
}
Objective-C
SwrveConfig* config = [[SwrveConfig alloc] init];
config.resourcesUpdatedCallback = ^() {
    // Callback functionality
};
Testing your integration
After you’ve completed the above, the next step is to test the integration. For more information, see Testing your integration.
Upgrade instructions
If you’re moving from an earlier version of the iOS SDK to the current version, see the iOS SDK upgrade guide for upgrade instructions.
SDK samples
For sample integrations of the Swrve iOS SDK, see the Swrve iOS SDK samples on GitHub.