Managing Swrve user roles and permissions
Swrve comes with three preset user roles—Company Admin, Full Access (previously called Default User), and Read Only. Our Roles Management and Assignment feature also lets you create custom user roles with any combination of permissions. You can assign roles to your users on a company-wide, app-level, or per user basis. For example, you may have a Junior Marketer role that has permission to create and QA test new campaigns, but not launch them. Or you may have a Data Analyst role that only needs access to your reports.
Creating new users
Only Company Admin users can create new users. You can create new users from the Company Settings page or from the App Settings page when specifying the lead developer for the app integration.
Create a new user
Step 1: Navigate to the Company Settings page.
Step 2: Under Users (or on the App Settings screen, under the Lead Developer section), select Create User.
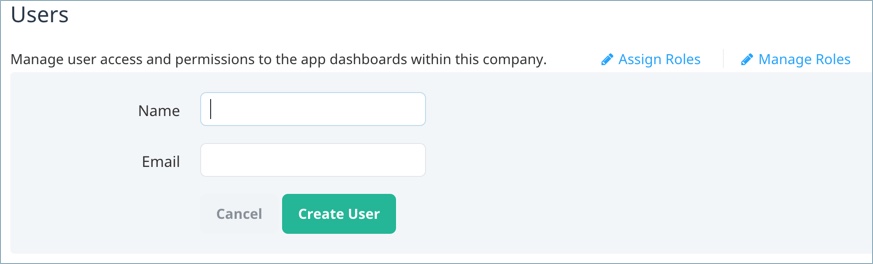
Step 3: Enter the user’s Name and Email, then select Create User.
Initially, new users don’t have permission to access any apps. For a user to view the required apps or activity, you must assign them a role.
Assigning user roles
After you create a new user, the Roles Assignment page is displayed. You can assign different roles to your users for each app in your company. You can also assign roles by app or at the company level. To navigate to the Roles Assignment page, on the Company Settings page, select Assign Roles.
To create new or edit existing roles, select Manage Roles. For information about creating custom roles, see Managing user roles and Role permissions below.
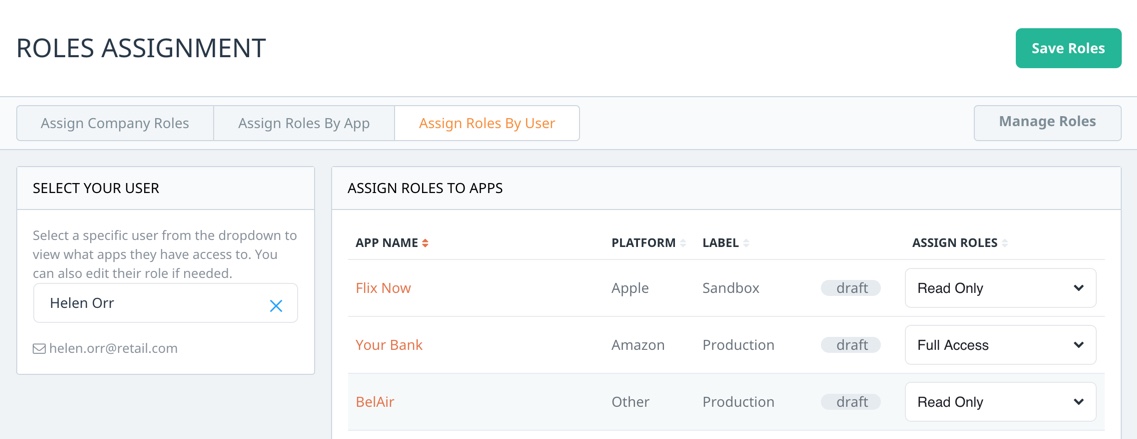
Assign Roles By User
Step 1: Under Select Your User, select the user from the list. Your company apps are displayed on the right side of the screen.
Step 2: For each app, select the Assign Roles To Apps list then select the role you want to give the user for that app. A draft tag is displayed for each app that you update.
Step 3: After you’ve set the required role for each app, select Save Roles to save all changes.
Assign Roles By App
Step 1: Under Select Your App, select the app from the list. A list of users is displayed on the right side of the screen.
Step 2: For each user, select the Assign Users Roles For This App list then select the role you want to give the user for that app. A draft tag is displayed for each user that you update.
Step 3: After you’ve set the required role for each user, select Save Roles to save all changes.
Assign Company Roles
Company-level permissions let you assign company admin roles.
Step 1: For each user, select the Assign Users Roles For This Company list then select the company-wide role you want to assign to the user. A draft tag is displayed for each user that you update.
Step 2: After you’ve set the required role for each user, select Save Roles to save all changes.
Managing user roles
The Roles Management screen provides a summary of the default and custom roles for your company. To navigate to the Roles Management screen, on the Company Settings page, select Manage Roles.

You can perform the following actions on the Roles Management screen:
- Create a new role
- Edit existing roles
- Copy an existing role
- Delete a role that is not currently assigned (the Usage column indicates the number of times a role has been assigned to any user across all apps)
Create a new role
Step 1: On the Roles Management screen, select Create New Role.
Step 2: Enter the Role Name, and optionally, the Role Description.
Step 3: Select the Role Scope. The available options are:
- App – lets you set permissions for various activity groups at the app-level.
- Company – lets you set permissions for company admin and marketing asset roles at the company-level.
Step 4: After you select the Role Scope, the activities that are available for the role are displayed. Select the required permission levels (read, manage, launch, download) for each activity.
Step 5: Once you’ve selected all required permission levels, select Save Role.
The new role is displayed on the Roles Management screen and is now available to assign to users in the Roles Assignment screen.
Role permissions
There are four permission levels that let you control not only who can read or edit content, but also launch campaigns or download data in Swrve. The available permissions are:
- Read – Gives the user read-only access to view the content of a page or section.
- Manage – Gives the user permission to create, edit or delete entities in the dashboard.
- Launch – Gives the user permission to launch campaigns, holdout experiments or resource A/B tests.
- Download – Gives the user permission to download CSV files with the results of various reports or campaigns.
Role activities and scope
The tasks or screens that a user has permission to access are grouped into activities. When creating or editing a custom role, you can set the scope of the role (company- or app-level) and then select the relevant permissions for each activity.
App-level activities
App-level roles cover the following activity groups:
- API Access – lets the user access Swrve’s various REST APIs for export (for more information, see the Swrve Export API Guide).
- User Lists – lets you manage your user lists in Swrve and add users to a specific list (for more information, see the User Lists Guide).
- App Admin – lets the user manage app settings, such as adding a new app or platform and managing push notification certificates.
- Campaigns – lets the user create, manage and launch campaigns or download campaign results.
- Holdout Experiments – lets the user create, manage and launch holdout experiments.
- QA Users – lets the user create and manage QA users.
- Reporting – lets the user access all reports, manage segments and add reporting annotations (notes).
- Resource A/B Testing – lets the user create, manage and launch resource A/B tests.
Company-level activities
Company-level roles cover the following activities:
- Company Admin – lets the user create and manage new apps, new users, and manage and assign user roles.