Embedded experiences
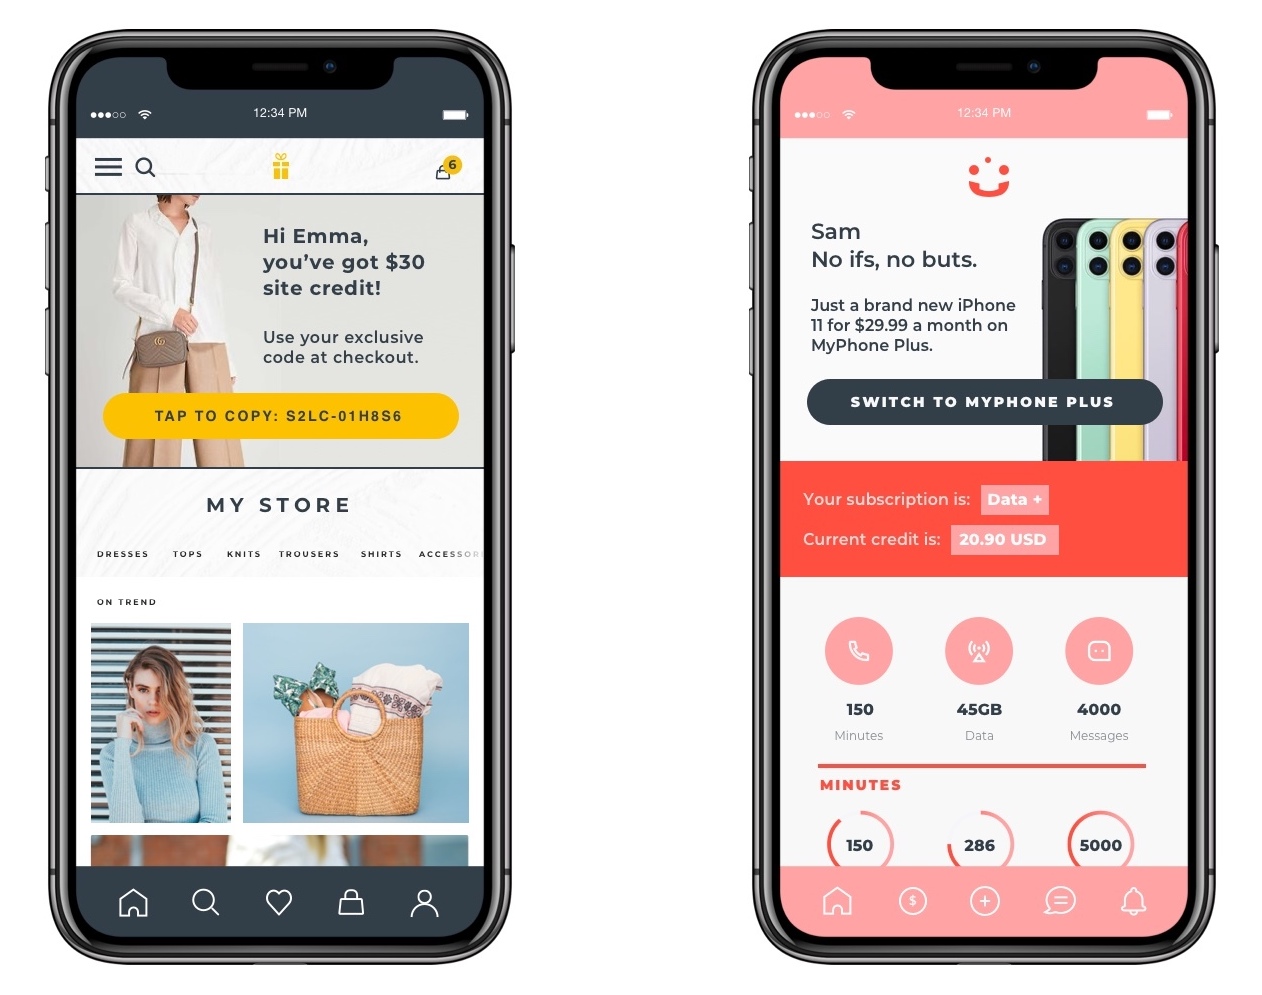
Use Swrve’s embedded experiences to create custom content in a text format and download that content to your app. The plain text format gives your app developer the power to build tailored, native experiences while still leveraging Swrve’s advanced targeting and triggering capabilities. Embedded campaigns are available in our consolidated campaign flow under the App Update channel. You have the option to trigger the campaign at precise points in the app or make the content available through Swrve’s Message Center API.
Prerequisites
To send embedded campaigns to your app, your development team must integrate the latest Swrve SDK. For more details, see the relevant platform guide.
Creating an embedded campaign
The first steps for setting up an embedded campaign are the same as other channels, with a few extra actions.
To set up your campaign
- To create a new campaign from your Campaigns center, select Create campaign.
- On the Choose your marketing channel screen, select Embedded experience.
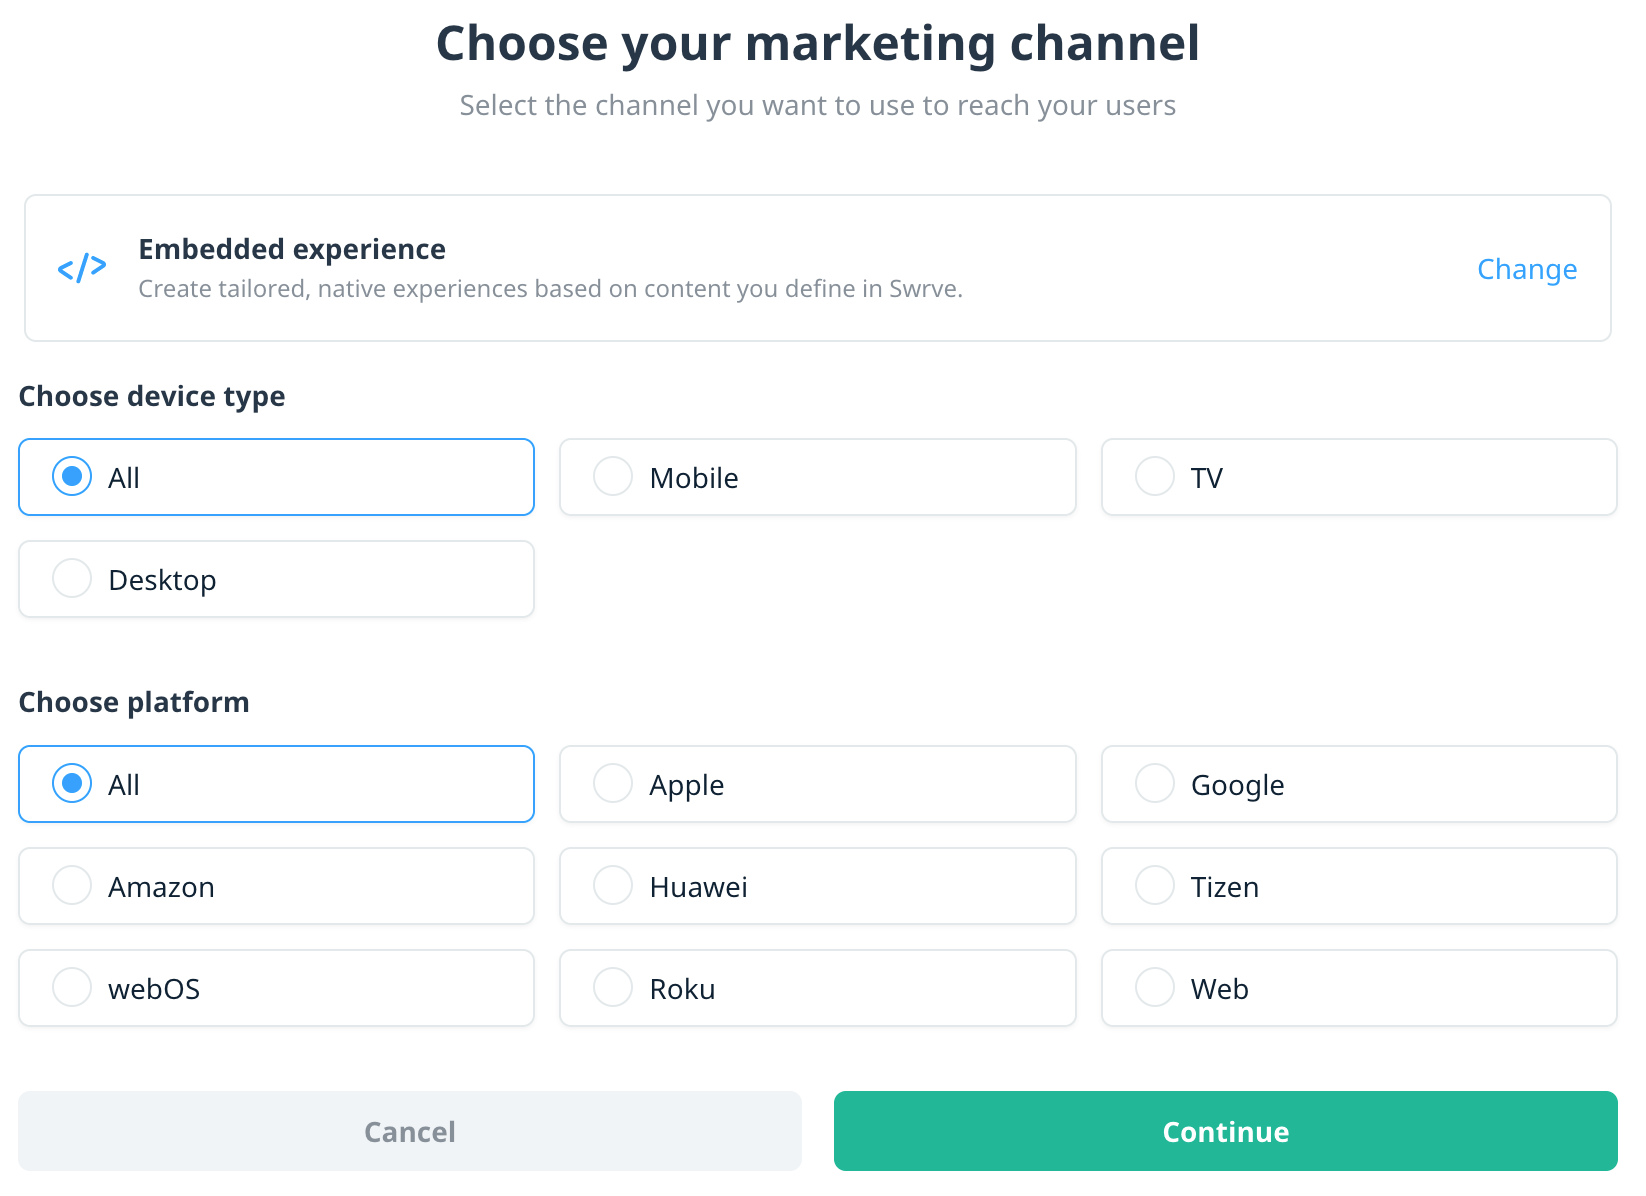
- To deliver Embedded campaigns to a specific device type, for example if the content structure is different between desktop and mobile, select a Device type from the options of Mobile, TV, and Desktop. The default is All device types.
- To deliver Embedded campaigns to a specific platform, for example if your campaign’s content is not relevant to all platforms, select a Platform from the options of Apple, Google, Amazon, Huawei, Tizen, webOS, Roku, and Web. The default is All platforms.
- To continue to the Campaign overview screen, select Continue.
- Enter the Campaign name, Description, and Tags, then select Save to go to the campaign builder.
The blocks on the campaign screen guide you through building your campaign, but you can complete them in any order.

This article covers how to add campaign content, test, and launch your embedded campaign. To learn how to create your target audience, set your campaign display triggers, and schedule a standard campaign, see the following:
Adding campaign content
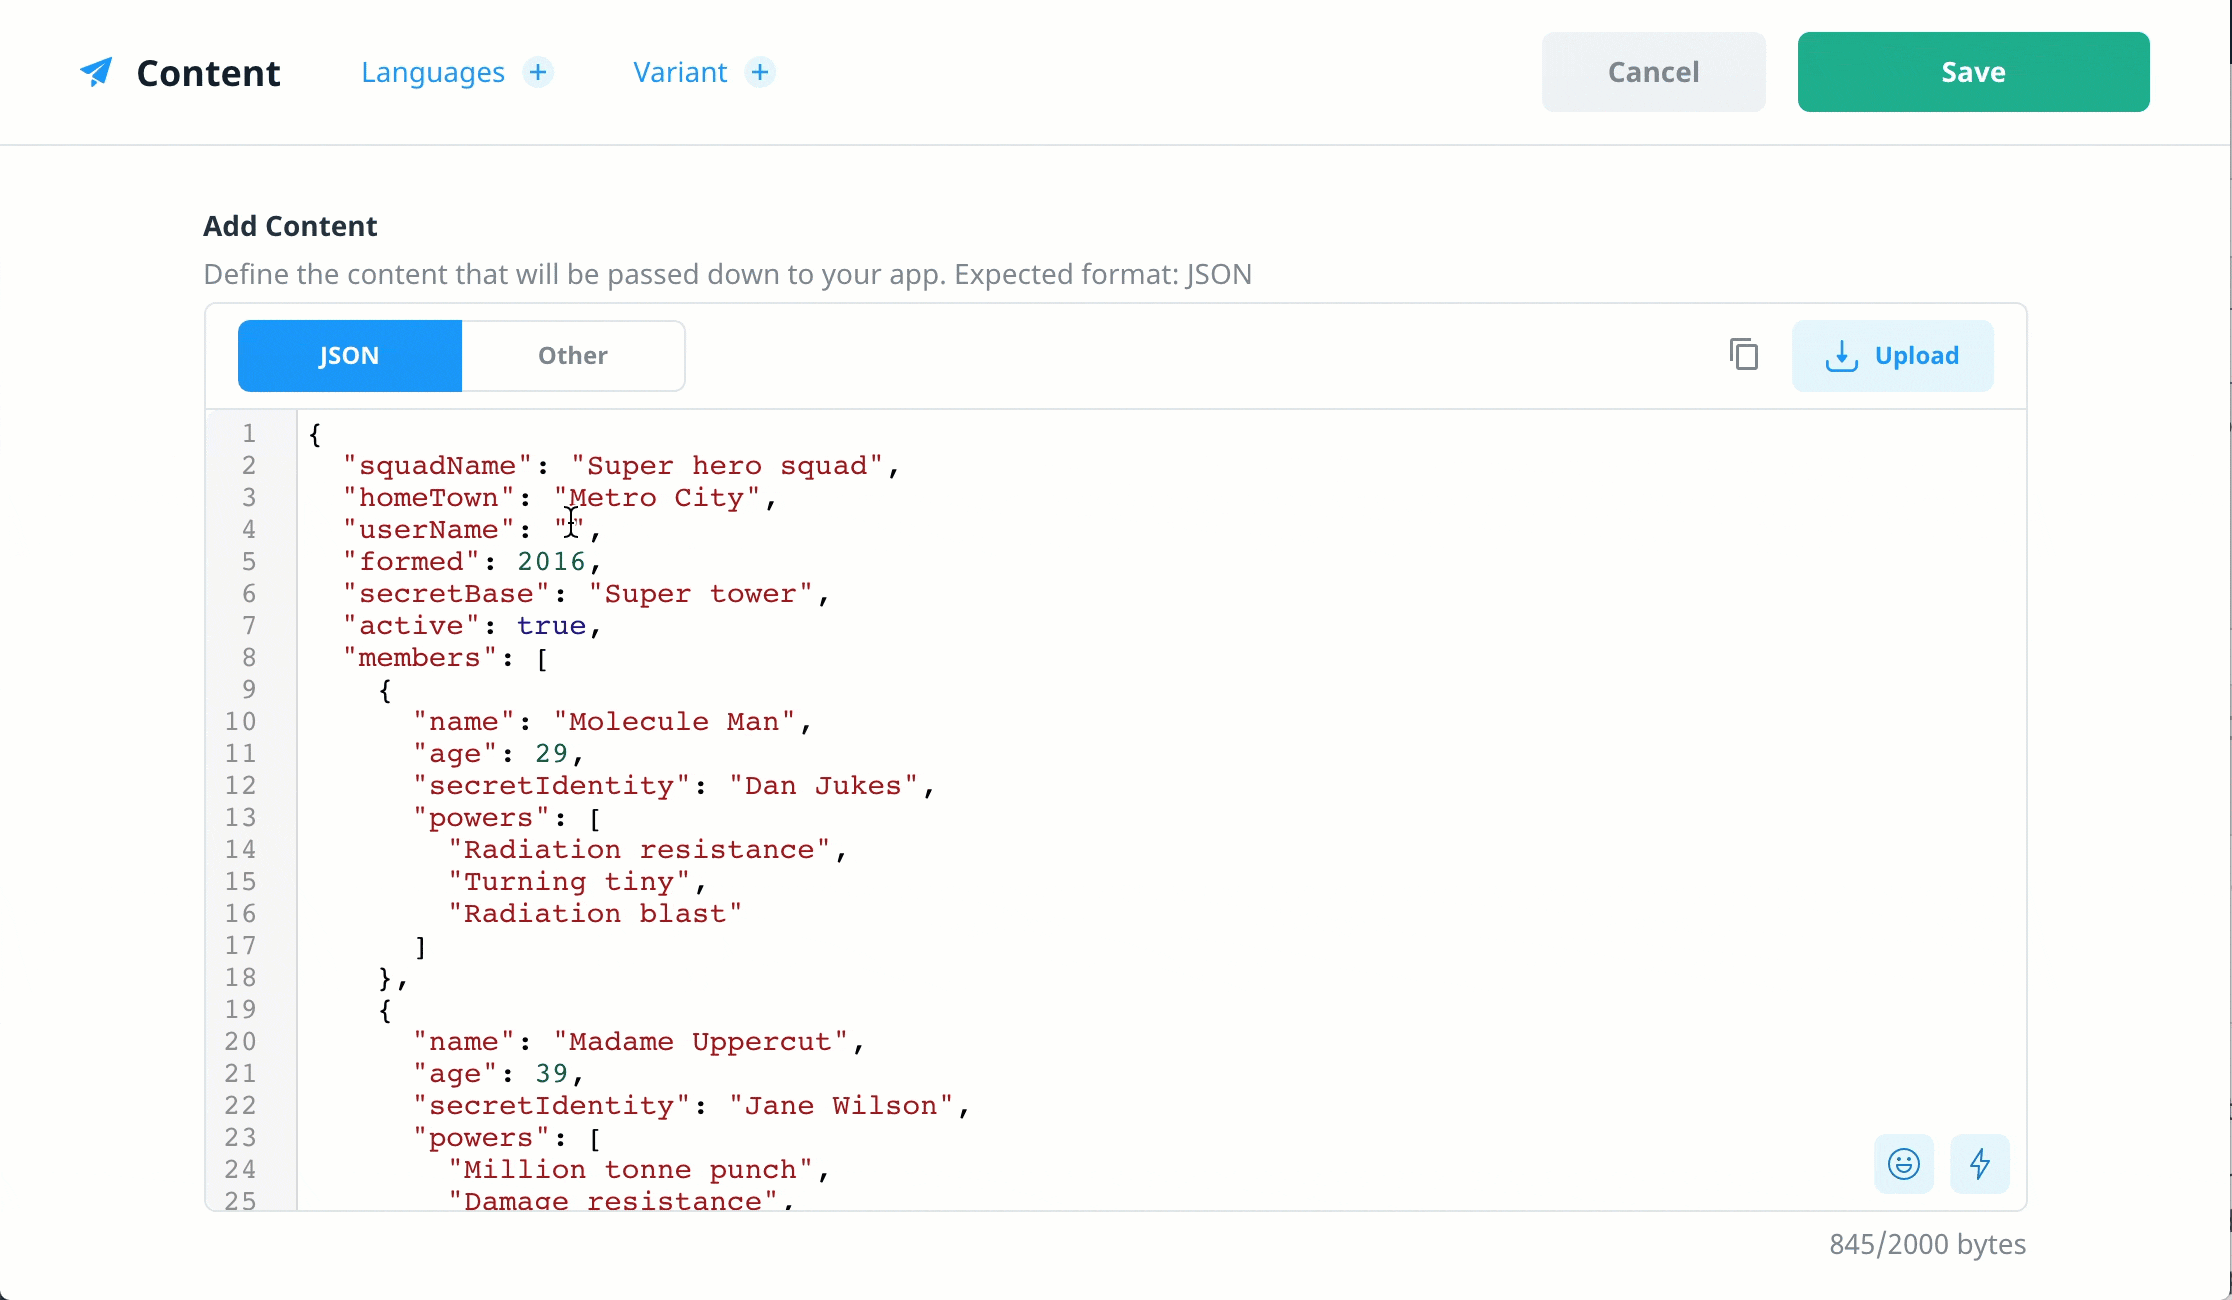
Since the purpose of an embedded campaign is to provide the developer with data to update the app, the content of the campaign must consist of JSON or plain text.
To add your campaign content
- From the Campaigns builder, select the Content block.
- In the Add Content section, you have the option to enter or paste text into the editor. To add content from a file, select Upload, and then select a valid file type (for example, .json, .xml, .html, or .txt). Note that content you upload from a file replaces any content currently set in the editor.
- Depending on your content format, set the format to JSON or Other.
- If set to JSON, the editor validates the content and displays a warning if the content is not valid JSON. Hover over the warning icon to see error details.
- If set to Other, the editor does not perform validation.
- To copy the contents to your clipboard, select Copy to clipboard .
Personalizing your content
Use Swrve’s real-time user properties to include dynamic, personalized content in your embedded campaign—for example, the customer’s favorite sports team, game character, or movie genre.
For more information on how to personalize your campaign content, see Campaign personalization.
Button click tracking
Depending on how your developer has configured your embedded campaigns, use Button click tracking to track users’ engagement with the campaign. If applicable, select the number of call-to-action buttons your embedded campaign contains. If you don’t want to track interactions for your campaign, leave the number of buttons as zero.
Localizing and A/B testing your content
One of the most exciting features of our streamlined campaign flow is the ability to localize and A/B test your campaign content within a single, unified campaign. Use the Languages and Variant tabs to create localized versions of your content or create variations of your content to test for best conversion and engagement.

For more information on how to localize and A/B test your campaign content, see Localizing and A/B testing campaign content.
Testing your campaign
Because embedded campaigns don’t display a visible message, the expected outcome of testing the campaign depends on how your development team has configured your app to handle the content in the embedded campaign.
To test the campaign on a physical device, first ensure your device is set up on the QA devices screen. For more information, see Testing triggered campaigns.
Launching the campaign
If you have no further changes to your campaign, on the campaign build screen, select Activate or Schedule campaign.
Next steps
- Manage your campaigns from the Swrve Campaign center. For more information, see Managing your campaigns.
- If you’re using a push notification to trigger the embedded campaign, review how to configure the linked embedded campaigns in Push notifications to in-app campaigns.
- Schedule and launch your campaign. For more information, see Scheduling your campaigns.