Push via API
Swrve’s streamlined campaign workflow supports creating push notification campaigns that are triggered via API. Use the redesigned message builder to include predefined content or include custom content when sending the API call from your external system. For information about configuring your request to the Push API, see the Swrve push API guide.
Create a push API campaign
The first steps for creating a push via API campaign are similar to creating a scheduled push campaign.
Set up your campaign
- To create a new campaign from your Campaigns center, select Create campaign.
- On the Choose your marketing channel screen, select Push notification.
- Under Choose push notification type, select Via API as the push type.
- Under Choose platform, Any is selected by default. If your app supports multiple platforms, the campaign will be sent to qualifying users regardless of their platform. If you need to create a platform-specific campaign, select the individual platform.
- To continue to the Campaign overview screen, select Continue.
- Enter the Campaign name, Description, and Tags, then select Save to go to the campaign builder.
The blocks on the campaign screen guide you through building your campaign, but you can complete them in any order.
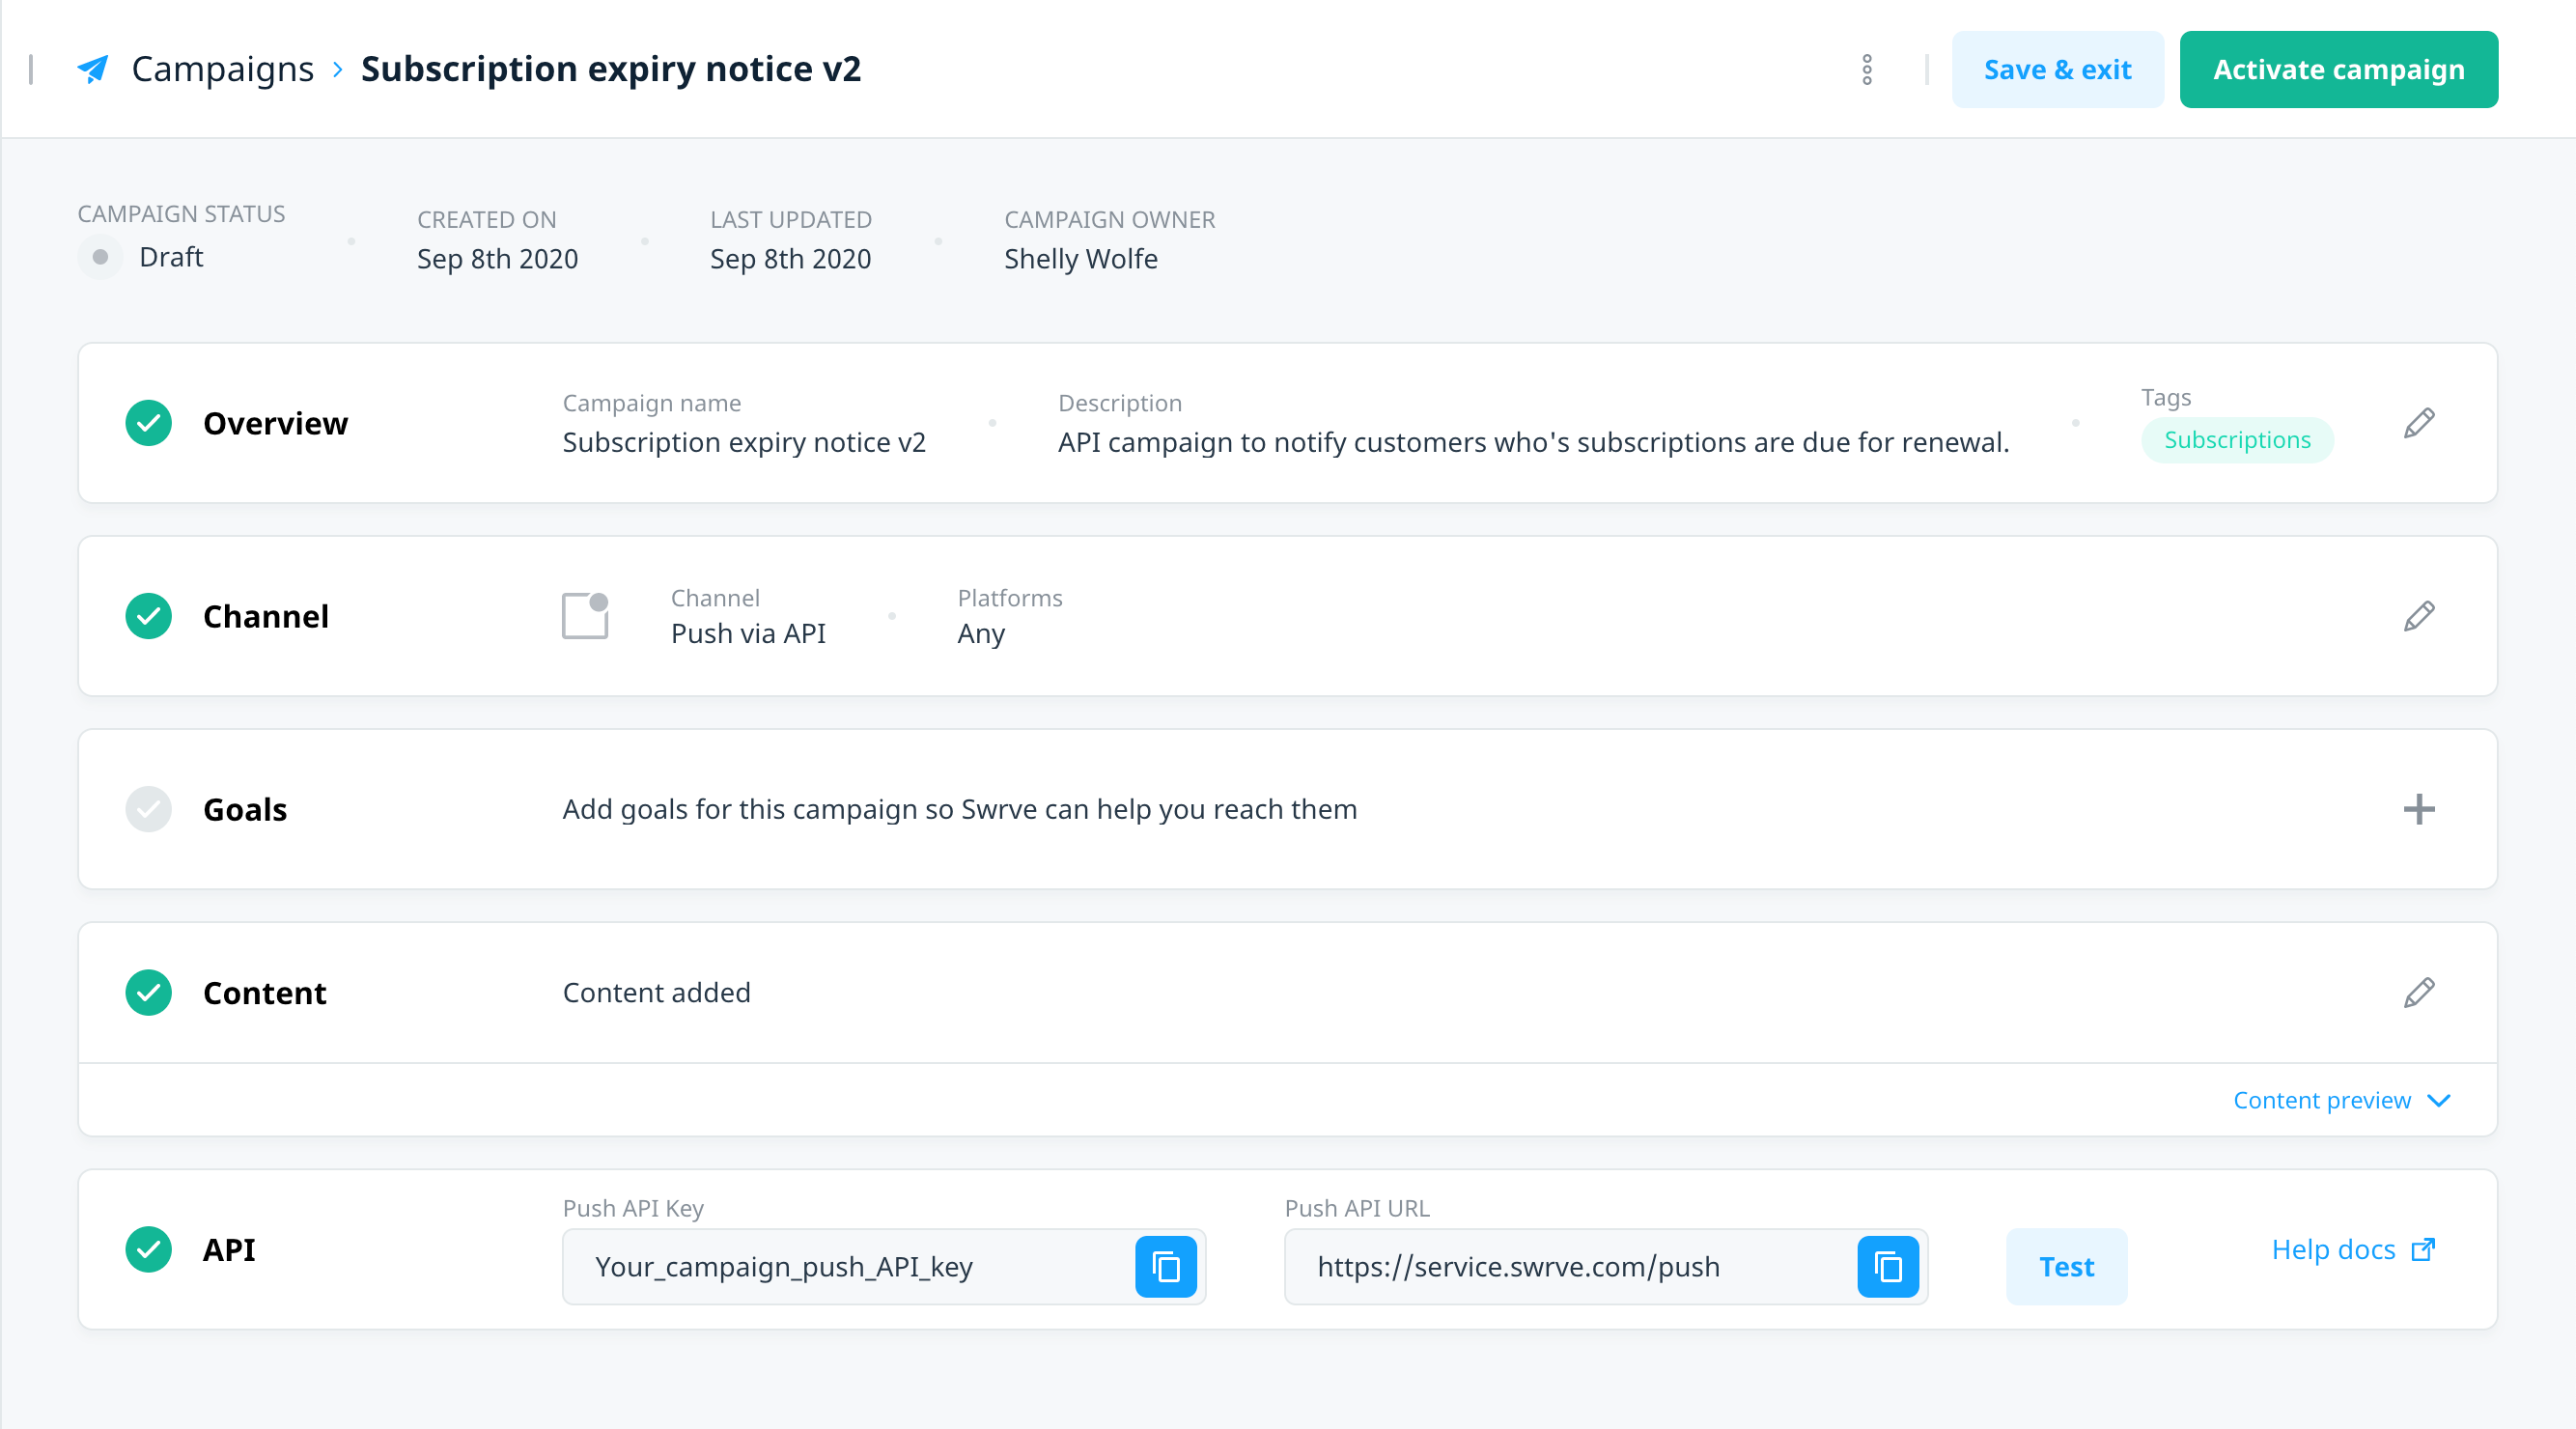
There are two main differences between the blocks available for a scheduled push campaign and push via API. Since push via API campaigns are triggered externally, there is no need to specify the Audience or Schedule. Push via API campaigns have an additional API block where you can test the content you want to send via API call.
For general information about each section, see the following:
Default campaign content
If you want to include default content for your push API campaign, on the Content block, select edit . Adding content is optional—if the API call includes custom parameters, it overwrites the default content. For more information about custom parameters, see the Push API guide.
The options available for adding your notification content are the same as scheduled push, except you cannot test multiple variants of a push API campaign. Localization is now available for Push via API campaigns. For information on adding notification content, see Adding your notification content.
Personalize your content
Use Swrve’s realtime user properties to insert dynamic, personalized content in your Push via API campaign—for example, the customer’s favorite sports team, game character, or movie genre. For more information, see Campaign personalization.
To use realtime user properties, first configure the properties you want to personalize your campaign with. For more information, see Manage user properties, or contact your CSM at support@swrve.com for further assistance.
Test the campaign
To preview your message on a physical device, first ensure your device is set up on the QA Devices screen. There are two options for testing your push via API campaign:
- Test the default content from the Content editor.
- Test the campaign-specific API key with whatever message parameters you require.
Test your default content
On the Content screen, the steps for testing your notification content are the same as scheduled push. For more information, see Testing your message.
Test the campaign-specific API key
In the campaign builder screen, use the API block to send a test push to a QA device from outside the dashboard.
- On the API block, select Test.
- In the Send test message window, select your device from the list.
- The window displays sample cURL and HTTP POST commands with the campaign-specific API key and your user ID.
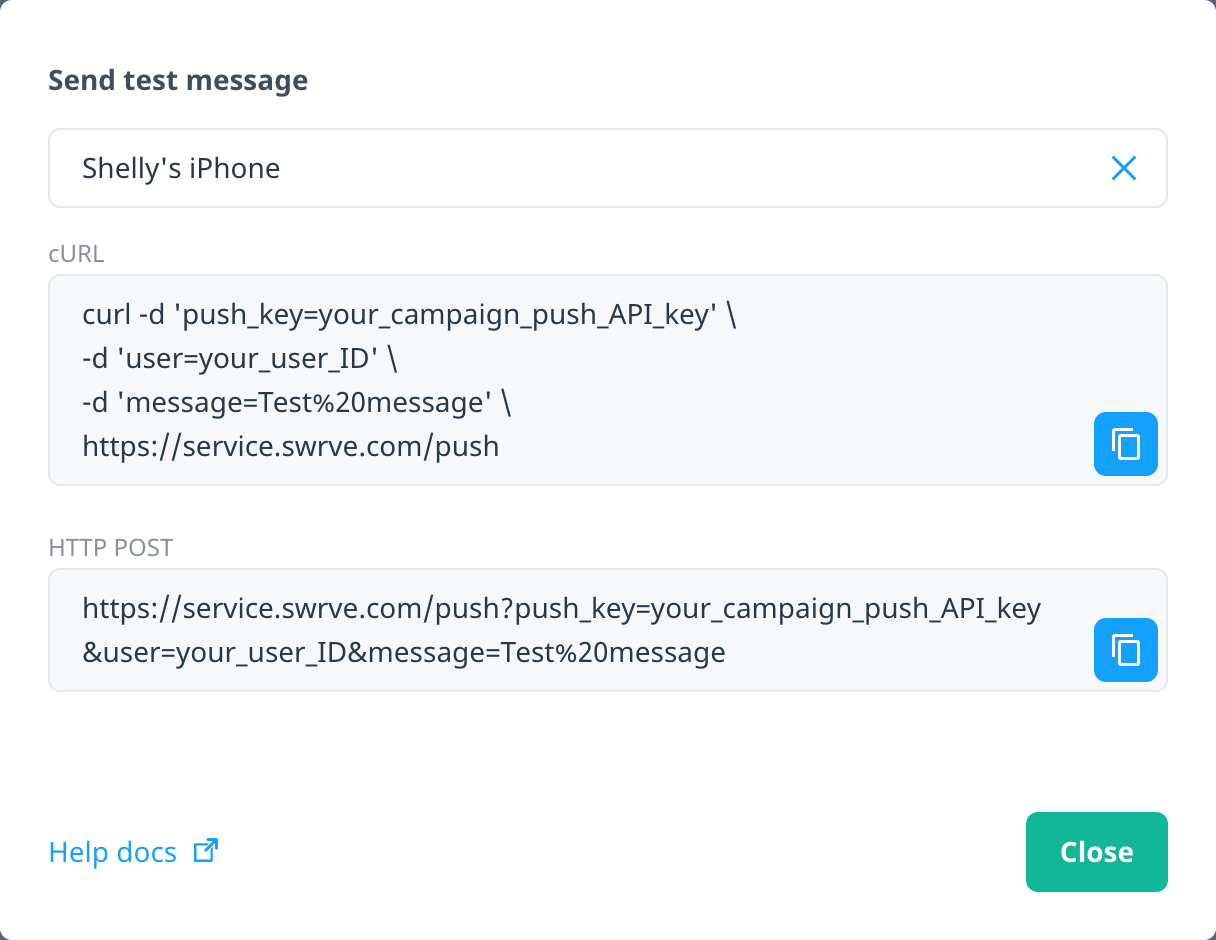
Select Copy to clipboard , then paste the message to a notepad or other clipboard.- To test your default content, remove the test message content (for example,
-d 'message=Test%20message'in the cURL command). - To test other content, replace the test message with the message parameters you want to test. For a list of message parameters you might want to test, see the Swrve Push API guide.
- To test your default content, remove the test message content (for example,
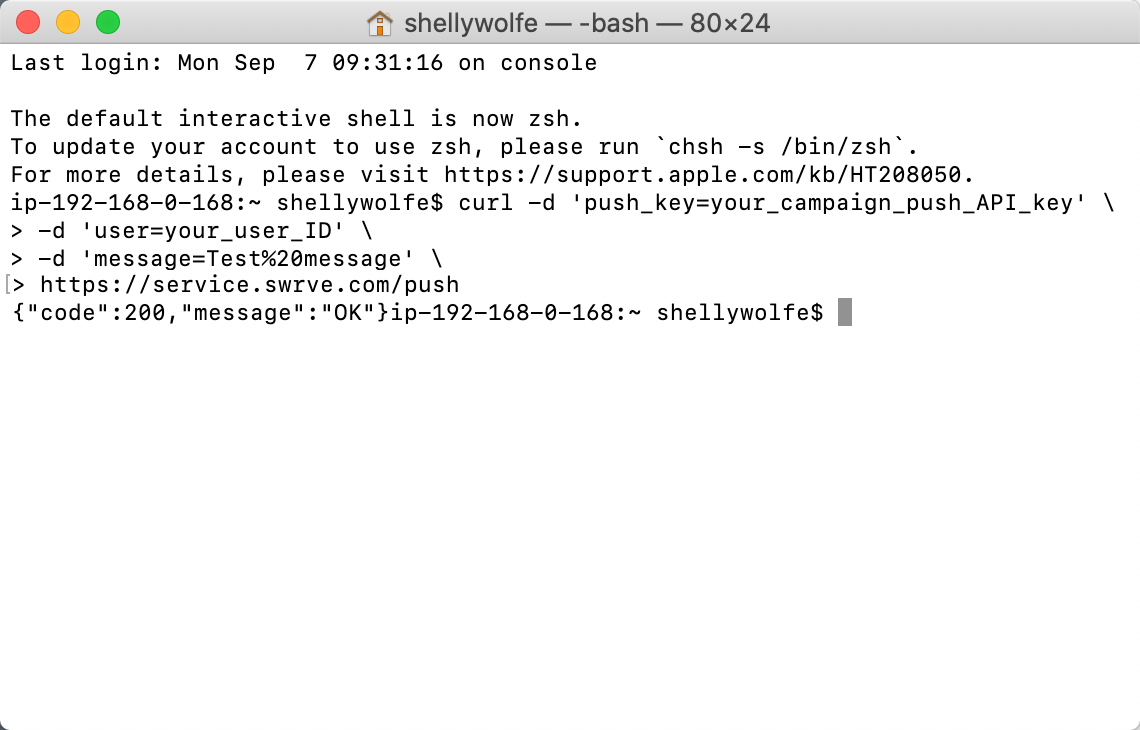
- To send the test message to the device, run the cURL command in a command-line window (for example, Windows Command shell or Mac Terminal) or copy the HTTP POST command to a REST client service like Insomnia or Postman, or an online service like ReqBin (remembering to use POST, not GET). The Swrve Push API returns a response code that indicates if your test was successful.
Start the campaign
If you’re happy with your test message and are ready to make the campaign active, on the Campaign builder, select Activate campaign.
Once the campaign is active, use the campaign-specific Push API Key and URL displayed on the API block to trigger push notifications to individual users, either via webhooks from a third-party system or using your own custom code.

For more information on the API call method, URL parameters, expected responses, and possible error codes, see the Swrve push API guide.
Next steps
- Set custom goals to measure the success of your campaign. For more information, see Campaign goals.
- If you’re using the push API with your marketing cloud campaigns, review how to configure the linked push notification campaign in Salesforce Journey Builder, Salesforce Serve Cloud, or Oracle Responsys Program.
- View results and reports for your campaign or change the status. For more information, see Campaign reports or Managing your campaigns.