Oracle Eloqua Campaigns

Supported actions
Use Swrve’s integration with Oracle Eloqua to share data between both systems and trigger actions or events in Swrve directly from an Eloqua campaign.
From an Eloqua campaign, trigger the following Swrve actions:
- Trigger in-app message campaigns that use your Eloqua segments to generate the audience.
- Send rich push notifications with custom properties and deeplinks.
- Send events from Eloqua to Swrve.
- Update user properties of mobile users in Swrve.
From your Swrve-powered app, you can instantly:
- Create Eloqua contact records and custom objects with data coming from the app.
Prerequisites
To use the Swrve app for Eloqua, contact your CSM at support@messagegears.com or request a contact from the Oracle Cloud Marketplace. Once your CSM enables your account, they will give you a link to install the Swrve app in Eloqua. They will also configure and activate the Eloqua integration in Swrve and enable external audiences for your Swrve campaigns.
Link your Swrve dashboard to Oracle Eloqua
After you install the Swrve app, you need to link your Swrve dashboard to Eloqua. From the Eloqua campaign canvas, drag one of the Swrve Campaign Steps into the canvas, select the step, and then in the step dialog box, select the configuration icon . In the Cloud Action Configuration screen, select Link Account and enter the credentials for your Swrve dashboard.

Once you link your account, you’re automatically directed to the Configure Activity screen. If you need to change your credentials, select Link Account and re-enter them. If two-factor authorization (2FA) is enabled for your Swrve account, it is not required for linking to the Eloqua app.
Create a campaign with Swrve actions
After you install the Swrve app for Eloqua, the supported Swrve actions are available to use in the Eloqua campaign canvas. There are four actions available:
- Push Notification
- In-app Message
- Send Event
- Update User Property
When using Swrve actions in your Eloqua campaign, you must include the following elements:
- Audience – The segment of users or a program event that triggers entry to the campaign.
- Swrve Campaign Step – The Swrve action you want to include in your campaign.
This article only covers setting up a basic Eloqua campaign using Swrve actions. For more details about creating campaigns in Eloqua, see the Oracle Eloqua user documentation.
Add your audience
To specify your campaign audience:
- Drag the Segment Members element into the canvas.

- To configure the audience, double-click the Segement Members element, enter a name for the audience, and then select a segment from the list.

- To add a Swrve action to your campaign, drag the required action into the canvas, link it to the previous element, and then double-click the element or right-click and select Configure….

- In the step dialog box, select the configuration icon and then enter the required values for that specific action.
For details about how to configure each action, see the relevant section below.
Push Notification
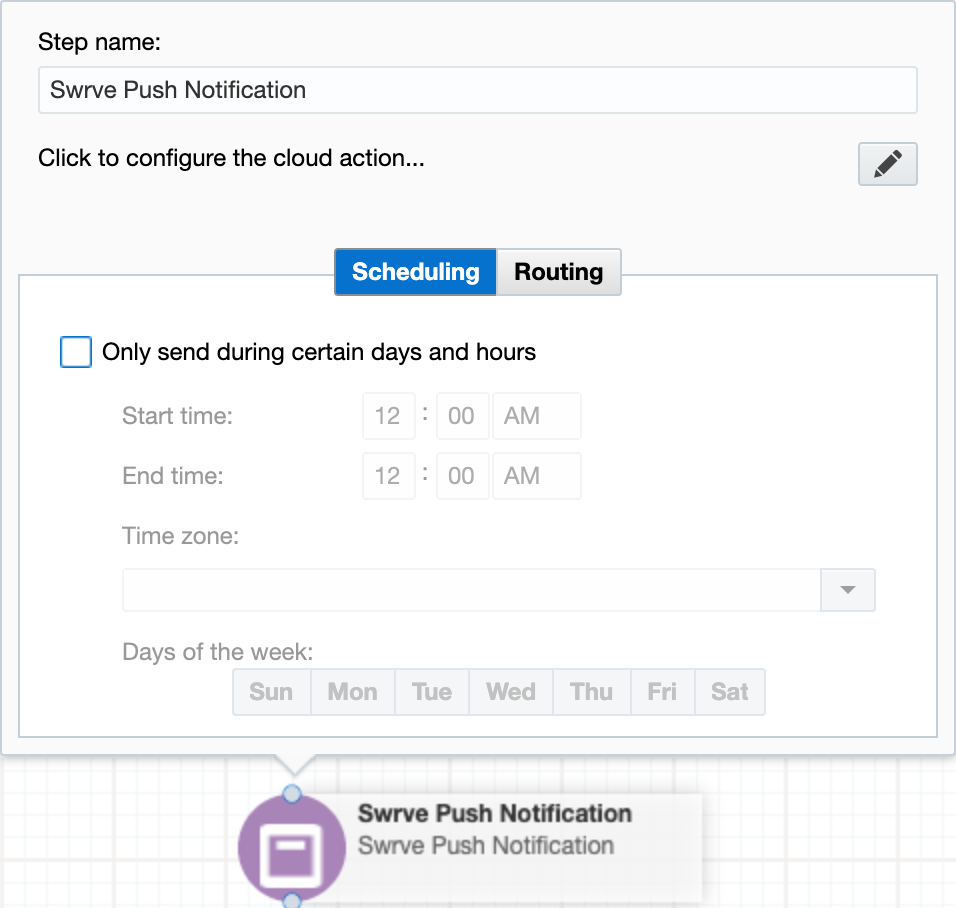
To configure a Swrve push notification, complete the following sections as required:

Swrve Campaign
- App Name – Displays a list of your Swrve apps that are linked with your Eloqua account and that have active push notification campaigns (including sandbox and production apps). Select the app you want to use for the campaign.
- Push Campaign – Push notifications in Eloqua use the Swrve Push API to take advantage of all of Swrve’s built-in tracking and analytics. We recommend creating a Push API campaign for each individual push you want to include in your Eloqua campaign. Any push API campaigns you create in Swrve display in this list. For more information, see Push API campaigns.
- Swrve User ID – The ID Swrve uses to uniquely identify an app user.
Notification Content
If the selected Swrve Push API campaign contains default content, any content you add here overwrites those defaults, if specified.
- Text – The push notification content. This can be text that you enter directly or that is completely extracted from the Eloqua contact or custom properties. To insert data, select the property name from the Insert Property list.
- Sound – To set an alert sound for your push notification, select the Sound list and enter the desired sound. For information about configuring custom sounds so that they are available in the Alert Sound list, see Intro to push notifications.
- Category – If your push notification is targeted at Apple users, the Category field enables you to make the notification appear as an interactive push notification on devices running iOS 8 or later. Select a custom action category (for example, Yes/No, Ignore/Respond) from the list. For information about configuring custom action categories for this list, see Intro to push notifications.
- Advanced – Custom Payload – If you want to send instructional parameters to your app when you send the push notification, define custom key/value groups or pairs. For example, you might want to direct the user straight to the store (instead of the default start screen) when they open your app from the push notification. Alternatively, you might want tracking parameters to be passed from the push notification for use by your internal or external tracking systems. To add custom key/value pairs:
- Select Advanced – Custom Payload.
- In the Custom key/value pairs section, select Add key with sub pairs or Add key/value pair, as required.
- Enter a key/value pair in the Key and Value fields. For example, go_to/store, trial/30days or discount/10percent. The Payload Preview displays the actual code sent with your push notification.
The Add key with sub pairs option enables you to nest multiple key/values under the group name in the JSON payload. Consult with your development team about the appropriate key/value pairs to use to trigger the outcome you require.
After you’ve selected the Swrve Campaign details and added your Notification Content, to return to the campaign, select Submit.
In-app Message and embedded campaigns
To make an in-app message or embedded campaign available in your Eloqua campaign, you must first create the campaign in Swrve. We recommend following a standard naming convention for your campaigns so they’re easy to find in the campaign list. For more information on the main steps involved, see one of the following:
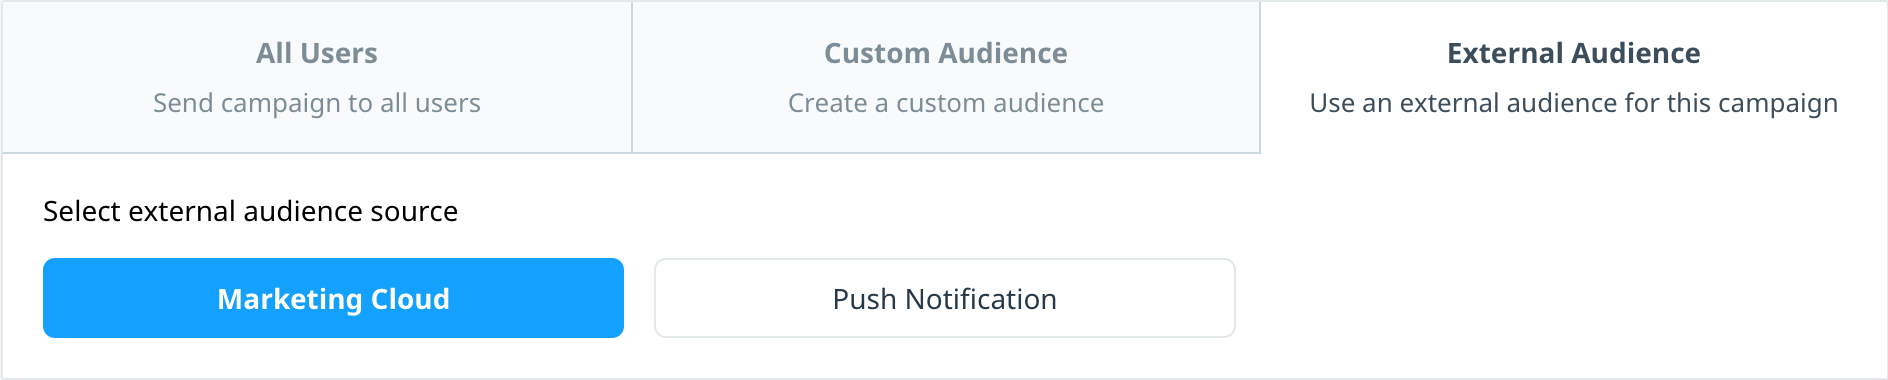
To make the campaign available in Eloqua, on the Audience step of the campaign workflow, select External Audience, and then select Marketing Cloud.
If you include an In-app Message action in your Eloqua campaign, it automatically adds the user to the audience for the associated Swrve campaign.

To configure the In-app Message action, complete the following fields:
- App Name – Displays a list of your Swrve apps, including sandbox and production versions. Select the app you want to use for the campaign.
- In-app Messages Campaign – Select the campaign you created in Swrve. If you don’t see your campaign in this list, ensure the Swrve campaign is set to active and that you selected Marketing Cloud as the external audience source when creating the campaign.
- Swrve User ID – The ID Swrve uses to uniquely identify an app user.
Real-time data transfer from Eloqua to Swrve
In many cases you’ll want to send information from Eloqua to Swrve. This information is per user and is transferred instantly as users hit the corresponding step in a campaign.
There are two options for sending information to Swrve:
- Send Event – Send events you want to count and track over time.
- Update User Property – Send facts about a user that hold a set value at any given moment in time.
The following sections explain how to configure these actions.
Send Event
The Swrve app enables Eloqua to send custom events to Swrve. You can then use those events in Swrve to trigger other mobile campaigns such as in-app messages or other Swrve actions when the custom events are received.
To send a Swrve event as part of your Eloqua campaign, select the Send Event action from the Campaign Steps list.

To configure the Send Event action, complete the following fields:
- App Name – Displays a list of your Swrve apps, including sandbox and production versions. Select the app you want to use for the campaign.
- Swrve User ID – The ID Swrve uses to uniquely identify an app user.
- Event Name – The name of the action or behavior Swrve records for this user. Event names must be unique, alphanumeric, contain only special characters underscore (_) and periods (.) and no spaces. Swrve counts the number of times it see this information for each user and notes the time the event arrives.
- Event Content – When sending events, at times you may want to include additional information to help target behavior. That extra information is often described with a label (or key) and a value. To add a key-value pair, select Add and enter the key and value. The values of the key-value pair can be dynamically inserted from any Eloqua contact or custom properties.

Update User Property
Use the Update User Property action to send data you have in Eloqua about non-mobile user activities to Swrve. After the Swrve user profile is updated with this information, Swrve can immediately change how it engages with the user based on this new context.

To configure the Update User Property action, complete the following fields:
- App Name – Displays a list of your Swrve apps, including sandbox and production versions. Select the app you want to use for the campaign.
- Swrve User ID – The ID Swrve uses to uniquely identify an app user.
- User Properties – User properties are described with a label (or key) and a value. You must include at least one. The above example illustrates how to update the user’s profile to show they now qualify for free shipping and the tier of rewards they are at. First, select Add, enter a Key called free_shipping and set the value to true. The information about tier is stored in this instance of Eloqua in a field called REWARDS_TIER. To update the rewards tier, add a new key-value pair called tier and use the Insert Property list to find the corresponding value in your contacts list or other data source.
To check the existing custom properties for your app, download the Custom User Properties CSV file from the User DB Downloads screen, or in the audience builder, on the Property tab, check the list of available properties in the filter list. For more information, see Intro to user databases or Segment and audience filters.