Push notification permissions
iOS and Android require app users to give permission for key services, such as push notifications, and to access personal information, such as location, contact information, and photos. This guide explains how Swrve collects and reports notification permissions. It also shows you how to time your permission request for optimal buy-in and how to target users based on their permission preferences to ensure the success of your future push notification campaigns.
To send push notifications to your users, you must first request their permission to do so. iOS and Android use different methods to collect notification permissions from app users.
Collecting device tokens on iOS
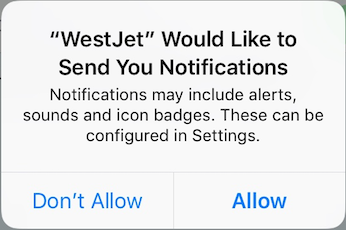
Apple uses the Apple Push Notification service (APNs) to send push notifications from Swrve to an iOS device, using a device token that is unique to each app and each device. The first time a push-enabled app requests the device token, iOS displays a dialog that requests permission for your app to send notifications to the user of the device. Apple only lets you display this dialog once.
If the user selects Don’t Allow, Swrve doesn’t collect the device token and you won’t be able to send that user any push notifications. That is why the timing of such a request is crucial.
We recommend using Swrve’s built-in SDK functionality to delay the timing of this first device token request until the user is most likely to agree to such messaging.
Depending on the user’s selection, Swrve updates the iOS push notification property swrve.permission.ios.push_notifications with the associated value:
| Permission | Property Value |
|---|---|
| Allow | authorized |
| Don’t Allow | denied |
| Customer hasn’t seen permission dialog | unknown |
The last value, unknown, is an area of opportunity to increase your push permission opt-in. Users in this group have either not been asked to opt-in or opted out of a pre-permission prompt. For information on how to target these customers, see Requesting notification permissions.
Swrve also tracks when a user’s status changes for the notification permission as an event: Swrve.permission.uis.notification.on or off. Use these two events to better understand how frequently iOS users opt in and out of receiving notifications.
To send a user push notifications, their iOS push notification property must be set as authorized. If the value is set as denied, you may never be able to send them push notifications, unless they change the permission manually in their app settings.
In iOS 12, Apple added a feature for provisional authorization of push notifications. This feature enables you to send push notifications as soon as a user opens your app for the first time, without requiring the user to opt-in. Users with the iOS push notification property set to provisional only see the notifications displayed in the device’s Notification Center. When the user views the notification, the message automatically includes a built-in prompt asking if they want to continue to receive notifications. For information on implementing provisional authorization, see Provisional authorization for push.
By default, the Swrve SDK sends the iOS push permission value at app startup and it is automatically available in the audience filter options for targeting your push notification campaigns. For information on how to estimate your potential push audience for campaign targeting, see Estimating your push audience.
Displaying notifications on Android
Android uses a different model. Rather than waiting for the user to grant permission before they collect the device token, Android stores the device token to the user’s profile the first time they open the app. Historically, users were automatically opted in to receiving notifications and had to manually revoke the permission in the app settings page if they wanted to opt out.
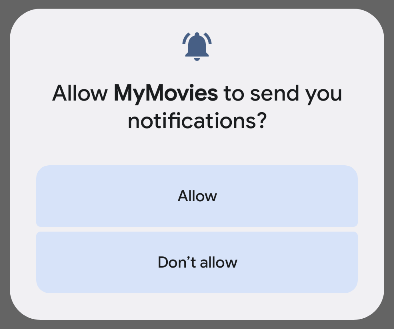
With the release of Android 13, users must now actively grant permission for an app to display notifications on their device. With this in mind, you have the option to delay the permission request prompt. Android only allows you to display the permission prompt a maximum of two times, so it’s important to carefully consider the context in which you trigger the request. If a user declines permission, any notifications you send to the device are not displayed.
To control when you display the permission request, your developers need to upgrade your app to version 10.9.0 of Swrve’s Android SDK and update the target version of your app to Android 13. If your app targets Android 12 or lower on a device running Android 13, the OS controls the permission prompt and automatically displays it the first time the user opens the app. Existing app users are not affected, as long as they granted permission prior to upgrading their device to Android 13. For more information on configuring the notification permission request, see the Android integration guide.
Android push permission properties and events
Swrve’s Android SDK collects the following push permission properties, including additional Android 13-specific properties that let you see how many times the permission prompt has been displayed:
| swrve.permission.* property | Value | Description |
|---|---|---|
*.notifications_enabled(Android 12 and below) |
true | Android automatically collected or the user granted permission to display notifications. |
| false | User manually revoked permission. | |
*.android.notification(Android 13 and higher – This property is directly related to the existing property above, but uses different values to indicate the permission state.) |
granted | The user has granted permission. |
| denied | The user has denied permission. | |
*.android.notification_show_rationale |
true | Indicates the permission dialog was shown once and the user denied it (not dismissed). |
| false | Indicates the permission dialog has not been shown, was shown but dismissed, has been shown twice, or the user has already granted permission. | |
*.android.notification_answered_times |
0, 1, 2 | The number of times the user has responded to the permission request. A dismiss is not counted—the user must respond by granting or denying permission. |
Swrve also tracks when a user’s status changes for the notification permission as an event: Swrve.permission.android.notification.granted or denied. Use these two events to better understand how frequently Android users opt in and out of receiving notifications.
Requesting notification permissions
Before you ask users to grant notification permission, use Swrve’s in-app messages to communicate to your users the benefits of accepting notifications from your app. As previously noted, iOS and Android limit the number of times you can display the system permission dialog—once on iOS and a maximum of two times on Android. However, there are no limits to the number of times you can display an in-app message as a pre-prompt before triggering the system dialog. Additionally, a well-timed in-app message provides context to the request and often results in higher opt in rates.
There are also two types of campaigns you might want to use to increase opt in rates. The first scenario is targeting new users who haven’t yet seen the system permission dialog. The second is known as a “push plea” campaign, or prompting users who previously denied permission to manually update the permission in the related app settings screen. The steps for constructing notification opt in campaigns vary slightly based on platform.
Encourage new users to opt into push notifications
To create a permission prompt in-app message campaign:
Step 1: From the Campaigns center, create a new campaign.
Step 2: Select In-app message as the channel, then select Mobile as the device type.
Step 3: Select the platform you want to target, whether Apple (for iOS devices) or Google, Amazon, and Huawei (for Android devices). We recommend creating an individual campaign for each platform, as the button actions in the content editor and the user properties that define your target audience are slightly different for iOS and Android.
Step 4: On the Content screen of your campaign, add your message content. Include either a background image or button that prompts the user to grant notification permission.
Step 5: For the background or button action, select Request permission, and then Push notifications (iOS) or Notifications (Android) as the permission type.
Step 6: Create the target audience for your campaign. The user properties you use to target your users depends on the platform, and in the case of Android users, whether they’ve already seen the system permission prompt twice or only once.
iOS
Target iOS users whose push permission value is unknown.

Android
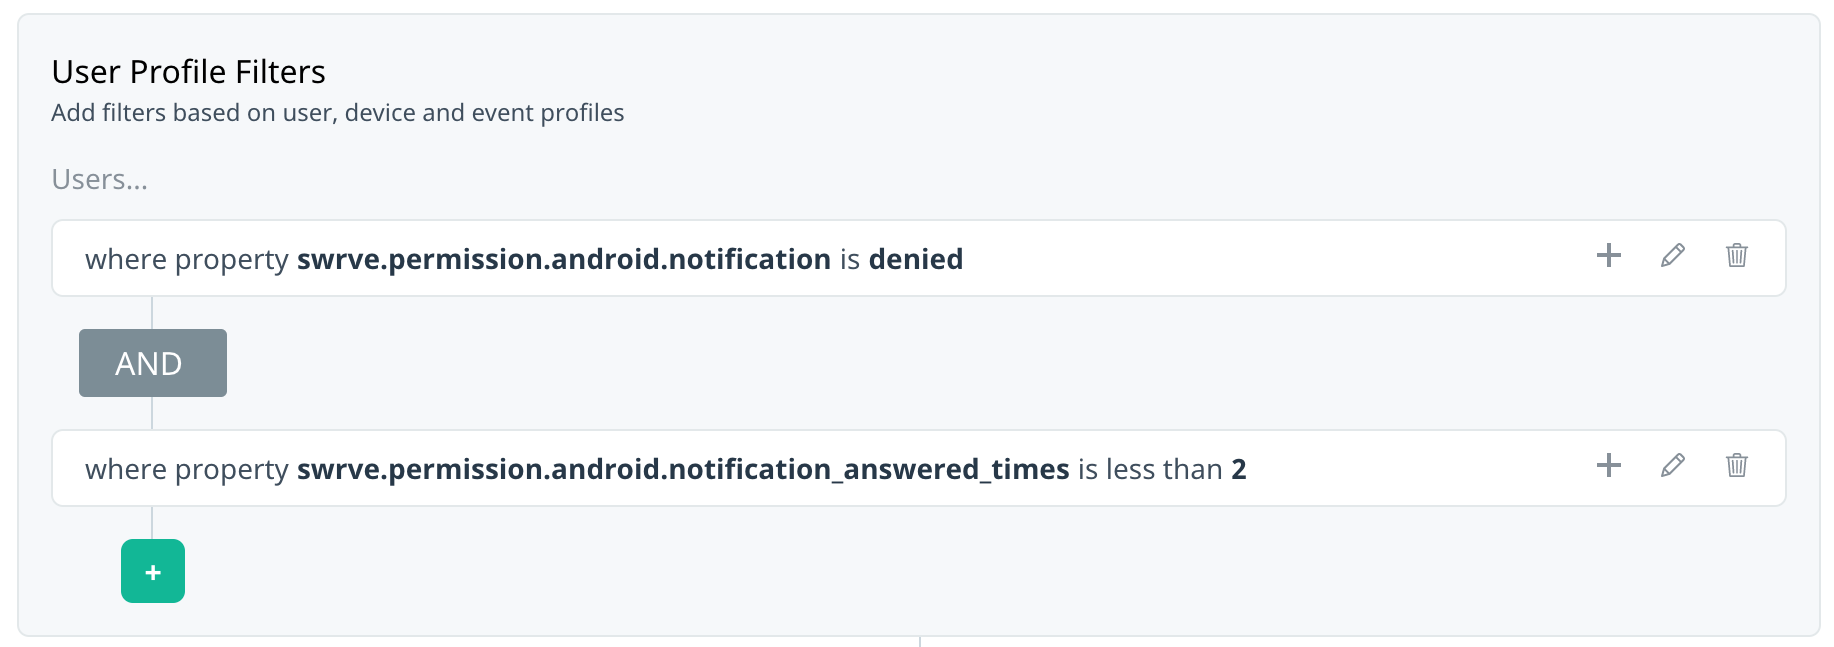
Target Android users whose push permission value is denied and answered less than twice.
| Target audience | Description | |
|---|---|---|
| Google/Huawei | swrve.permission.android.notification = denied | Targets opted out users. |
| swrve.permission.android.notification_answered_times is less than 2 | Targets users who have seen the prompt < 2 times. | |
| Apple | Swrve.permission.ios.push_notifications = unknown | Targets users who haven’t. |
Prompt users to manually update their permission settings
Use this type of campaign to convert users who previously opted out of receiving notifications or, for Android, users who have triggered the system prompt the maximum number of times.
Steps 1 to 4: Complete the same steps as outlined in the new users campaign above.
Step 5: For the background or button action, select Open notification permission settings.
Step 6: Create the target audience for your campaign. The user properties you use to target your users depends on the platform, and in the case of Android users, whether they’ve already seen the system permission prompt twice.
iOS
Target iOS users whose push permission value is denied.
Android
Target Android users whose push permission value is denied and answered at least twice.

| Target audience | Description | |
|---|---|---|
| Google/Huawei | swrve.permission.android.notification = denied | Targets opted out users. |
| swrve.permission.android.notification_answered_times > 1 | Targets users who have seen the prompt 2+ times. | |
| Apple | swrve.permission.ios.push_notifications = denied | Targets opted out users. |
Permission request best practices
When should I display my opt in campaign?
Trigger the campaign when the reason for requesting permission to send notifications is intuitive based on the user’s action (i.e. engaging with a feature that requires or benefits from notifications). For example, when the user follows a sports team, books their first ride, or completes their first purchase.
When to use push plea campaigns?
As push plea campaigns are targeted at users who have explicitly opted out, Swrve recommends only triggering the campaign when the user has either:
- Attempted to use or enable a feature that requires or benefits from notifications
- Explicitly expressed interest in receiving notifications
Can I deliver this campaign to a user multiple times?
Yes, we recommend you occasionally check in with the user every to ensure they understand the benefits of opting in for push notifications.
Should I A/B test this campaign?
Always! Try A/B testing different creative to see which explanation or visuals produce the highest opt-in rates —then optimize, optimize, optimize! For example:
- Visual steps vs. plain text
- Passive vs. urgent
- Large vs. small imagery
Configuring notification preferences
This section describes how your development team can configure the timing of your notification permission dialog for optimal buy-in (iOS) and Swrve’s solution for real time push notification opt-out.
Timing the iOS notification permission dialog
You can delay the system push permission prompt to display after a user sees and interacts with your own branded in-app message—a pre-permission campaign. For more information on how to create a pre-permission campaign inside Swrve, see Requesting notification permissions.
By delaying the prompt until after a user views the message, there is no limit to the number of times the user can be shown the message, as you are not displaying a system prompt unless they agree to opt in through the pre-permission campaign.
Notification permission opt-in campaigns (iOS only)
One way to optimize the notification permission request is to create a branded, in-app campaign that is displayed first and asks the customer if they would like to give permission to receive notifications. If the customer agrees, you can then trigger the iOS permission dialog. This lets you ask for permission as many times as you like without triggering the permission dialog. For more information on how to create this type of campaign, see Timing the device token (push authorization) request.
Push preferences
Although we recommend only allowing users to opt into all push messages, you can enact “Push preferences” as a method to allow users to select the types push notifications they want to receive.
There are two steps involved in implementing this method:
- Create a notification preference center
- Construct a simple page inside the app to collect the user’s preferences. This is not provided by Swrve.
- Set a custom user property for each preference category
- Assign a custom user property to the user when they select a specific notification category in the push preference center. Examples include:
marketing_notification_frequency= daily, weekly, monthly
order_status_notifications = true / false
billing_notifications = true / false
account_notifications = true / false
- Assign a custom user property to the user when they select a specific notification category in the push preference center. Examples include:
Once you collect the user’s preferences, you will need to ensure that you include this “preference” as a custom user property in the target criteria of the specific campaign. This means that no user can receive the campaign unless they have opted in via the preference center.
Real time notification opt-out (Unsubscribe)
If you wish to enact a real time push opt out (that is, unsubscribe), there are a few requirements and steps involved. Again, this setting is very restrictive and not often recommended by Swrve. However, we understand some may have legal obligations to opt out their users to all non-transactional notifications in a real time fashion.
Push opt-out
For a user to opt out of scheduled push notifications from an app, the app needs to send a user property update for property swrve.opt_out.push with value “1”. If this was done by mistake, or if a user decides they want to receive push notifications after all, the app can send a user property update for property swrve.opt_out.push with value “0” and they will be removed from the opt-out list.
Data refresh timing
While opting out is real time, opting back in can vary in timing. If the user opts out by mistake (usually meaning the user opts back in within a 24-hour window of opting out), then their opt back in will be handled real time. If the user returns to opt back in after a few days, it will take another 6-12 hour data refresh to make them eligible to receive push notifications again.
Integration requirements
This feature does not require an update to the Swrve SDK, but will require an app update to actually start sending this property when a user decides to opt out. For more information, contact your CSM at support@messagegears.com.
Using notification permissions to target campaigns
This section shows how to use push notification permissions and their associated user properties when building your Swrve push notification campaigns. This will help you plan and create campaigns in Swrve that optimize your notification permissions.
Estimate your push audience
Depending on how you leverage push permissions (push preference, real time push opt-out), it’s important to understand how to estimate your potential push audience for your upcoming push campaigns in Swrve.
All users with a push token
To view your estimate audience:
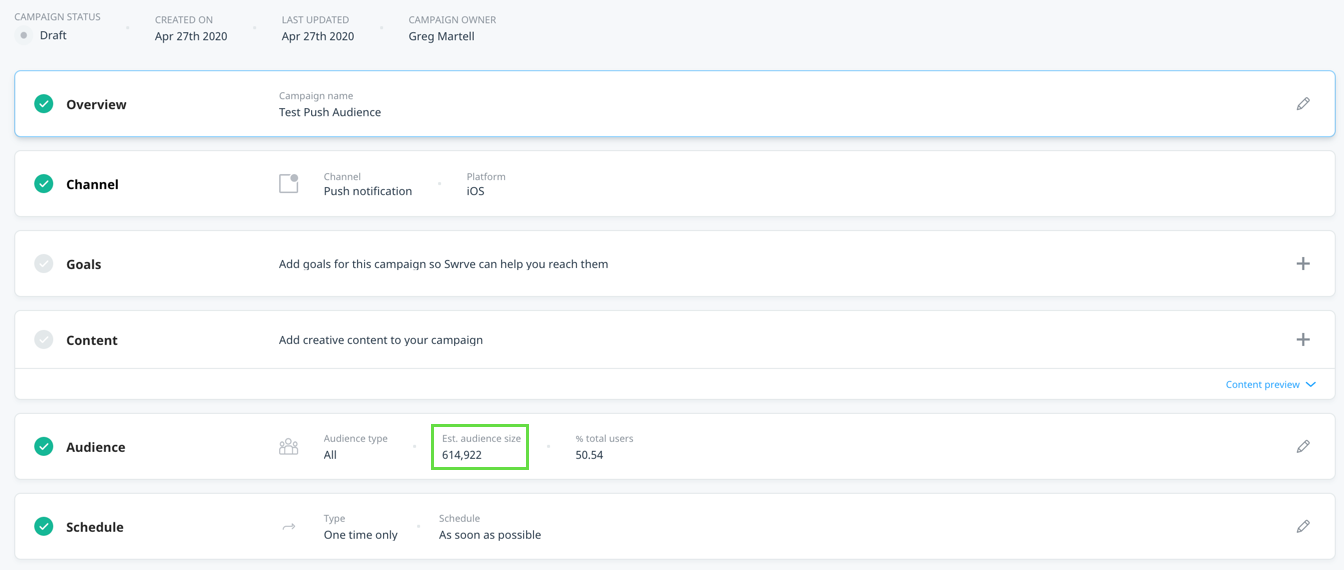
- When creating a new campaign from your Campaign center, select Push Notifications as the campaign channel.
- On the Campaigns builder, the Audience block displays your estimated audience size. This is a count of the device tokens, or all users with a push token.
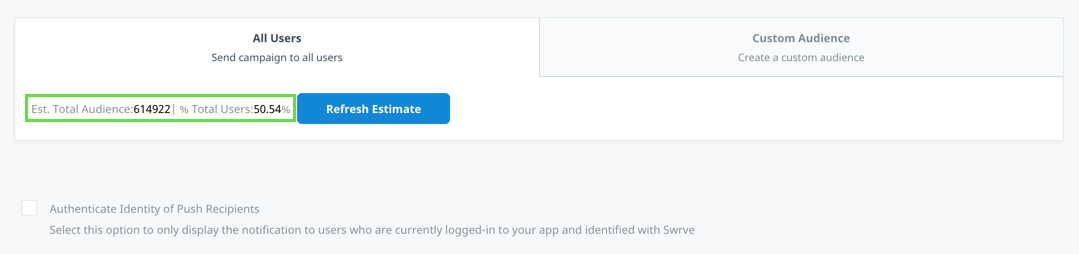
swrve.opt_out.push=1.Users with a push token that did not opt out
On the Audience screen, the estimated audience includes this suppression content of those that opted out in real time, that is, user’s with a property value of swrve.opt_out.push=1.
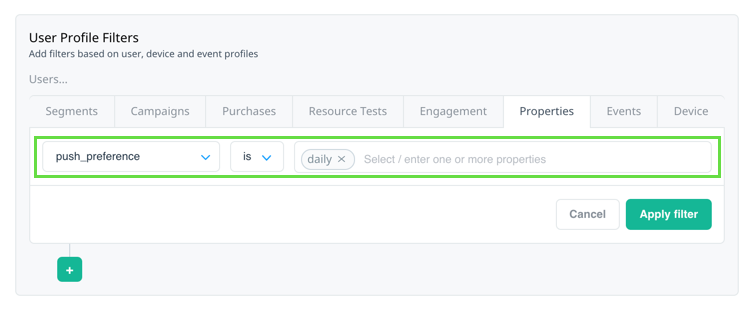
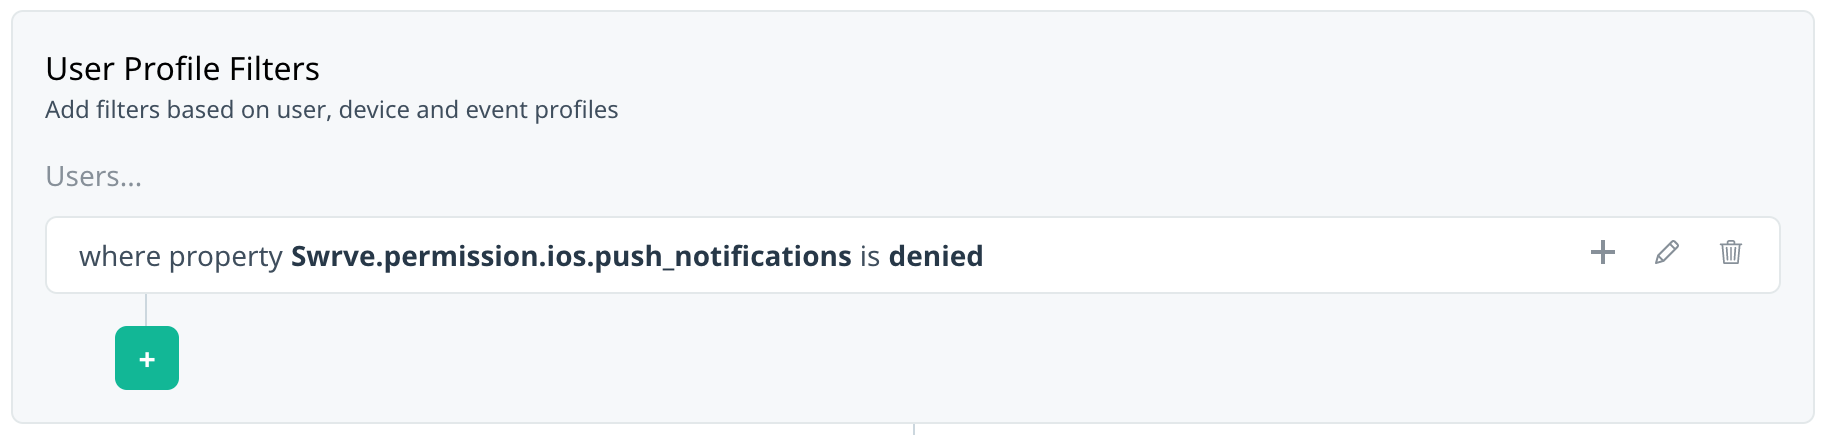
Users with push token that did not opt out and have a push preference
When building a custom audience, use the User Profile Filters Properties tab to continue to filter your estimated audience with the specific push preference that the user requested. This will further narrow down the target of potential recipients.