Quick push notifications
Swrve’s streamlined campaign workflow supports creating push notification campaigns that you want to quickly send to a predefined audience. Use Swrve’s quick push notification campaigns to send breaking news-type notifications or new content updates. Some common use cases are:
- Breaking news
- Travel alerts
- New content available, such as videos, songs, or photos
- Weather alerts
- Sports results
- Political updates
- New betting odds
- New blog posts
- Latest editions published (for example, magazines)
There are two main parts to sending a quick push notification:
- Predefine the audience(s) to whom you want to send quick push notifications.
- Create and launch a quick push campaign, as needed.
Create a quick push audience
Before you create a quick push notification, you must define the audience. Even if you want to send a notification to all users, you must define an audience that includes all users (for example, users who have used the app at least once). After you define an audience, it is available to use for any quick push campaign.
To create a predefined audience for quick push notifications:
- On the Manage menu, select Quick push audiences.
- On the Quick Push Audiences screen, select Create Audience.
- Enter the Name of the quick push audience.
- Create your filter based on the available data types (for example, Purchases, Events, Device), operators, and values provided. For detailed information on the data types and filter descriptions, see Segment and audience filters.
- Select the type of data on which you want to base your filter.
- Create the filter using the filter type, operator, and value fields provided. To include multiple values in a filter, select or enter the additional values in the value box.
- Select Apply filter to add your filter. The audience definition displays a summary of the filters as you add them.
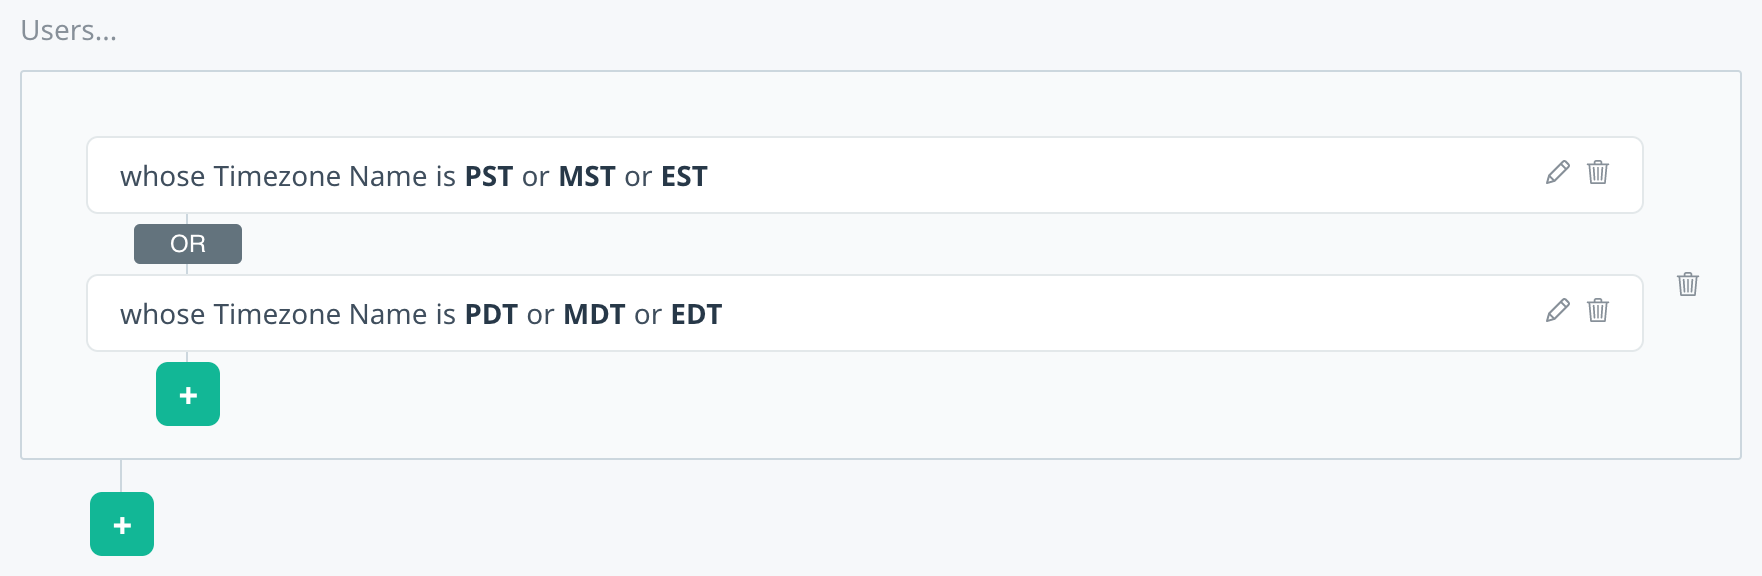
- Optionally, to create more complex filters, use secondary filters to apply additional constraints within one group.
- To add a secondary filter, on the filter summary select add (+) and then select either AND or OR as the operator you want to use.
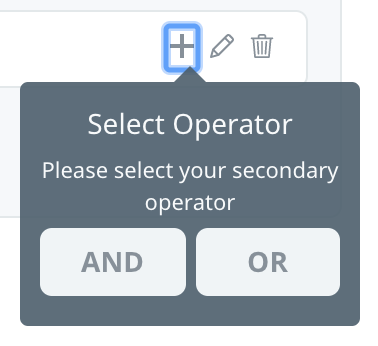
- Add the additional filter criteria and then select Apply filter. The filter definition is added to the summary and you can continue to add more secondary filters as required.
- To add a secondary filter, on the filter summary select add (+) and then select either AND or OR as the operator you want to use.
- To add another group of filters to your segment, select Add a new filter and then select the primary operator you want to use.

- Repeat steps 1 to 3 above for every additional filter.
- After you’ve defined the filters for your quick push audience, select Create Quick Push Audience to save the audience definitions.
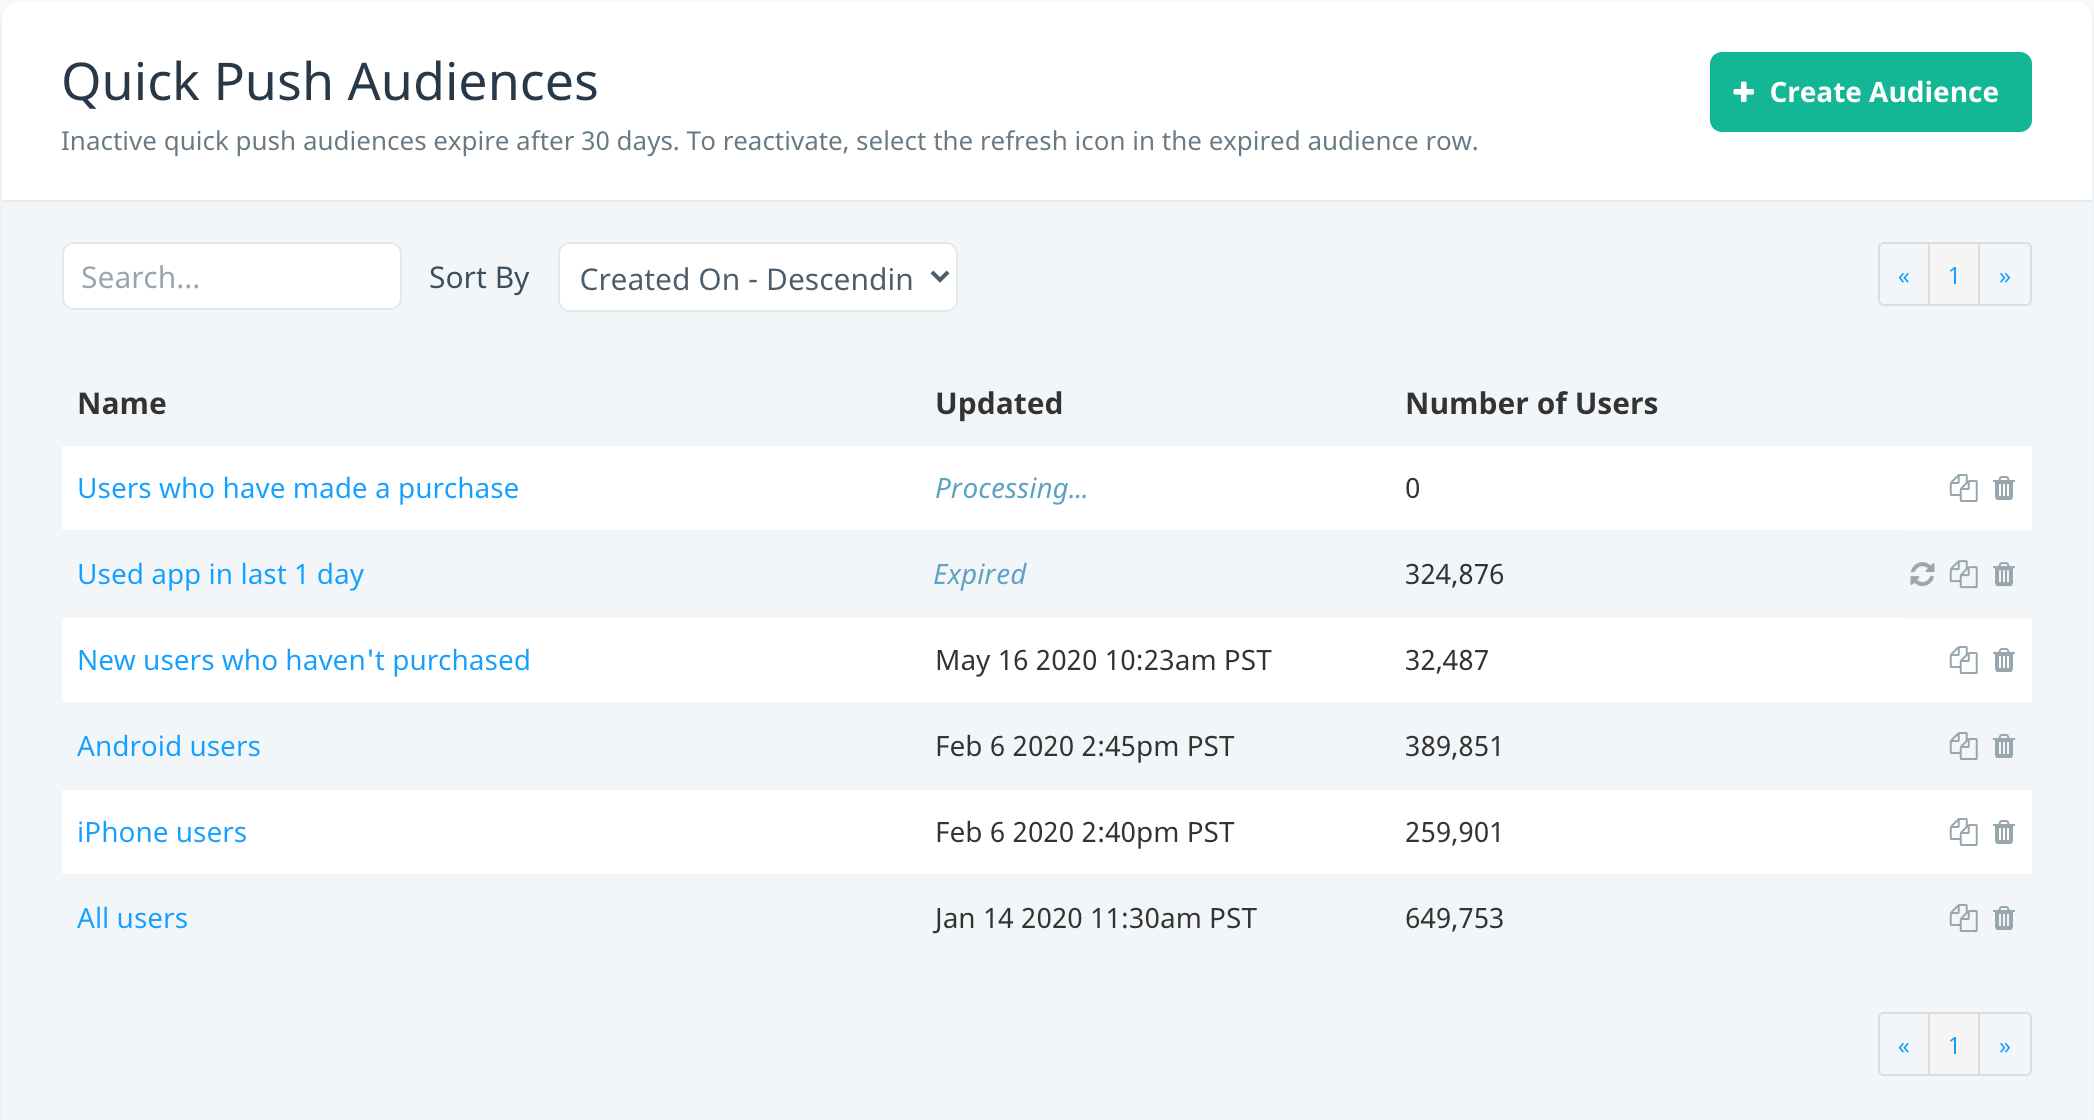
The new audience is displayed on the Quick Push Audiences screen. The status in the Updated column initially shows as Processing, as the system gathers all users that match the audience definitions. The Number of Users column displays the number of users in that audience, and the audience is updated regularly as user behaviors change.
The audience is available to use in your quick push campaigns after approximately one hour.
Quick push audience expiry
After 30 days, any inactive quick push audiences expire and Swrve stops updating the user count. To reactivate the audience for use in your quick push campaigns, select Activate in the row of the expired audience.
Creating a quick push campaign
The first steps for creating a quick push notification campaign are similar to creating a Scheduled push campaign.
To set up your campaign
- On the Campaigns screen, select Create campaign.
- On the Choose your marketing channel screen, select the Push notification campaign channel.
- Under Choose push notification type, select Quick as the push type.
- Under Choose platform, All is selected by default. If you need to create a platform-specific campaign, select the individual platform(s).
- To continue to the Campaign overview screen, select Continue.
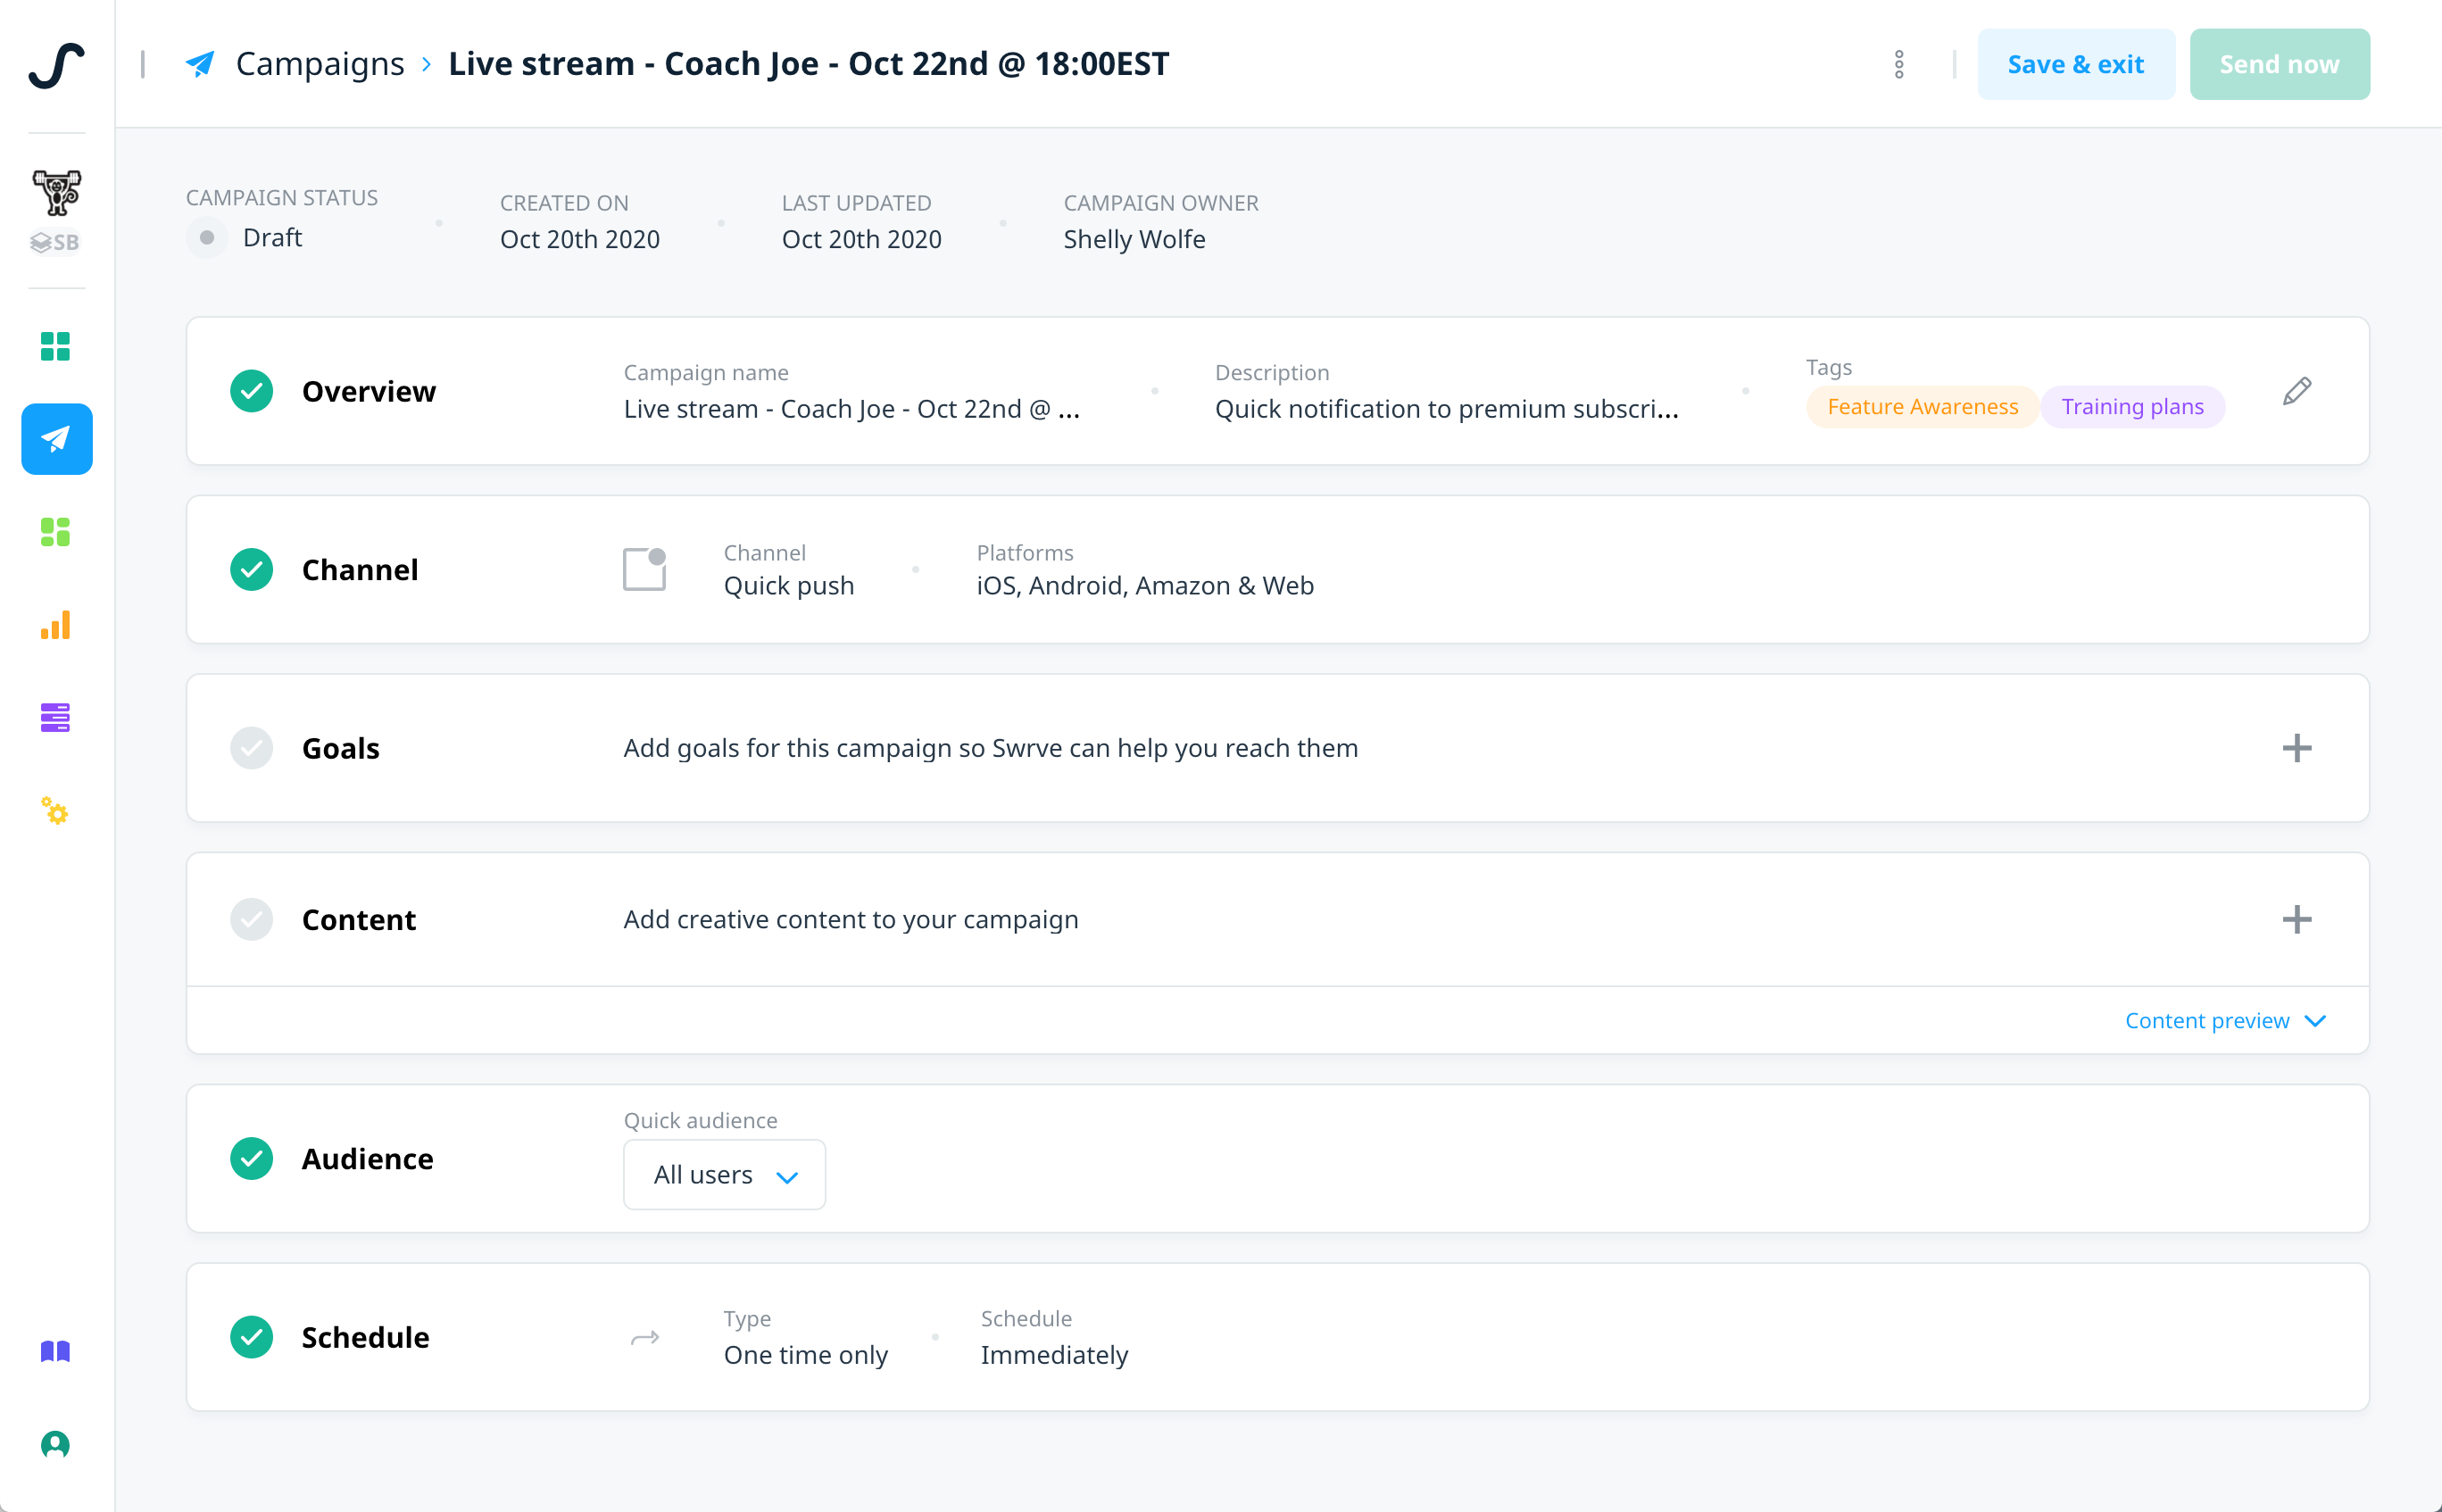
- On the Campaign overview screen, enter the Campaign name and Description.
- In the Tags list, select any tags you want to apply to the campaign.
- From the Select quick audience list, select the quick push audience that you want to send the campaign to.
- To save the campaign as a draft and go to the campaign builder, select Save.
The blocks on the campaign screen guide you through building your campaign, but you can complete them in any order.
There are a few differences between the options available for a scheduled push campaign and quick push on some of the campaign blocks:
- Content – The options for adding content to a quick push campaign are the same as scheduled push, except you cannot include personalization, localization, or A/B testing.
- Audience – Since you must predefine your quick push audience, there’s no option to add additional filters when you create your campaign. If required, you can select a different audience from the Quick audience list.
- Schedule – The purpose of creating a quick push campaign is to send it to your audience immediately, so there are no options for setting the frequency or schedule of the campaign.
For general information about each section, see the following:
Adding your campaign content
To add or edit your push notification content from the campaign build screen, on the Content block, select add + or edit .
The options for adding content to a quick push notification are the same as a scheduled notification, depending on the platforms your app supports. For more information about how to add your campaign content, see Creating a multi-platform push campaign.
Launching your campaign
When you’re ready to launch your quick push notification campaign, on the campaign builder screen, select Send now. A confirmation message displays the name of the selected audience and prompts you to confirm you want to send the campaign. To launch the campaign, select Confirm.
Once launched, the campaign status changes to Pending while the system sends the notification. After the campaign is sent, the status changes to Finished. To view results for a Finished campaign, on the Campaigns builder screen, select View Report.
Next steps
- View results or reports for your quick push notification. For more information, see Campaign reports.