Creating geo-triggered campaigns
Use Swrve’s geo-triggered campaigns to send messages to audiences in geographic areas of your choice. Zero-in on specific audience segments in a niche location, or make a geoplace as big and broad as you want. If you pick up on the right trends you could, for example, create regional campaigns to promote products according to weather conditions. It isn’t always about fine granularity but it is always under your control.
To create geo-triggered campaigns in Swrve, you and your development team must complete the required prerequisites, including integrating the Geo Sample project alongside your regular Swrve SDK and setting up the geoplaces you want to have available for your campaigns. For more information, see Intro to geo-triggered campaigns and About geoplaces.
Creating your geo-triggered campaign
Create geo-triggered campaigns directly from Swrve’s Campaign center. To view all your campaigns, on the menu, select Campaigns. Geo-triggered campaigns are included in the push notification channel, and use a local rich notification to deliver a message to a customer’s device. However, unlike other types of push notification campaigns, they do not require a push token.
There are five stages to creating a geo-triggered campaign:
- Select your campaign delivery channel and notification type.
- Complete the campaign overview.
- Add your notification content.
- Define your target audience, geoplace triggers, cooldown periods, and campaign goals.
- Preview and test your campaign and, when ready, launch it.
Select delivery channel
To select your campaign delivery channel and notification type:
- On the Campaigns screen, select Create campaign.
- On the Choose your marketing channel screen, select Push notification, and then select Geo location as the notification type:

- Select Continue to go to the campaign Overview screen.
Campaign overview
On the Overview screen, enter the Name for your campaign that will serve as a label for the campaign in the Campaigns screen. Optionally, add a description in the Description box.

Select Next: Content to go to the Add Content screen.
Adding notification content
Use the Add Content screen to enter the content of your notification and select the associated actions you want to trigger if a user engages with the notification.
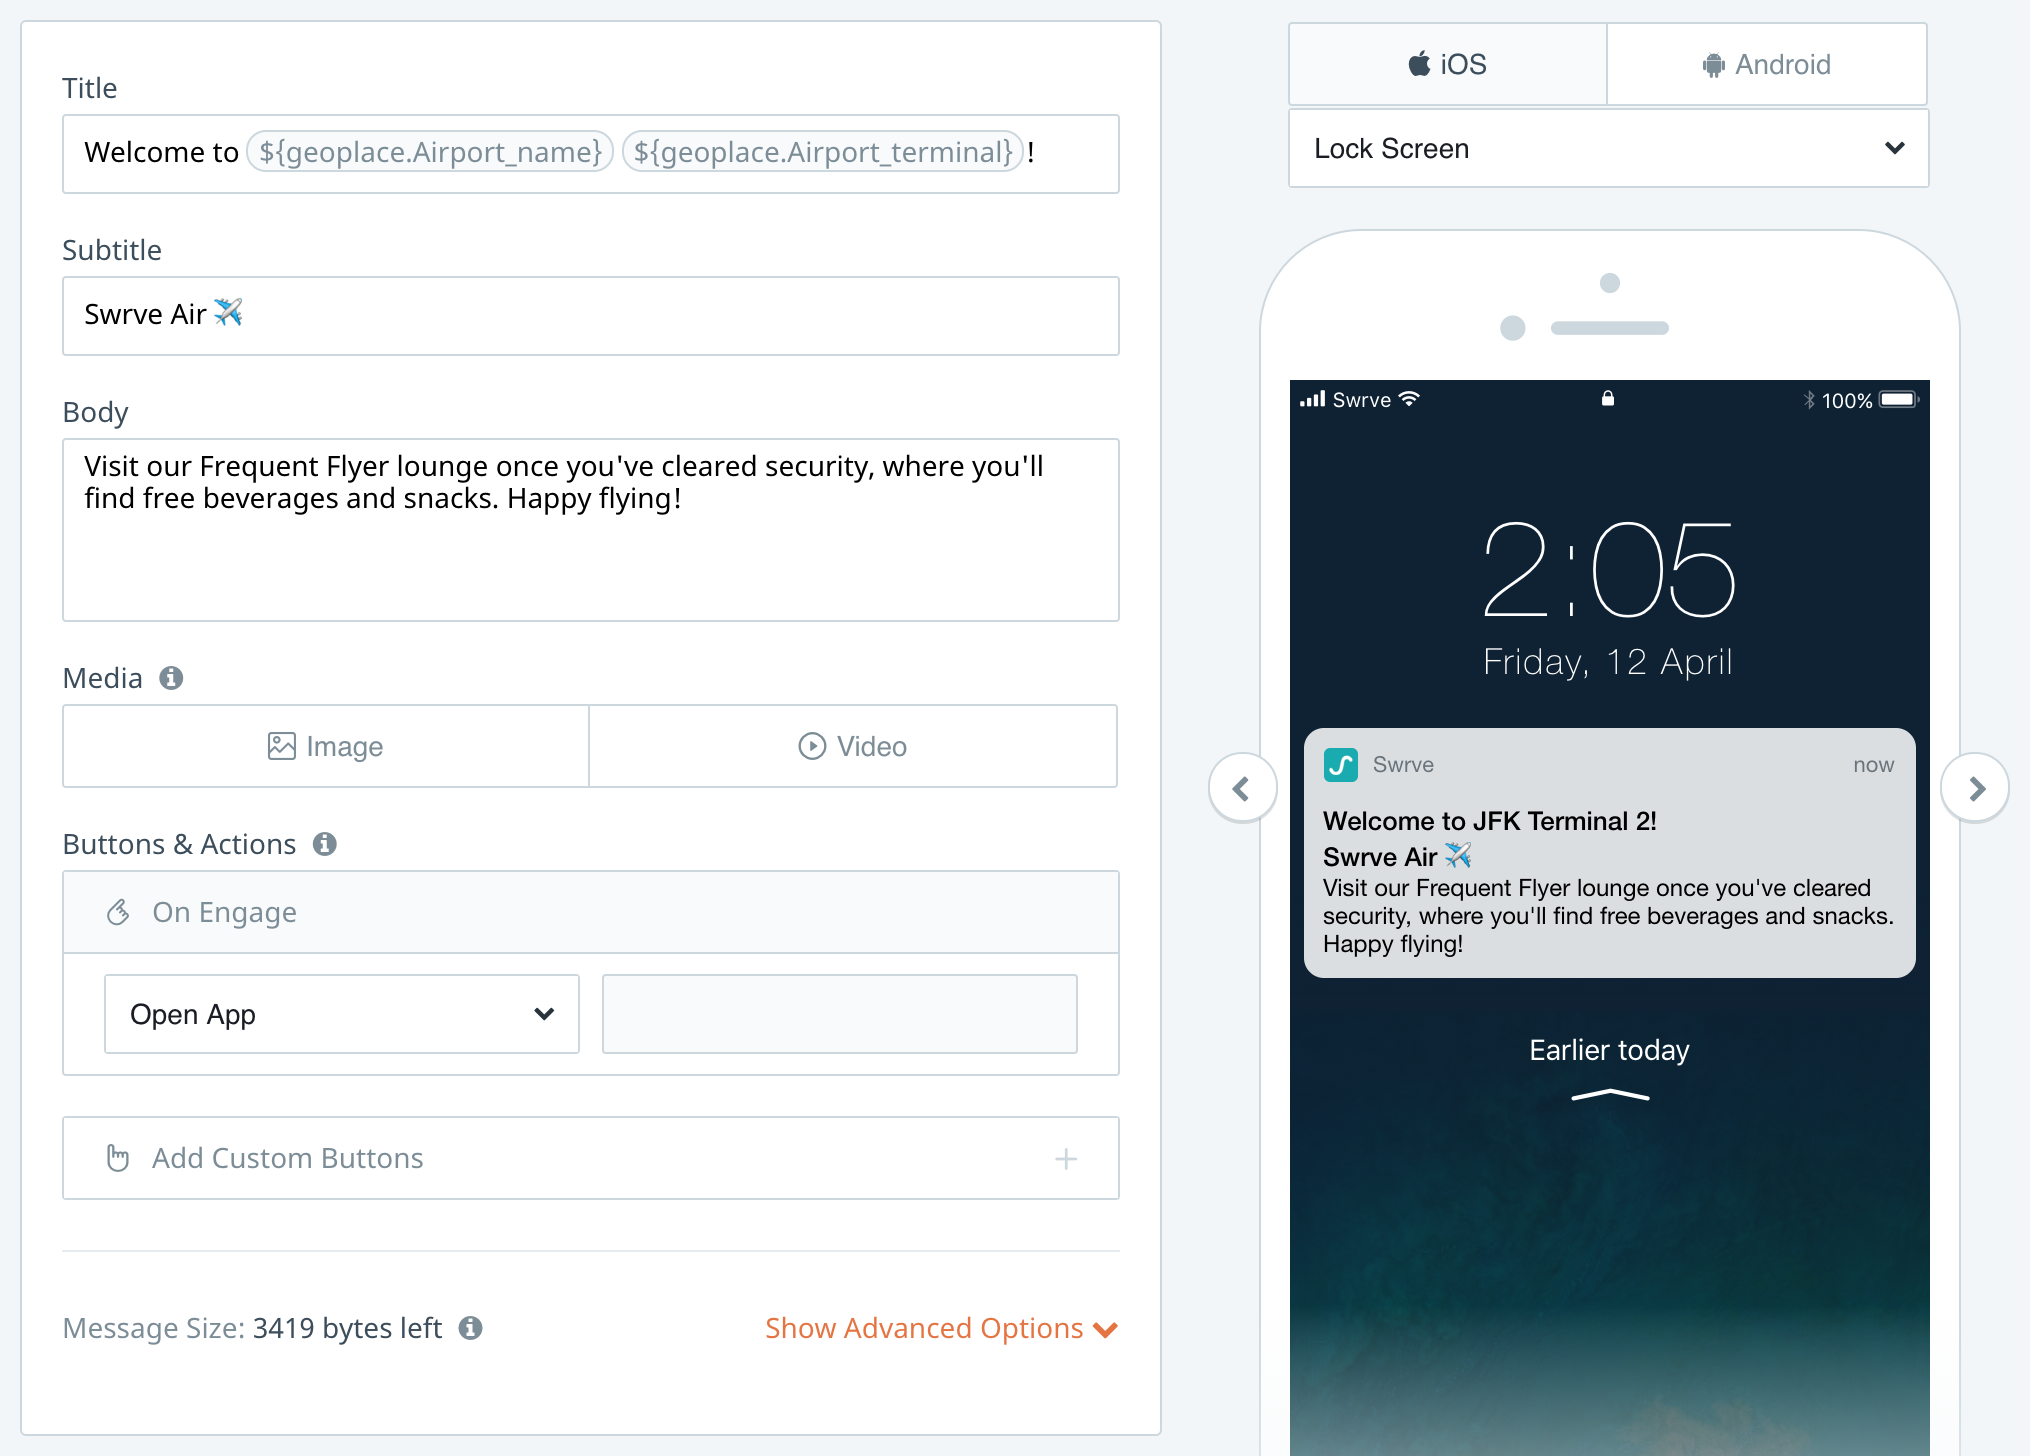
- Enter your basic notification content:
- Title (optional) – the notification title.
- Subtitle (optional) – the notification subtitle.
- Body – the notification text.
The title and subtitle are limited to 255 characters but may be truncated in the actual display, depending on the device and platform. We recommend testing on different QA devices to ensure your content displays appropriately.
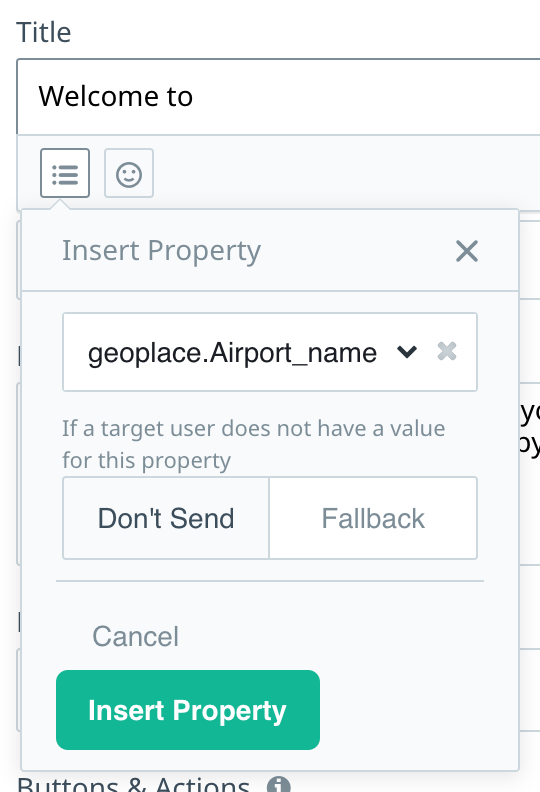
When you enter a value in a text box (for example, Title, Subtitle, Body or button text boxes), the Insert Property and Insert Emoji icons display.
Use Insert Property to search for geoplace custom properties and insert dynamic values in your message content (for example, airport name, restaurant location) using the property values. You have the option of not sending the notification or using fallback content if the property value does not exist for a selected geoplace.
Use emojis in your message text to personalize or enhance the content. For more information, see How do I include emoji in push notifications?
As you enter your message content, the device preview displays what your message looks like on different platforms or formats. Select iOS or Android to preview on either platform. Use the list below to view how the notification appears in different formats (for example, lock screen, recent, banner, extended view, Apple watch). Note: The format of the delivered message depends on the device preferences and operating system of the recipient.
- If you want to include rich media in your message, in the Media section, select the type of media, and then either upload the file or enter the URL of the file you want to use. For more information on the media options available, see About rich push notifications.If the media URL includes a custom property (for example, a location-specific image), in the Show Media Options section, use the Media Fallback options to specify fallback content that is used if a geoplace does have not a value for the referenced media.Select the Submit button when you’re finished adding the content.
- In the Button & Actions section, select the action you want to trigger when the user engages with the notification. The available actions are:
- Open App – opens the app in the foreground.
- Open deeplink/URL – directs the user to a particular custom location. For example, you might use a deeplink to direct the user to a specific screen in your app. Coordinate with your development team to determine the exact deeplink URL to use.
- Link to In-App Message / Conversation – opens the app and triggers the selected in-app message or Conversation campaign. To link a geo notification to an in-app message or Conversation campaign, you must first create the linked campaign, which will then display in the list of available campaigns. For more information, see Linking push notifications to in-app campaigns.
- If you want to include additional actions for your notification when it’s displayed in extended view, select up to three custom buttons. To add custom buttons:
- Select Add Custom Buttons.
- Select the number of buttons you want to include (1, 2 or 3):
- Give each button a name on the button label. Depending on the platform, you may be limited by the number of characters that will display on the button.
- Select the desired actions. If you select URL/Deeplink, enter the required value in the box next to the action list.
- Select Save Buttons.
- By default, devices that don’t support rich media, or are not running the Swrve SDK version 4.11+ of your app, will only display the Title, Subtitle and Body notifications. If you add media or buttons to your notification, you can also include custom text to display on such devices. Select Add Custom Text and then enter the alternative Title, Subtitle and Body.
- (Optional) If you want instructional parameters to be sent to your app when you send the push notification, define custom key/value pairs. For example, you might want to direct the user straight to the store (instead of the default start screen) when they open your app from the push notification. Alternatively, you might want tracking parameters to be passed from the push notification for use by your internal or external tracking systems. To add custom key/value pairs:
- Select Show Advanced Options.
- In the Custom Properties section, select Add Key/Value.
- Enter a key/value pair in the Key and Value fields. For example, go_to/store, trial/30days or discount/10percent. The Payload box displays the actual code sent with your push notification.
- Once you’ve added your desired notification content and actions, select Next: Set Targeting to proceed.
Targeting your audience
Use the options on the Set Target screen to define your target audience, set the display triggers, set any campaign cooldown periods, and select your campaign goals.
Define your target audience
By default, geo campaigns are targeted at all users who trigger the selected geoplace(s). If you want to apply further conditions to refine your target audience (for example, users who have purchased at least 1 time and users who have used the app at least 5 times), use the Custom Audience tab of the audience builder to define your audience filters.
- Under the Define Target Audience section of the screen, select Custom Audience and then select the type of data on which you want to base your filter. For detailed information on the data types and filter descriptions, see Segment and audience filters.To add additional filters, select Add a new filter to display the Select Operator options:
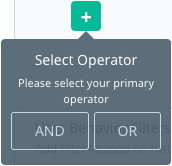
- Create your filter using the filter type, operator and value fields provided. Note that Swrve provides an AND / OR operator to enable you to associate multiple values with the same filter.
- Select Apply filter.
- The audience builder now includes the option to target users based on their historical behavior. For more information on how to create User Behavior Filters, see Targeting your audience by event payloads. Note: This feature may not be available depending on your agreement with Swrve. If you would like to have it enabled for your app, contact your CSM at support@messagegears.com.
Set campaign trigger
In the Set Display Triggers section, select the action that triggers the notification and the geoplaces you want to associate with the campaign:
- Select the campaign trigger. The options are:
- When user enters a geoplace – the notification is triggered when the user enters the geoplace.
- When user exits a geoplace – the notification is triggered when the user exits the geoplace.
- In the Where geoplace(s) match box, enter the name(s) of the geoplaces you want to use in the campaign. As you enter the geoplace name, a list of relevant geoplaces is displayed below. Depending on your naming convention and the number of geoplaces you want to include in the campaign, enter all or part of the geoplace name(s) to filter the list until only the geoplace(s) you want to include are displayed. Use the View as List or View on Map options to view the geoplaces in list or map view.
Set cooldown period
In the Set Cooldown Period section, use the available options to limit the number of notifications a customer receives from this campaign.
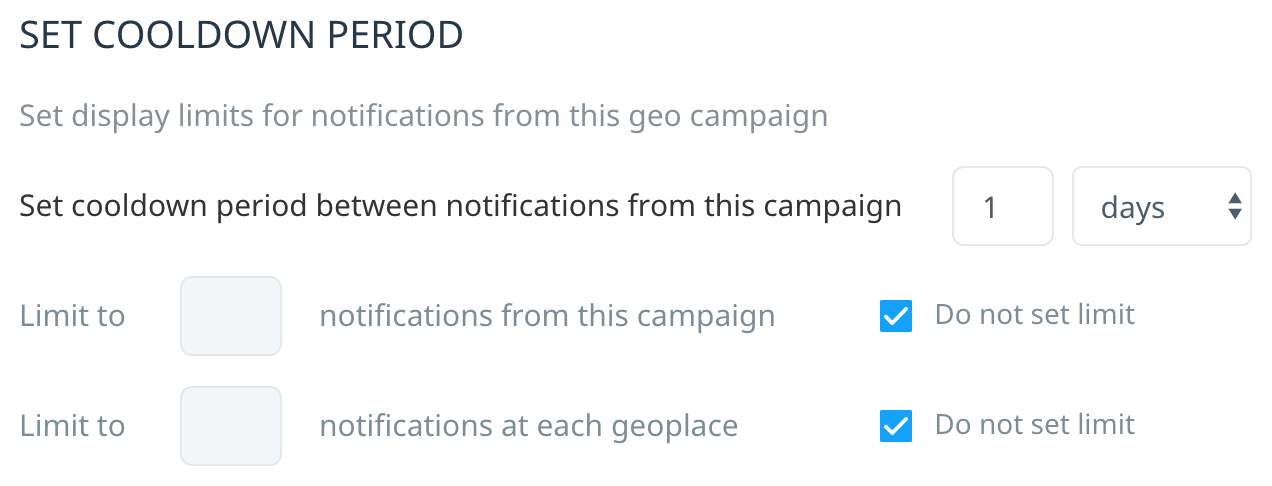
There are three options:
- Campaign cooldown – Sets the time that must elapse before a customer can trigger another notification from this campaign, across all geoplaces included in the campaign. To set a campaign-wide cooldown, next to Set cooldown period between notifications from this campaign, enter a value and select a time frame (minutes, hours, days) of the cooldown period. Note: If you’ve set an app-wide cooldown on the Geoplace Settings screen, the more restrictive of the two is applied.
- Campaign limit – If you want to limit the total number of notifications a customer triggers from the campaign, across all geoplaces, under the cooldown period, clear the Do not set limit checkbox and then enter a value to limit the total number of notifications from this campaign.
- Geoplace limit – If you want to limit the total number of notifications a customer triggers from each geoplace, in the next row, clear the Do not set limit checkbox and then enter a value to limit the total number of notifications at each geoplace.
Select campaign goals
The default attribution period for a campaign is 30 days (that is, campaign goals are attributed back to the user if they achieve the goal within 30 days from the time they first open the app after receiving the notification). Swrve automatically tracks certain goals, such as engagement rate and subsequent time the user spends in the app. Use the Select Campaign Goals section to customize the attribution period and select additional reporting goals.
To change the attribution period and select custom goals:
- In the Attribution Period box, enter a value for the number of days or hours you want to change it to and then select hours or days from the list.
- Select the Primary Goal for your campaign. This is the initial event or purchase you want users to make after receiving the notification. For example, the primary goal of the notification might be to have users download a promotional voucher for a local restaurant.
- Event – Use to track engagement with a specific feature you are promoting in your notification. Select an event from the list.
- In-App Purchase (using real currency) – Use to track in-app purchases of promotional items featured in your notification. Select of any item or of a specific item, and if required, select the specific item from the list.
- Purchase (using virtual currency) – Use to track virtual currency purchases of promotional items featured in your notification. Select of any item or of a specific item, and if required, select the specific item from the list.
- If required, select the Secondary Goal for your campaign. This might be an event or purchase you want users to make further downstream. For example, if your primary goal was to track users who downloaded a voucher, your secondary goal might be tracking if the user later submitted a review for that restaurant.
- Select Save as Draft: Preview & Test to save your draft notification and proceed to the Preview & Test screen.
The notification status is set to Draft and is saved on the Campaigns screen if you decide to exit the workflow and complete it later on.
Test and launch your campaign
The Preview & Test screen displays an overview of your campaign and enables you to QA test the notification and select the campaign start and end dates, as needed.
QA testing geo-triggered campaigns
If required, you can QA test your notification before launching the campaign. Any cooldown periods apply to QA devices as well, but you can bypass them by selecting the Reset device state checkbox in the QA device settings screen and then restarting the app. For more information on how to set up a QA device, see How do I set up QA devices?
To QA test your campaign:
- On the Preview & Test screen, under the QA Users section, select a user from the Add QA user list.
- Select the Add (+) icon to add the user.
- To test the campaign trigger, physically enter or exit the geofence with the QA device, or use an emulator to simulate entering or exiting the geofence.
- If the QA device does not receive the notification as expected, select the Logging link to check that the QA device is sending the campaign-related events. For more information on viewing QA device events and troubleshooting QA device issues, see How do I set up QA devices?
Schedule and launch
If you are happy with the preview of your campaign, in the Schedule section, perform the following actions:
- Select the Start date for the campaign from the calendar.
- If you want the campaign to end on a specific date, select the date from the calendar. Otherwise, leave the End date as Never – keep as on-going campaign.
- To launch the campaign, select Schedule Campaign.
If you schedule the campaign to start immediately, the status is set to Active. If you schedule the campaign to start on a particular date, the status is set to Scheduled until that date is reached.
Next steps
- View the campaign results on the individual campaign screen. For more information, see Managing geo-triggered campaigns.
- Change the status of your campaign using the buttons on the individual campaign screen. For example, you can edit, launch, stop or archive a campaign, depending on its current status. For more information, see Managing geo-triggered campaigns.