User lists
Swrve’s campaign audience builder supports targeting your users based on their historical behavior and user profile data—for example, users who searched for a flight in the last seven days or who have a lifetime spend greater than $50. Our new user lists feature adds the option to target a set list of user IDs, whether from Swrve or an external system. Create a new list in Swrve, upload a CSV file with specific user IDs you want to add to the list, and then include the list of users when building your campaign audience. For example, upload a CSV containing users who are eligible for a specific offer, and then notify those users with a push notification.
This article explains how to manage your user lists in Swrve and add users to a specific list via CSV on the User lists screen.
Manage your user lists
To view and manage your user lists, on the Manage menu, select User lists.
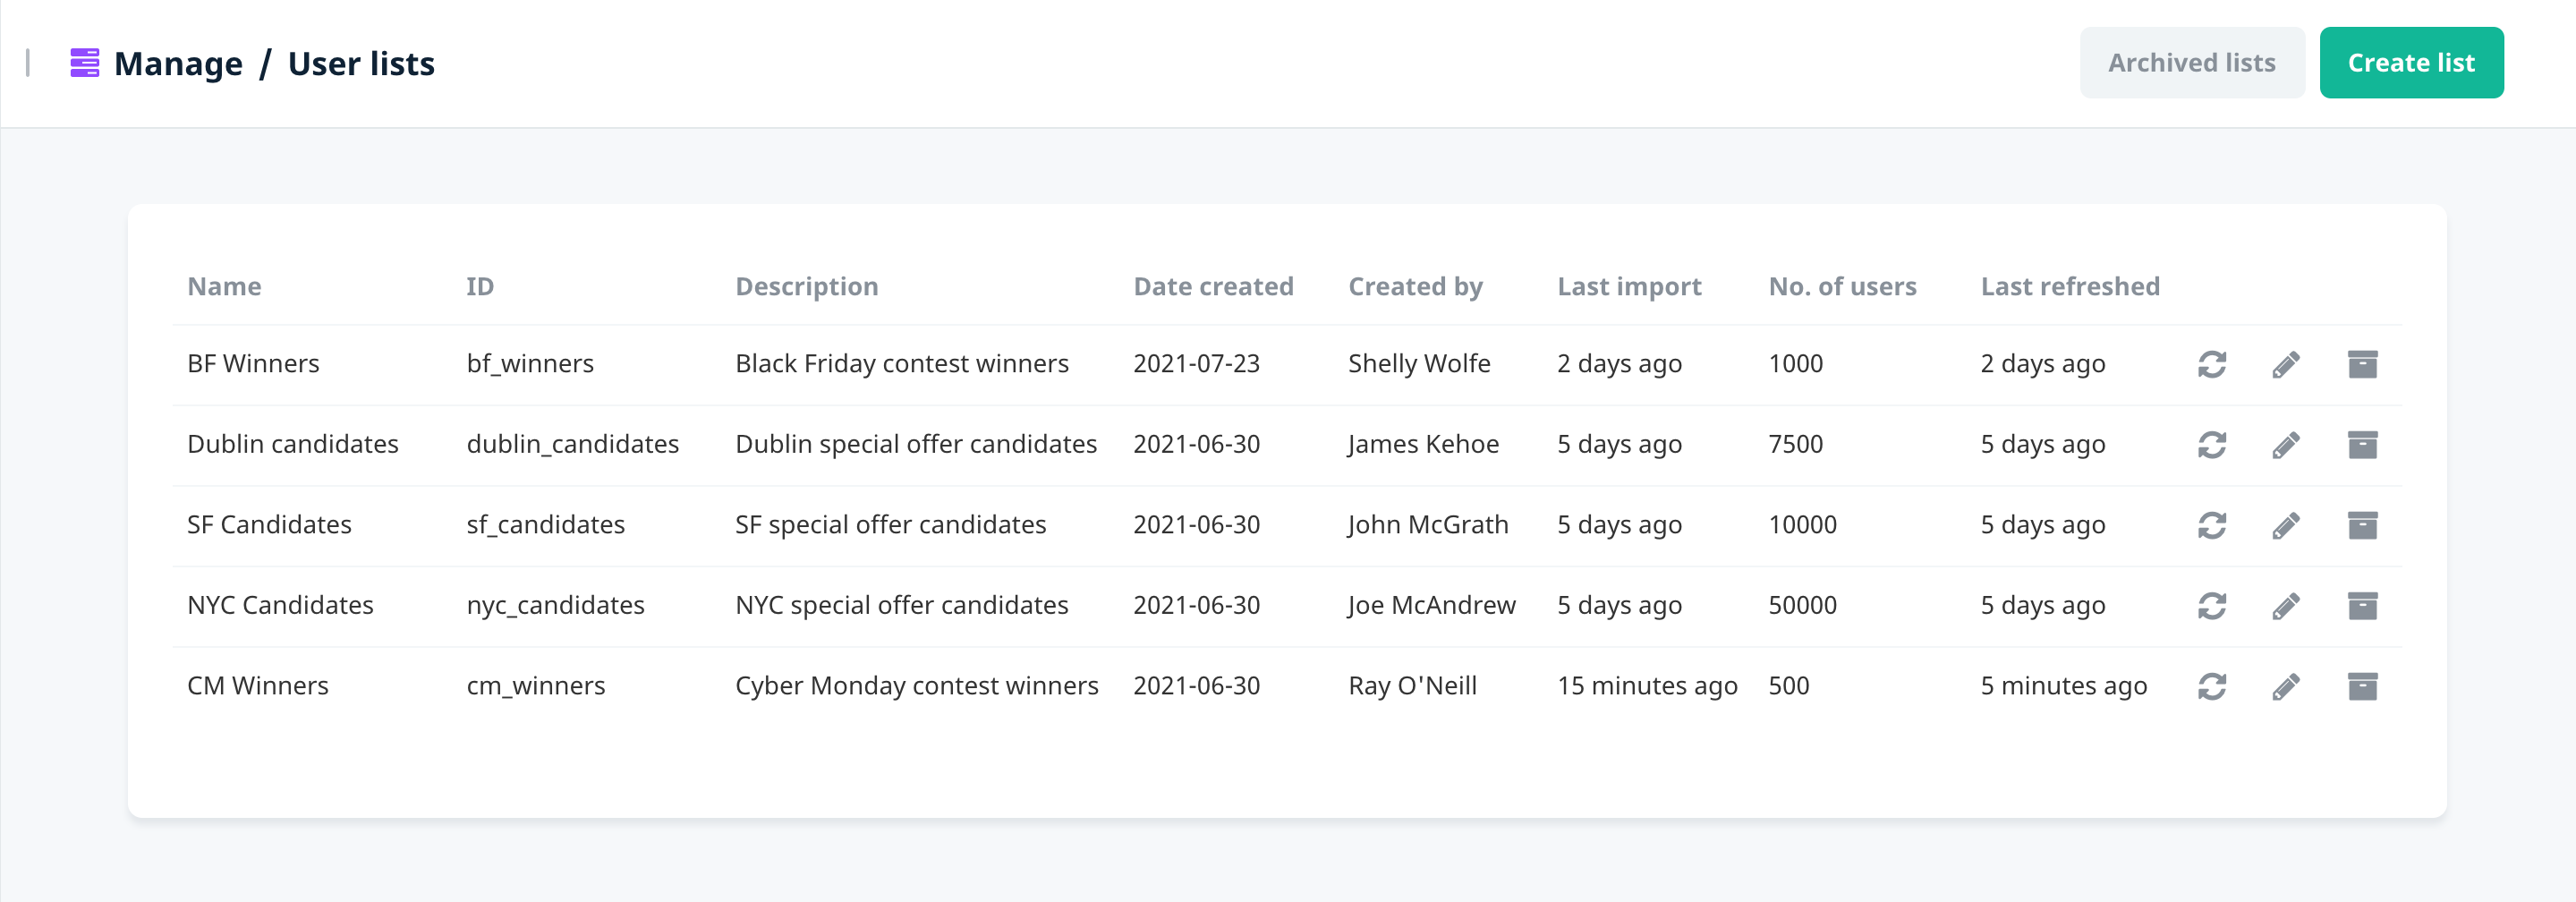
Use the options available to create a new list, edit the name or description of an existing list, archive a list, or recalculate the number of users in a list. The User lists screen also displays the following details for each list:
| Column | Description |
|---|---|
| Name | The list name as it appears in the User lists section of the audience builder. |
| ID | The ID you assigned the list for use with Swrve’s Event API. Once you set the ID, it cannot be changed. |
| Description | The list description. |
| Date created | The date the list was created. |
| Created by | The name of the Swrve user who created the list. |
| Last import | The date a Swrve user last added users to the list via CSV upload. |
| No. of users | The number of users currently in the list. |
| Last refreshed | The date the No. of users count was last recalculated. |
Create a new list
To create a new user list for your app:
- On the User list screen, select Create list.
- In the New User list dialog, enter the following details:
- List ID – A unique value that identifies the list when using Swrve’s Event API to add or remove users. Once you set the List ID, it cannot be changed.
- Name – The list name, as you want it to display in the User lists tab of the campaign audience builder.
- Description – Optionally, enter a description for the list. This might be helpful if you have multiple lists with similar names.
- To save the list and continue to the user list upload page, select Continue.
Once you save the list, you are redirected to the list upload page.
Upload user list
To target a list of users in your campaign audience, you first need to upload a CSV file that contains the relevant user IDs. You might also want to add new users to an existing list. The only way to remove users from a list is using Swrve’s Event API. For more information, see the Swrve Events API guide.
To view details or update the list from the User lists page, select the list name or edit . The user list page displays options for uploading the CSV file of your users and the history of previously file uploads.
CSV file format
The CSV file requires only a single column without a title. The column contains a list of Swrve user IDs or external user IDs. For example:
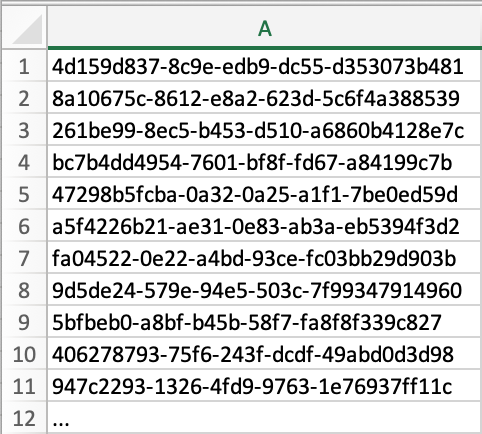
We recommend compressing larger CSV files before uploading. The uploader accepts .zip or .gz compressed CSV files.
Upload your CSV
To upload the CSV file of your users:
- In the Upload user list box, drag the file you want to upload to the box or select the file from your directory.
- In the User identifier section, select the type of ID you’re using to identify your users: Swrve user ID or External user ID.
Note: To upload a file with external user IDs, your app integration must have at least one active secret key configured in the Integration Settings screen. For more information, see Manage your API keys. - To upload the CSV file, select Upload new user list.
To view the status of the upload, refresh your screen. A line for the file is added to the Upload history. The time it takes Swrve to upload and process the file depends on the file size and whether Swrve needs to validate the user IDs (external user IDs only). The upload Status might be one of the following:
- Uploaded – The file was successfully uploaded and is ready to be processed.
- Processing – Swrve is processing the file and, if necessary, checking that the external user IDs exist in Swrve.
- Completed – Swrve has finished processing the file and any users that were added to the list are now available for targeting.
- Failed – An unexpected error occurred during the file processing. To determine the reason for the failure, contact your CSM at support@messagegears.com.
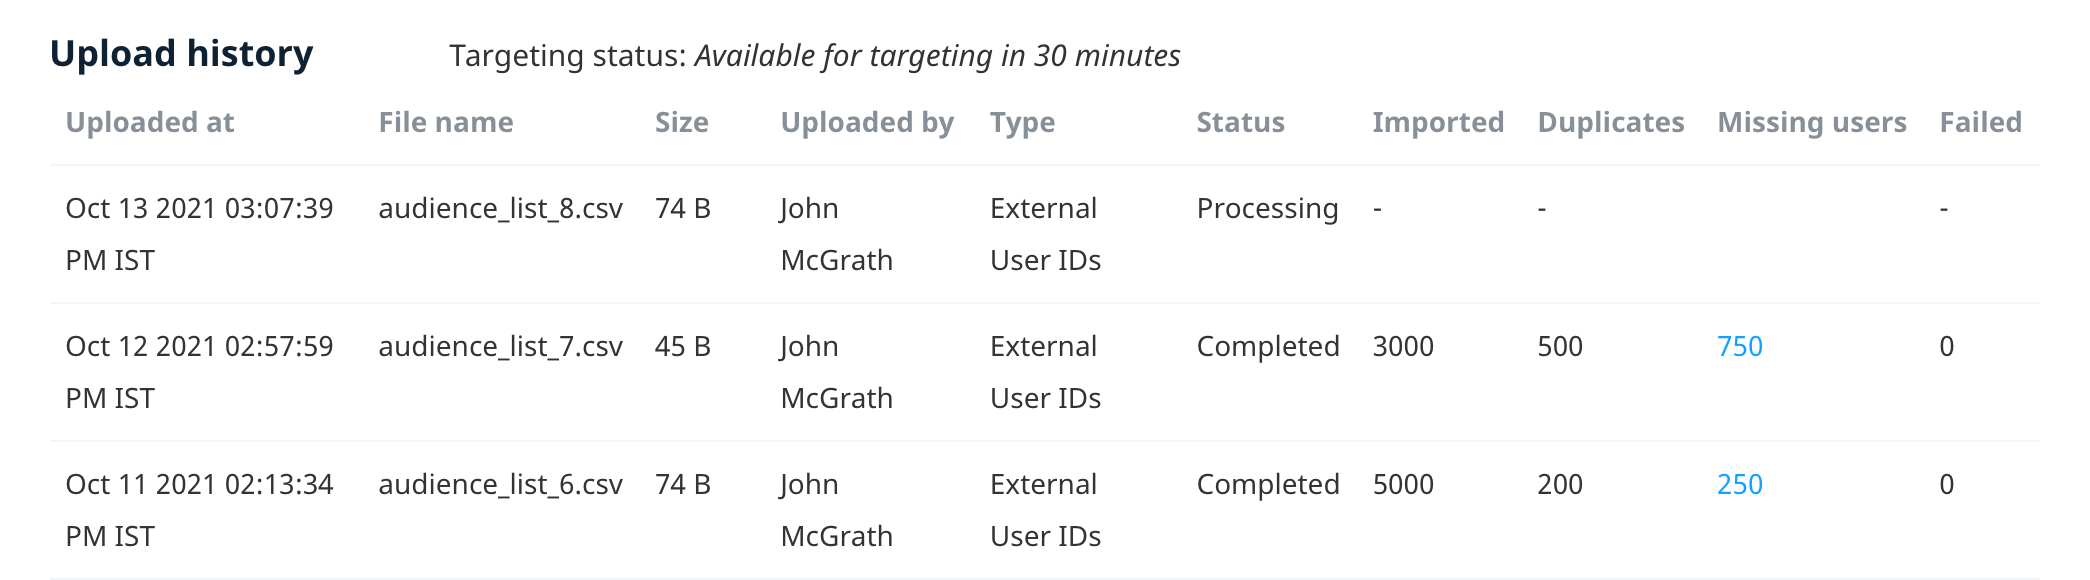
The Upload history displays the status of the upload and other file details:
| Column | Description |
|---|---|
| Uploaded at | The time the file was uploaded in the company’s timezone. |
| File name | The name of the uploaded CSV file. |
| Size | The size of the uploaded CSV file. |
| Uploaded by | The name of the Swrve user who uploaded the CSV file. |
| Type | The type of ID used to identify the users. |
| Status | The current status of the CSV upload. |
| Imported | The number of users who were successfully added to the list from the CSV file. |
| Duplicates | The number of duplicate users found in the CSV file. |
| Missing users | The number of users who could not be found in the Swrve system. To download a list of the missing user IDs, select the number link. Note: This only applies when importing users with an external user ID. |
| Failed | The number of users who could not be added to the list from the CSV file. |
Targeting status
The targeting status indicates when the users from the most recently uploaded CSV file will be available to target in a Swrve campaign. To ensure your campaign targets the most recently imported users, wait to launch the campaign until the targeting status indicates the file is fully uploaded and ready to use.
Targeting users lists in your campaigns
Once you create a list, it is generally available to target in the campaign audience builder within a few minutes, however there are a few factors that might have an effect on the number of users in your estimated campaign audience compared to the number of users in your list. For example, depending on the size of your CSV file, it might take some time for Swrve to process and add users to the list. To target a push notification campaign, your users need to have given Swrve permission to send push notifications, so depending on whether you’re uploading a list of new or existing users, the regular push token update period might apply.
Recalculate list size
The dashboard automatically recalculates the No. of users value of a specific list 10 minutes after processing the users from an uploaded CSV file. If you are only adding or removing users from a list via API, the dashboard does not automatically recalculate the No of users value, which means the value might not reflect the current number of users in a list. To get a current count of the number of users in a list, in the applicable list row, select Recalculate list size .
Archived lists
To archive a list, in the applicable list row, select Archive .
Once you archive a list, it is removed from the User lists screen and is no longer available in the User lists tab of the audience builder for targeting your campaign audience.
To unarchive a list, from the User lists screen select Archived lists, and then in the applicable list row, select Unarchive .
Next steps
- Add users to and remove users from lists using Swrve’s Events API. For more information, see the Swrve Events API guide.
- Learn how to target a user list as part of your campaign audience. For more information, see Targeting your audience with user lists.