About geoplaces
What’s a geoplace?
Geoplaces are a single geofence or collection of geofences that are used to trigger a notification to your app users. A geofence is a virtual perimeter for a real-world area. Swrve supports circular geofences. Swrve geoplaces are currently mapped 1:1 with a geofence, but might include multiple geofences in the future.
To view and manage your geoplaces, on the Manage menu, select Geoplaces.
Geo-notification cooldown periods
Depending on your use case for geo-triggered notifications, you might want to limit the frequency at which customers trigger or receive geo notifications. For example, you may have several geoplaces in the same vicinity (restaurants, stores, and so forth), that a user could enter in quick succession, resulting in a negative customer experience should they receive multiple notifications within a short period.
To manage the frequency at which users receive geo-notifications, there are four different levels of notification throttling, or cooldown, which are applied in the following order:
- App-wide – This limit applies to all campaigns and associated geoplaces for a certain app and overrides any limits set at the campaign level, unless the campaign-level cooldown is more restrictive.
- Opening hours – Limits the timeframe during which a customer can trigger a notification by comparing the geoplace opening hours to the local time on the customer’s device. The default setting for a new geoplace is always open (that is 00:00-23:59). To edit opening hours for your geoplaces, use the bulk CSV upload or Geoplace API.
- Campaign – Sets a campaign-level limit for the number of times a customer can trigger a notification, across any geoplaces included in the campaign. If you’ve also added an app-wide cooldown, the more restrictive of the two is applied.
If your Swrve Geo integration includes any custom filtering that limits notification frequency, such filters are applied after the above sequence.
For information on how to configure each type of cooldown period, see the following sections or Creating geo-triggered campaigns.
Managing geoplaces
The first step to creating a geo-triggered campaign is to create your geoplaces, including any custom properties, cooldown periods, or opening hours. Use the search or edit functions on the Geoplaces screen to create and manage your geoplaces.

For example:
- Set up to 12 custom properties and an app-level cooldown period on the Geoplace Settings screen.
- Download a CSV template that includes all the required fields for creating geoplaces in bulk by selecting Download CSV.
- Create or update your geoplaces in bulk by selecting Bulk Upload.
- Manually create a new geoplace by selecting Create Geoplace.
- View your geoplaces in list or map view by selecting the View as List or View on Map.
- Search for a specific geoplace or set of geoplaces using the search box and Sort By options available.
- Edit an existing geoplace by selecting the geoplace name and then moving the circumference points of the circle to resize or reshape the area, as appropriate.
- Delete a geoplace by selecting Delete in the geoplace row.
Geoplace settings
Use the options on the Geoplace Settings screen to add up to 12 custom properties to your geoplace setup or to set an app-wide cooldown period.
Adding custom properties
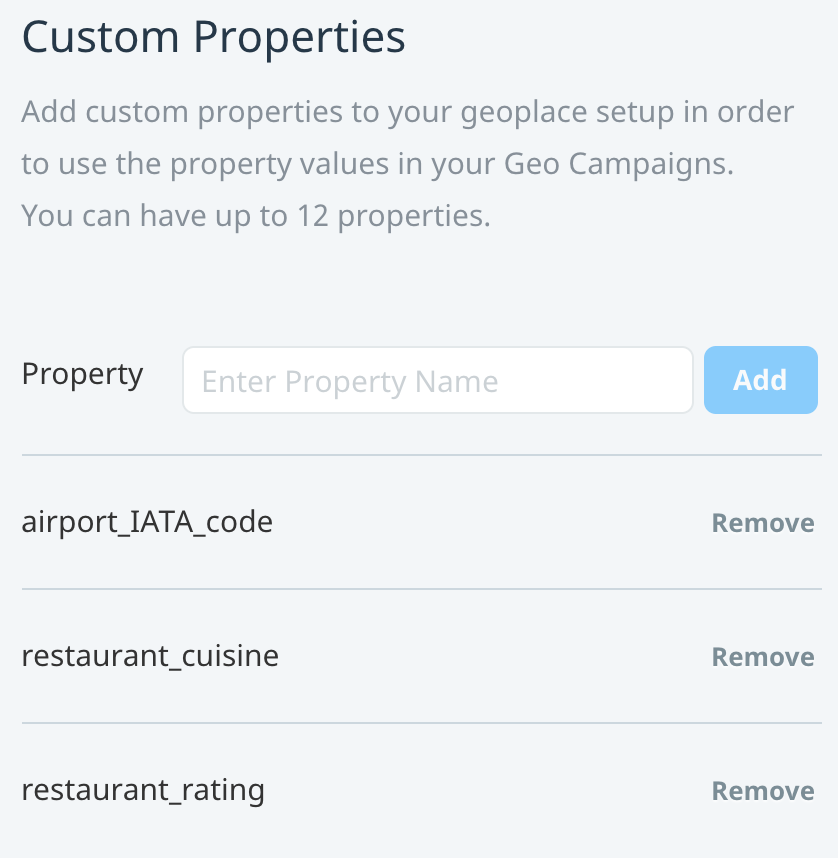
To include dynamic property values in your notification content, add up to 12 custom geoplace properties. For example, you might want to include values such as a location name or deeplink. To add custom properties for your geoplaces:
Step 1: On the Geoplaces screen, select Settings.
Step 2: Under the Custom Properties section, in the Property box, enter the property name and then select Add. The property name must be 32 characters or less and consist of lower case letters, dashes and underscores only (no spaces).
After you add a property, it appears in the list with the option to remove properties if no longer needed.
Step 3: After you have added all your custom properties, select Save.
You are returned to the Geoplaces screen and when you create a new geoplace, the properties are available under the Custom Properties section.
App-wide cooldown period
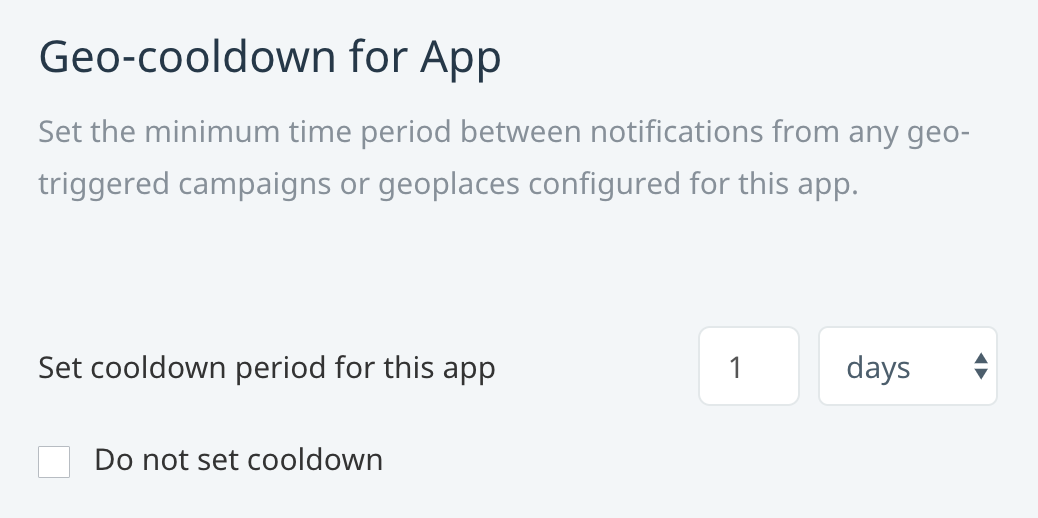
Limit the number of notifications a customer can receive per campaign and associated geoplaces by setting an app-wide cooldown period. App-wide cooldown periods override anything set at the campaign level. The default app-wide cooldown period is one day (24 hours).
To edit the app-wide cooldown period:
- Under the Geo-cooldown for App section, enter a value and select the time period you want to set, in minutes, hours, or days.
- Optionally, to disable the app-wide cooldown period, select the Do not set cooldown checkbox. Note: You might disable the app-wide cooldown period for QA testing or if you have multiple campaigns associated with a single geoplace that you want a customer to receive in sequence (for example, customer arriving at an airport). However, if you disable the app-wide cooldown, it’s important to set reasonable cooldown periods at the campaign or geoplace level.
- To save the new cooldown period, select Save.
Managing geoplaces using bulk upload
If you have a large number of geoplaces, use Bulk Upload to create or edit multiple geoplaces via CSV file. First, select Download CSV to download a template with the required columns you need to include.
CSV file format
The following table describes the information you must include in your CSV file.
| Column | Description |
|---|---|
| Name | The unique name of the geoplace. We recommend using a standard naming convention to make it easier for you to find your geoplaces later. For example, Restaurant Name – city – location. |
| Latitude | A number indicating the latitude of the center point in a circular geoplace. The value can contain decimal points. |
| Longitude | A number indicating the longitude of the center point in a circular geoplace. The value can contain decimal points. |
| Radius | A whole number indicating the radius of a circular geoplace, in meters. |
| Mon – Sun | The opening hours for the geoplace for each day of the week. If a day is left empty, that day is considered closed. For details on how to format opening hours, see below. |
| Property: property_name | The value of any custom properties you’ve defined in the Geoplace Settings screen. You must include the prefix Property: followed by the custom property name. Each custom property has its own column. |
Format considerations
Before you upload your CSV, review the following considerations:
- If you do not include all of the above columns, in the specified format, or you include additional columns, the file will be rejected.
- The order of the columns is unimportant, however the column names are case-sensitive.
- If any values are missing or in an invalid format, except for custom property values, the whole file will be rejected and no updates made.
- While we recommend using UTF-8, other formats should work as well.
- Since a CSV uses commas to separate values, if any of your cell or column entries are supposed to include a comma, ensure you use double quotes (“”) to prevent the value from being delimited. For example, “City, State”.
Uploading your CSV
When you’re ready to upload the CSV file of your geoplaces, complete the following:
Step 1: On the Geoplaces screen, select Bulk Upload.
Step 2: Select the CSV file you want to upload and then select Open.
Step 3: A warning message reminds you that existing geoplaces will be replaced. Select Continue to proceed.
Once you select Continue, the system performs a check to ensure the file format is correct, and if accepted, a message confirming the file is being imported is displayed. While the file is uploaded, all functions on the Geoplaces screen are temporarily disabled to prevent any other users from making manual updates to the geoplaces while the bulk upload is in progress.
The system processes all new, removed, and updated geoplaces, so the amount of time it takes to complete the upload depends on the number of changes in the file, not on the file size itself. Once the upload is complete, a system message displays a summary of all actions taken.
Manually creating a geoplace
To manually create a geoplace:
Step 1: On the Geoplaces screen, select Create Geoplace:
Step 2: Enter the geoplace Name—it’s good practice to use a standard naming convention with meaningful keywords to make it easier for you to find your geoplaces later. For example:
- Business type – Location name – City
- Airport name – IATA code – City – Country
Step 3: A Google map displays. If you give the browser permission to do so, the map defaults to your current location. Use the Search function to find the area you want to create your geoplace in. You can view the area in Map or Satellite view and further refine the view by selecting Terrain under the Map view or Labels under the Satellite view.
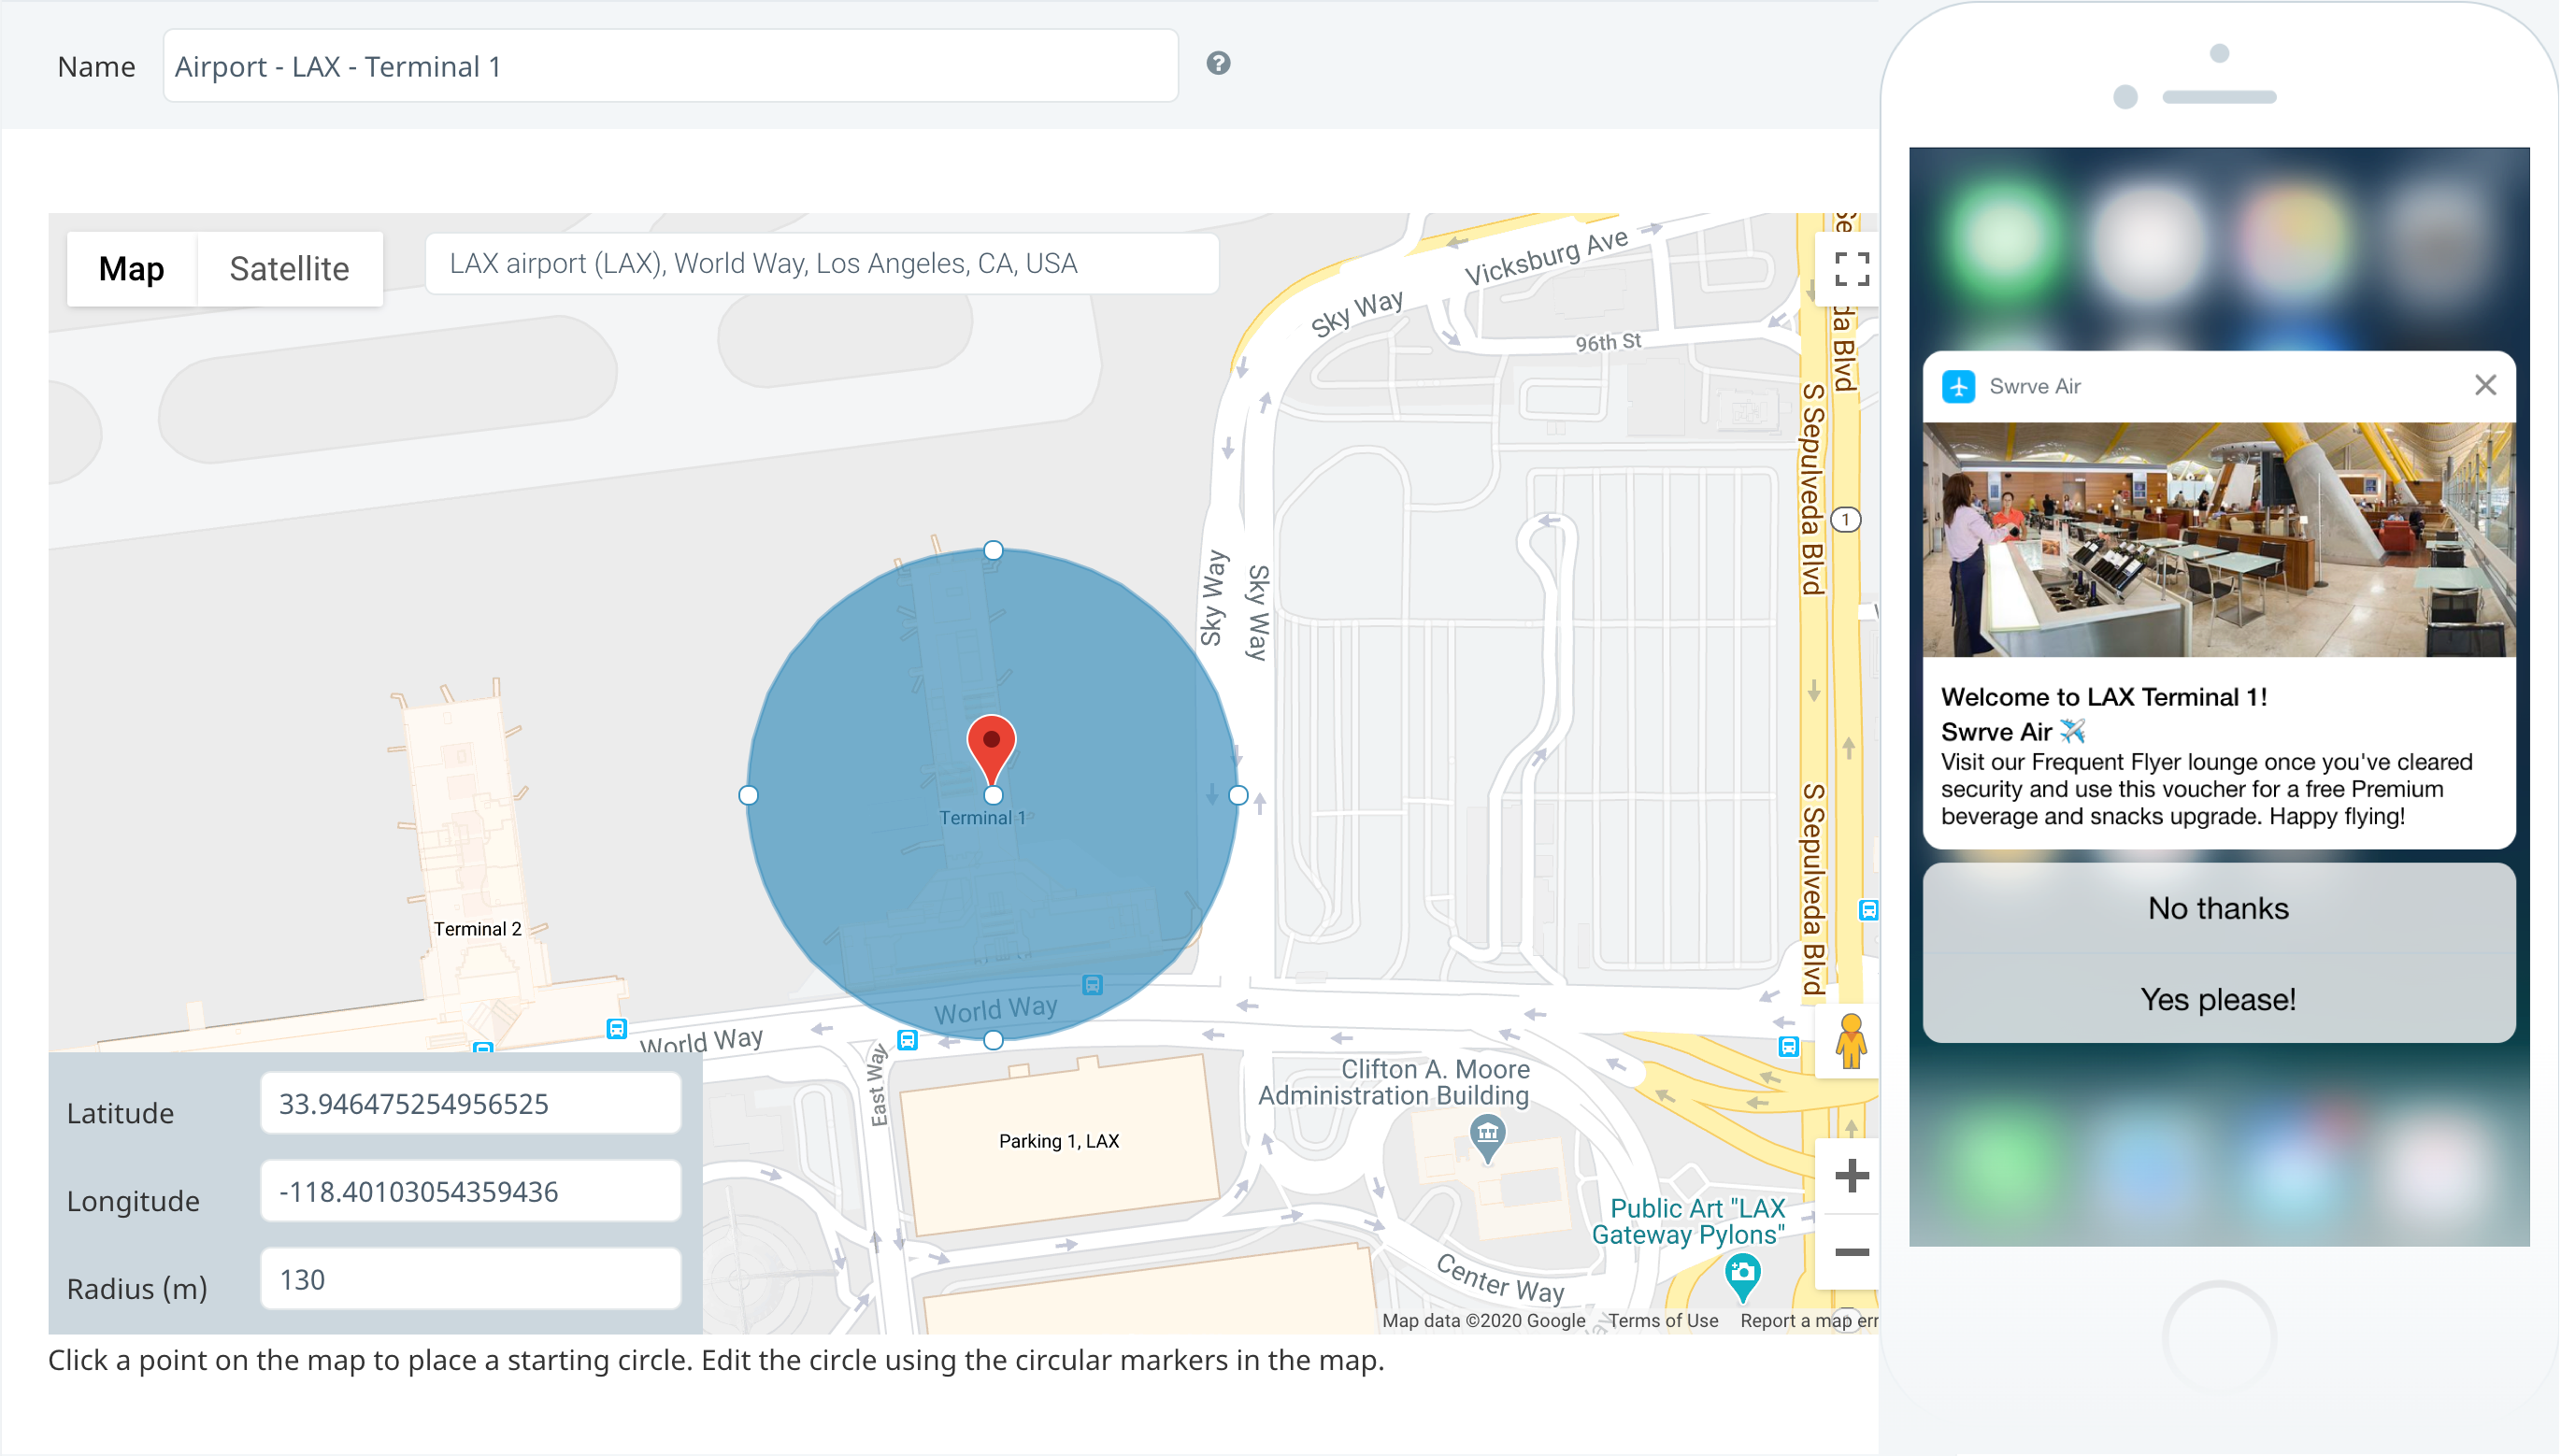
Step 4: Define your geoplace: This uses a set of geographic coordinates as the center of the circle and a radius, in meters, to define a circular geofence around it. On the map, select the epicenter of the geoplace you want to target and a blue circle displays.
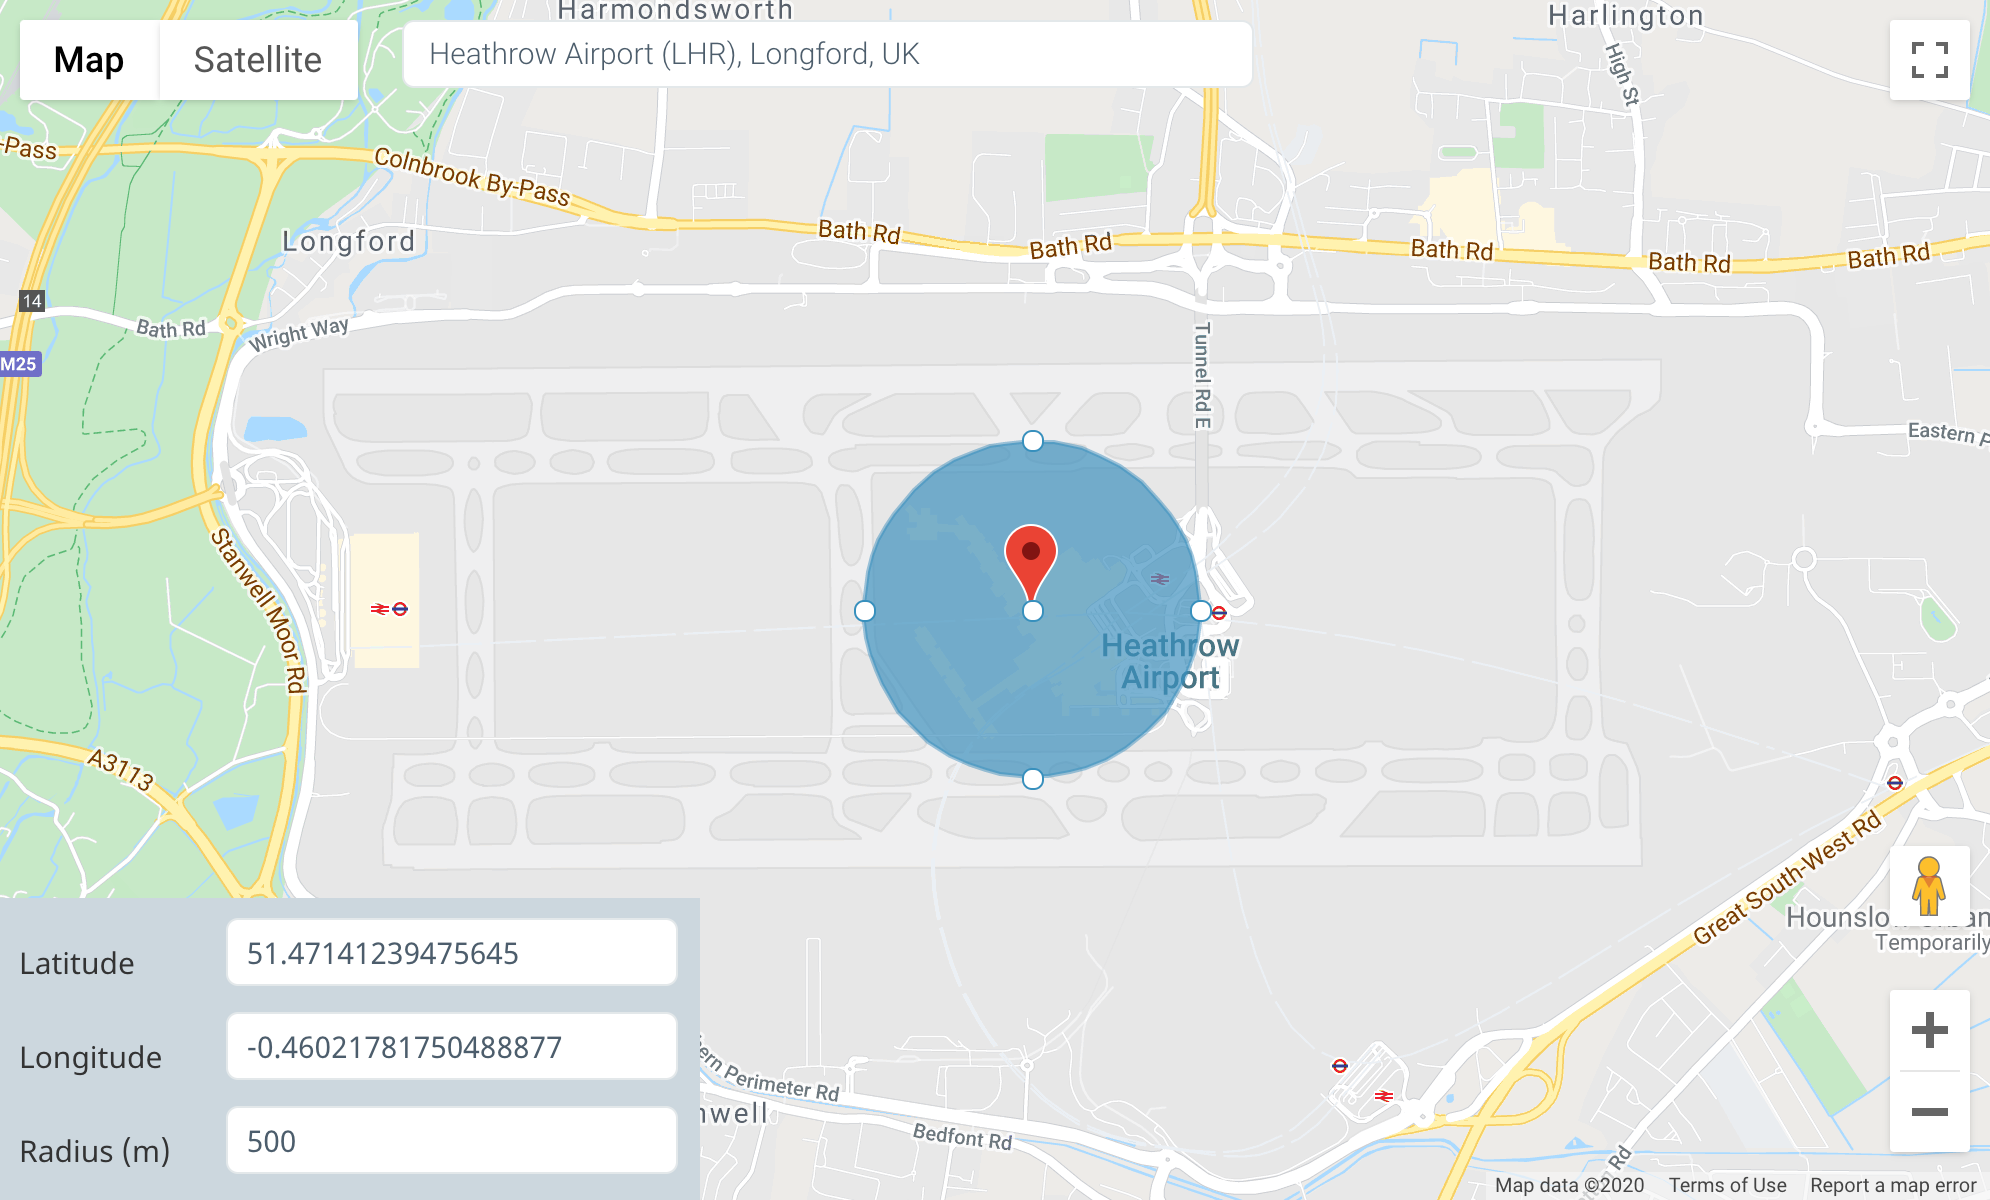
To change the size (in meters), enter a new value in the Radius box or select and move one of the points on the circumference to enlarge or reduce the area. To move the geofence, select and move the center point to another location or manually enter new coordinates in the Latitude and Longitude boxes.
Step 5: If your geoplaces include custom properties, they are displayed under Custom Properties. Enter values for each property as required.
Step 6: To save the new geoplace, select Save.
Your geoplace is created and displayed in the listing on the Geoplaces screen. To edit a geoplace, select the geoplace you want to edit from the list, make your changes and select Save.
Opening hours
Many business are limited by opening hours, such as stores, restaurants, cinemas, or museums. Certain locations might also be closed at different times of the day, such as a restaurant that has lunch and dinner hours. Other businesses might be closed on weekends or during the week, for example, offices or museums. To prevent your users from triggering a notification outside of your normal operations, use the CSV Bulk Upload or Geoplace API to define set opening hours.
To define opening hours:
- Include separate definitions for every day of the week.
- If a day is left empty, we assume the geoplace is closed and users will not trigger a notification if they enter the geoplace on that day.
- If the geoplace is open for a single range (for example, 09:00-11:30) then users are only notified within that range. Any footfall outside those hours will not trigger a notification.
- Enter all times using the 24-hour clock (for example, if your opening hours are 2 pm-10 pm, enter 14:00-22:00).
- If a geoplace has multiple opening hours throughout a day, enter all of the time ranges on the same day. For example, 07:00-11:00, 12:00-16:00, 19:00-23:00.
- If a geoplace is open all day, set the opening hours as 00:00-23:59. By default, any geoplaces you create manually are set to open all day.
Opening hours are applied in the timezone of the geoplace and checked against the timezone set on the device.
Next steps
- Use your geoplaces to create a geo-triggered notification campaign. For more information, see Creating geo-triggered campaigns.
- View results and reports for your geo-triggered campaign or change the status. For more information, see Managing geo-triggered campaigns.