Create campaigns in bulk
Swrve’s campaign center now supports creating push notification campaigns in bulk. Instead of creating campaigns individually, prepare and upload a CSV file with the details and content for one or more campaigns, and then create your draft campaigns with the click of a button. Use the available campaign CSV parameters to target multiple platforms and include different language and A/B test variant content for each campaign in your CSV file.
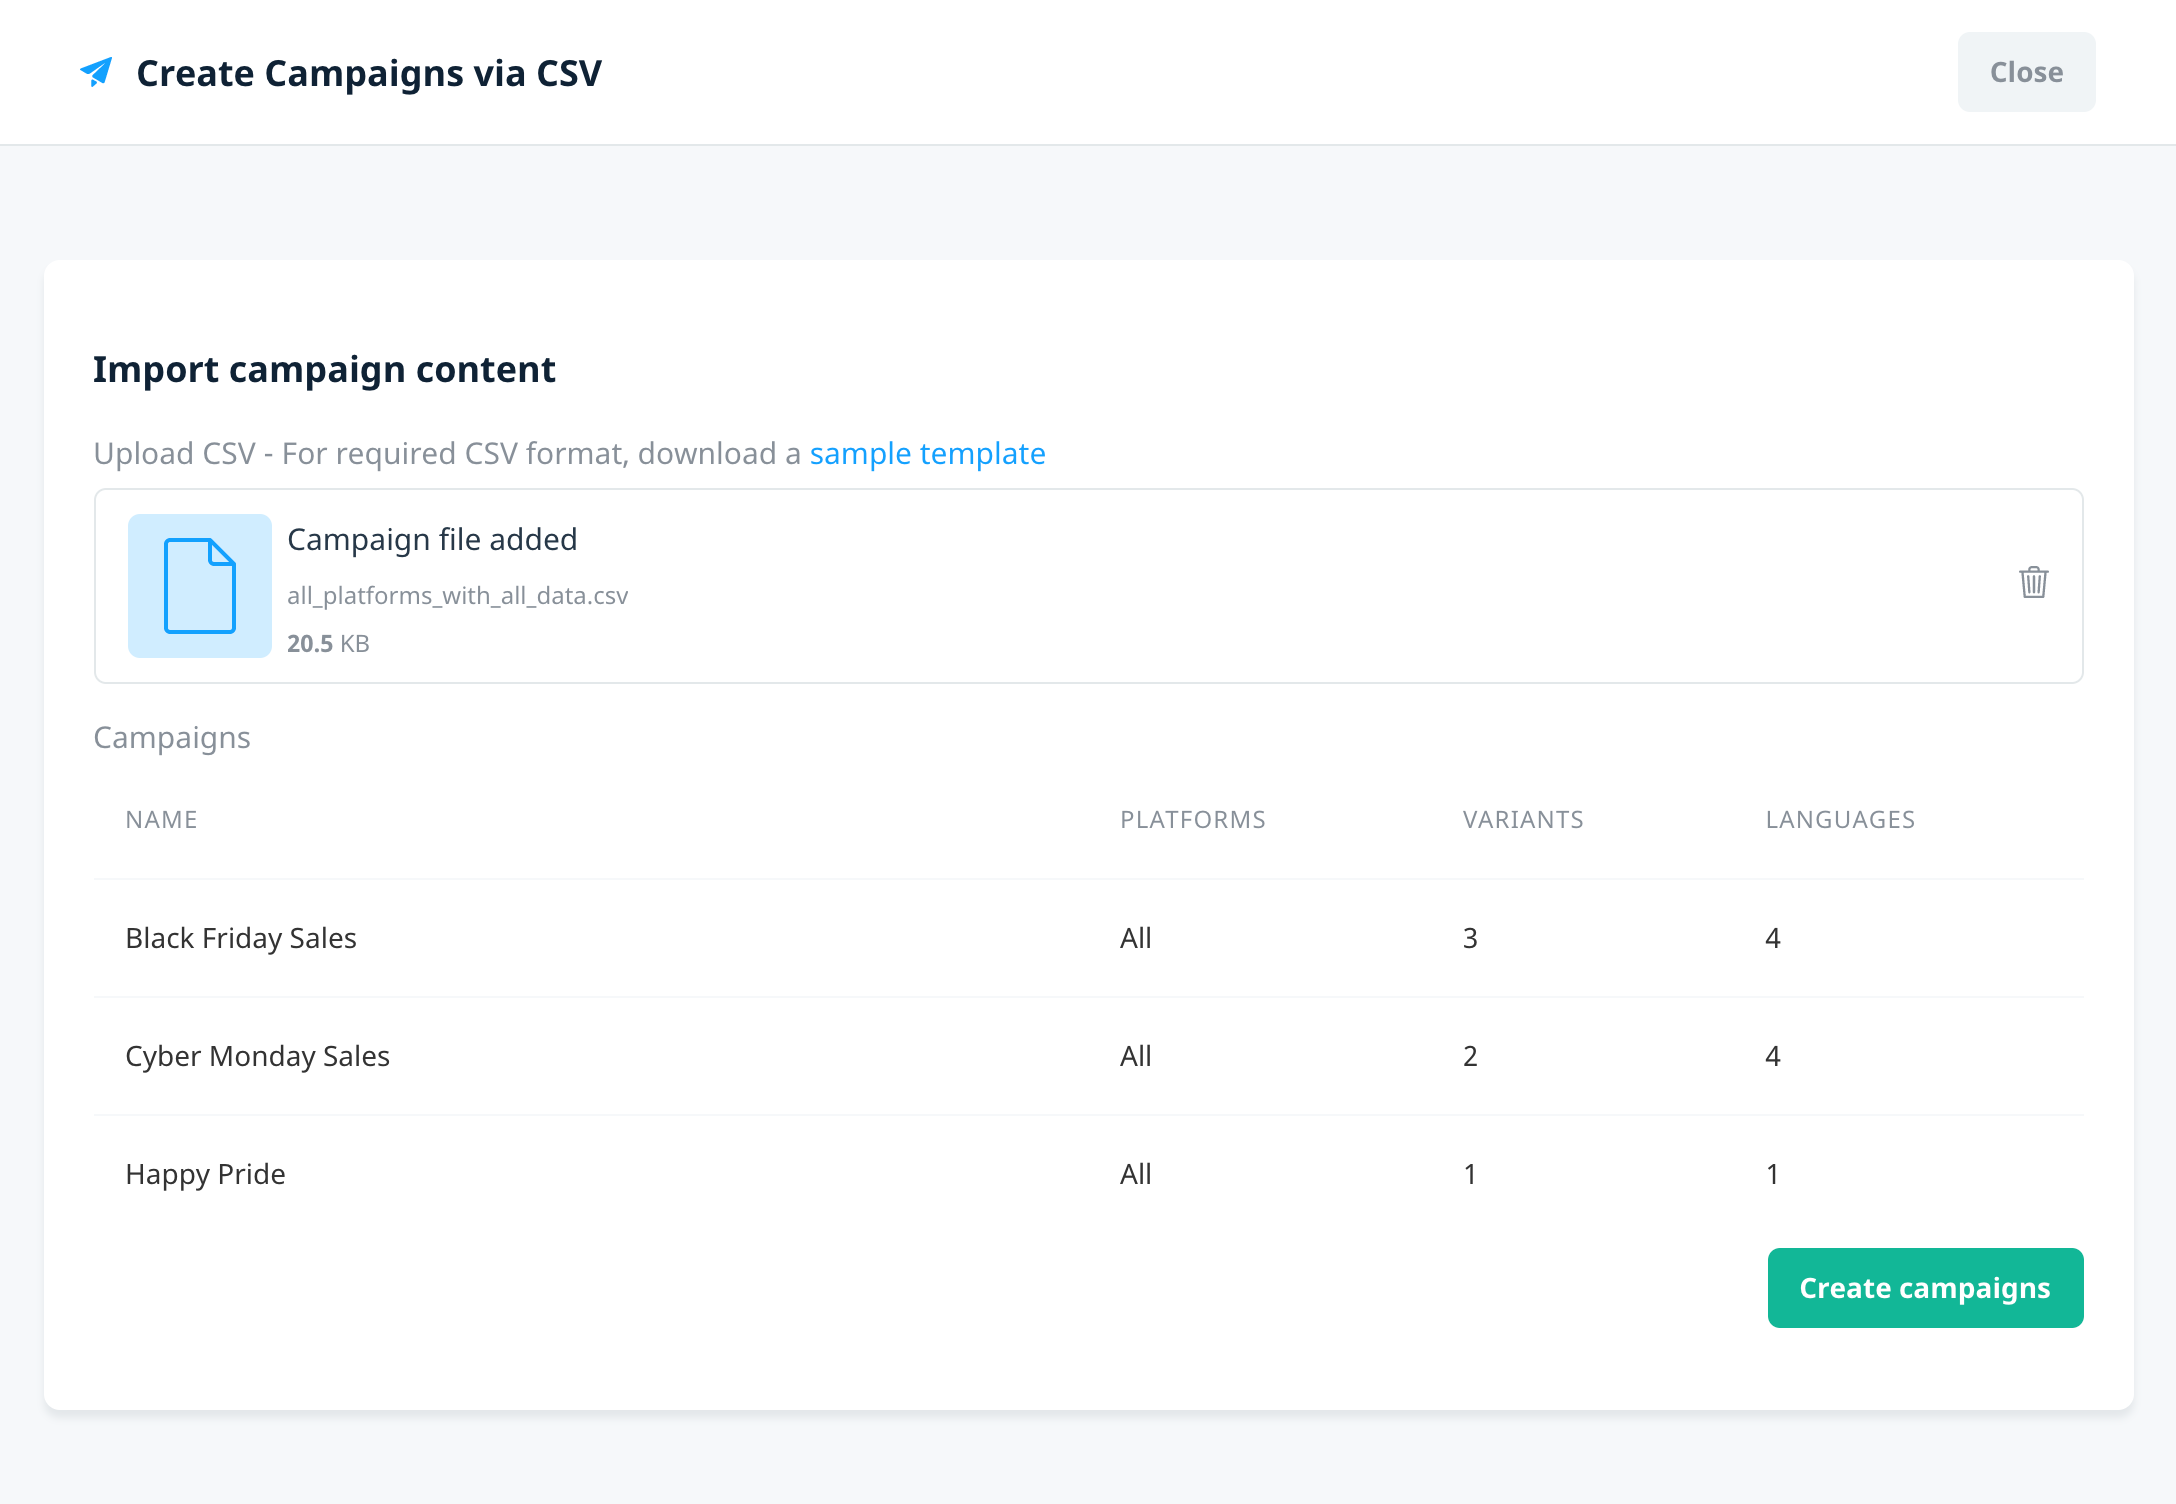
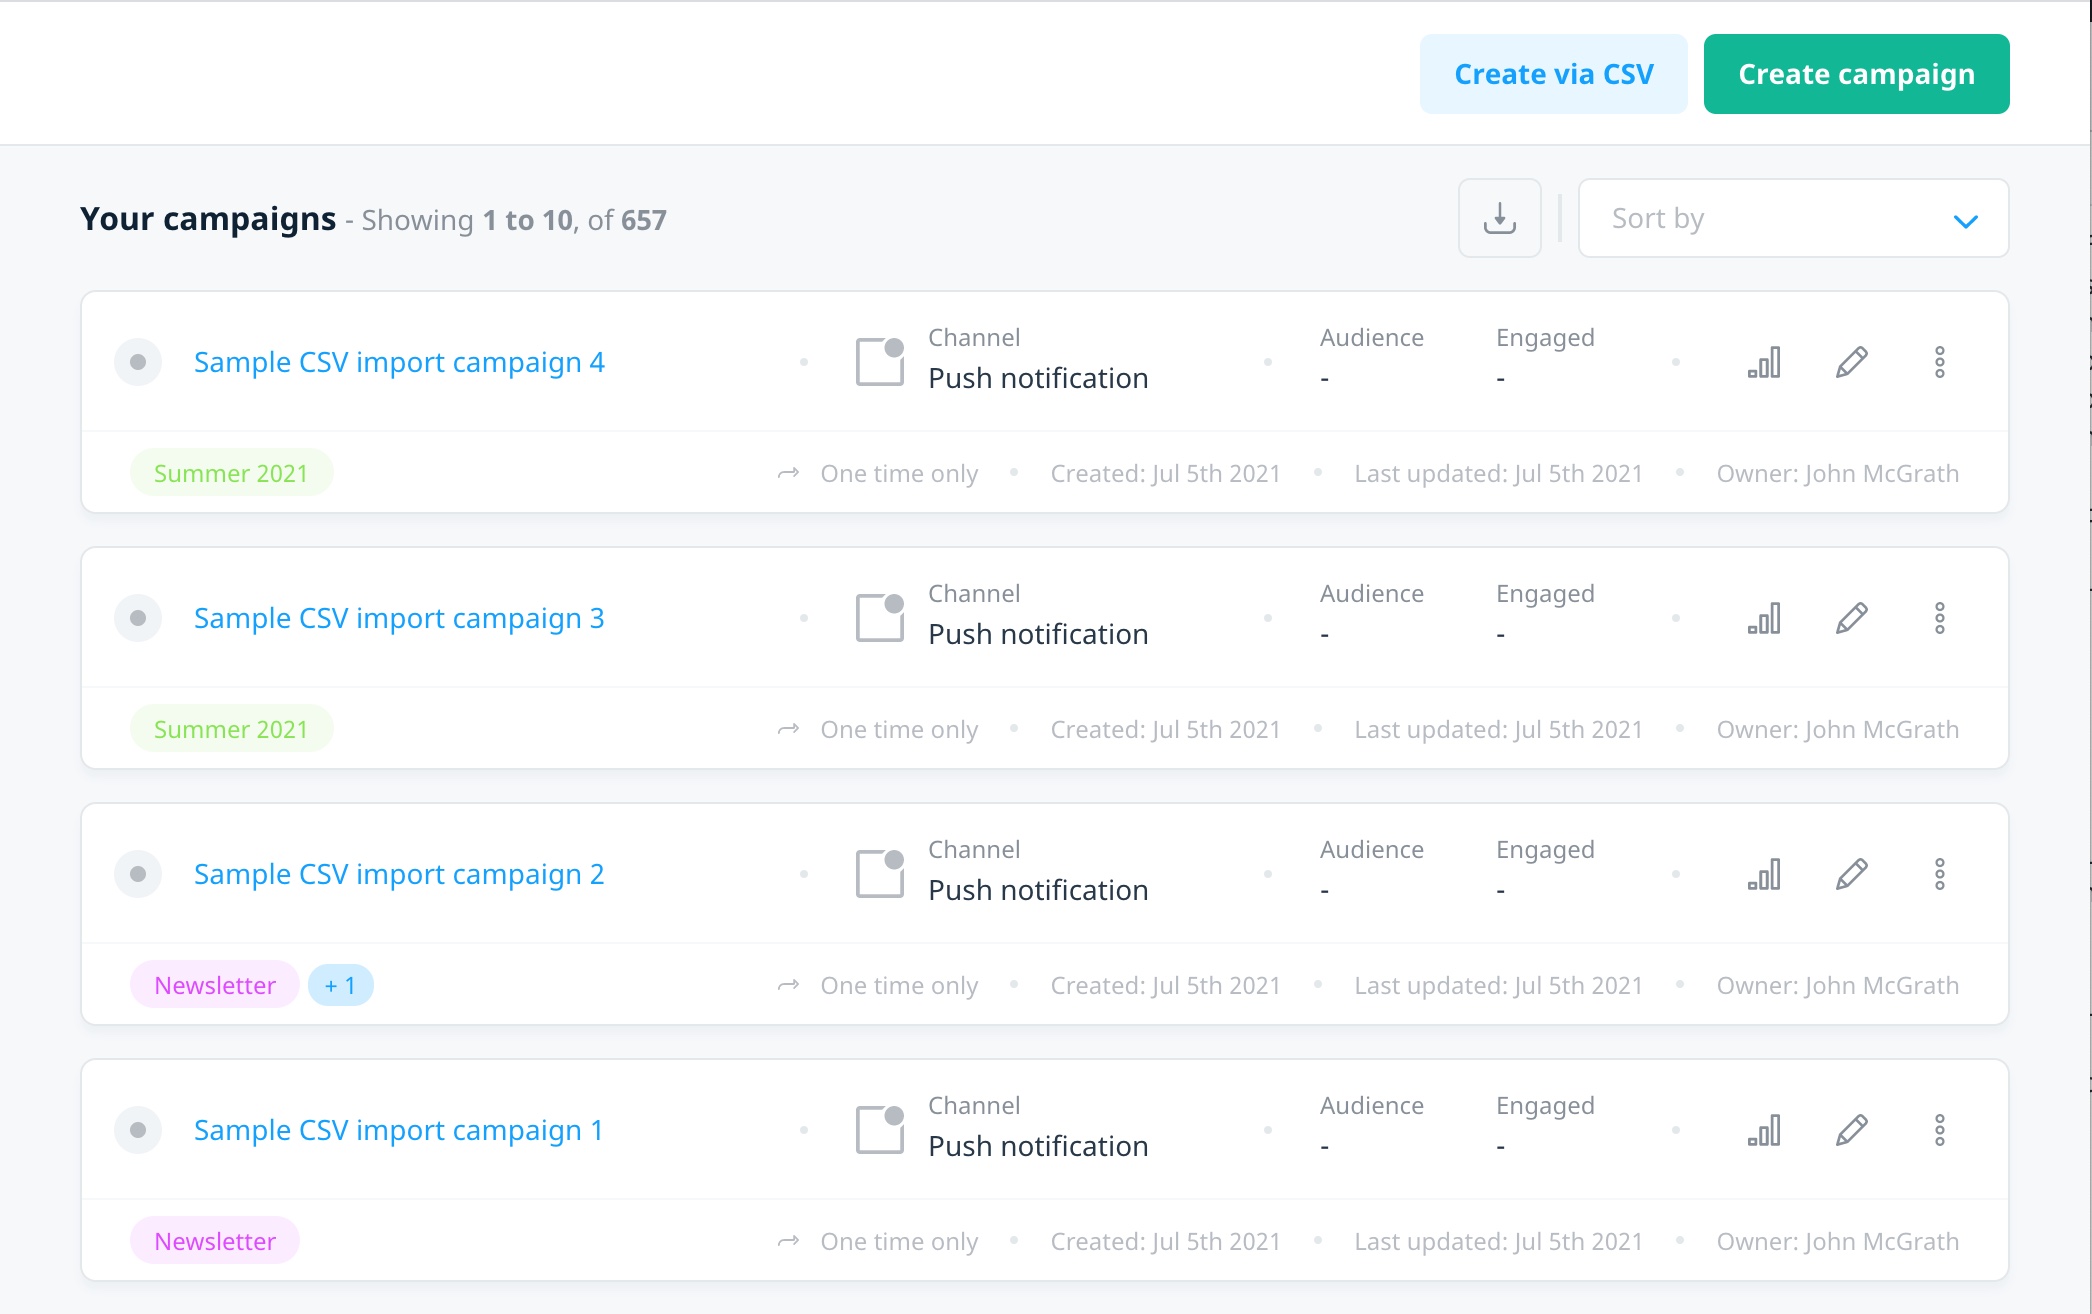
To upload your content and create multiple campaigns from your Campaigns center, select Create via CSV.
Download a sample CSV template
To help you add the necessary content for your campaigns, the Create Campaigns via CSV screen includes an option to download a CSV template that contains all the campaign-related fields relevant to your app. Note that the sample template only includes the platforms supported by your app.
We’ve also provided a Microsoft Excel spreadsheet with some example campaigns and the full list of possible language values. To download the file, select the following link: Sample push message campaigns.
Upload CSV and create campaigns
To upload your campaign content and create your campaigns:
- In the Import campaign content section, there are two options for uploading your CSV file:
- Drag the file from your desktop to the Drag and Drop files box, or
- Select choose file, navigate to and select the CSV file in your directory, then select Open.
- Swrve performs a check of the campaign(s) to ensure the CSV includes all required content. If the CSV includes platform information that your app does not support, an error message displays and you must resolve the issue to proceed.
If the CSV includes all mandatory campaign details and content, the Campaigns table displays a list of the campaigns included in the CSV and the following information about each campaign:- Platforms
- Number of variants
- Number of unique languages

- To create the campaigns displayed in the Campaigns table, select Create campaigns.
After you select Create campaigns, a progress bar displays the status of your created campaigns. Once complete, the Results section indicates the number of campaigns successfully created, the number of campaigns that failed to create, and the associated campaign names and reasons why the campaigns could not be created. For more information on campaign failures, see Error Messages.
Once created, all your draft campaigns display in the list of campaigns in your Campaigns center. Select an individual campaign to preview and test the content, set campaign goals, or schedule and launch the campaign as you would for campaigns created using the regular workflow.
CSV parameters
Your campaigns CSV file includes the content for all your campaigns, including platform, variant, language, and engagement actions, as well as any campaign goal attribution window. Complete the following fields in your CSV, as required:
| Parameter | Presence | Description |
|---|---|---|
| sequence_number | Required | A unique identifier for each campaign within the CSV. Must be numeric. |
| campaign_name | Required | The campaign name. Must be unique and not use the same name as any existing push campaigns in your app. |
| campaign_description | Optional | Description of the campaign. |
| push_type | Optional | The type of push notification campaign. Supported campaign types are standard (or scheduled) and via_api. |
| activate | Optional | If set to true, activate sets the campaign state to active upon campaign creation. Available only if the push_type is via_api. |
| tags | Optional | Name(s) of the tags you want to apply to the campaign, separated by commas. For example, “Black Friday, Cyber Monday”.
Note: You must first create your tags in the Manage Tags page. Values that don’t exist in your Manage Tags page won’t be added to the campaign. |
| platform_<name> | Required | The platforms you want the campaign to target. You must set at least one platform parameter to true.
Note: Only include the platforms your app supports. If you try to include an unsupported platform, you’ll receive an error message. |
| audience_type | Required | The type of audience you want to target, whether all users, a user list, or a saved audience. |
| in_list | optional | Available only if audience_type is user_list. If targeting users who are in a list, provide the list IDs of the lists you want to target. |
| not_in_list | optional | Available only if audience_type is user_list. If targeting users who are not in a list, provide the list IDs of the lists you want to target. |
| audience_id | optional | If audience_type is saved_audience, the ID of the audience you want to apply to the campaign. |
| type | optional | The goal type, whether a specific event or purchase. If event, you must provide the event name as the value. |
| value | optional | The specific event or purchase item you want to track. To track any in_app_purchase or purchase item, leave this value blank. |
| goal_n_type | optional | The goal type, whether a specific event or purchase, where n represents the goal number. If event, you must provide the event name as the value. |
| goal_n_value | optional | The specific event or purchase item you want to track. To track any in_app_purchase or purchase item, leave this value blank. |
| attribution_window_hours | Optional | The time during which any goals you set for the campaign are attributed back to a user, in hours.
For example, to apply a 3 day attribution window to the campaign, set attribution_window_hours to 72. The default attribution window is 7 days. |
| variant_index | Required | Numeric value indicating the A/B test variant.
Note: The row with the lowest variant_index value always corresponds to the A variant, and so on. For example, if the CSV contains a campaign with two rows—variant_index values 0 and 3—the resulting campaign will have Variant A and Variant B. |
| language | Required | The specified language for each variant_index variant.
Note: The All Languages value corresponds to the default language variant shown on the campaign Content screen. Each unique variant_index value must include one row with All Languages, regardless of whether the campaign is localized. |
| title | Optional | Text that is displayed as the title in push notifications. |
| subtitle | Optional | Text that is displayed as the subtitle in push notifications. |
| body | Optional | The body of the push notification content. Required to launch or schedule a push notification campaign. |
| rich_media_url | Optional | Link to the media that is displayed in the push notification when supported by the device.
Has to be valid and HTTPS URL, and include an extension. |
| ios_media_url | Optional | If you want to include iOS-specific media, enter the link for the media. For example, iOS supports GIF and audio files. |
| action | Required | The action you want to take when a user engages with the notification. Possible actions are open_app or open_url (deeplink). |
| deeplink_url_<platform> | Optional | Required if the action is open_url. Enter the deeplink URL for each platform.
Note: The CSV upload only accepts deeplink parameters for the platforms your app supports. |
| button_n_title | Optional | If you want to include up to three custom buttons in your notification, add the title for the corresponding button, where n is 1, 2, or 3. |
| button_n_action | Optional | The button engagement action. Possible actions are: open_app, open_url, and dismiss. |
| button_n_deeplink_url_<platform> | Optional | Required if the button action is open_url. Corresponds to the deeplink URL for each platform. |
| android_extended_title | Optional | Android only: The notification title when displayed in expanded view. |
| android_extended_body | Optional | Android only: The message content when the notification is displayed in expanded view. |
| android_large_icon_url | Optional | Android only: Used as the notification icon when the notification is displayed in banner view.
Has to be valid and HTTPS URL, and include an extension. |
| android_extended_icon_url | Optional | Android only: Used as the notification icon when the notification is displayed in expanded view.
Has to be valid and HTTPS URL, and include an extension. |
| payload | Optional | To include instructional parameters that are sent to your app when you send the push notification, include individual or nested groups of JSON key/value pairs:
{
    "key": "value",
    "group": {
        "key": "value",
        "key": "value",
        "key": "value"
    },
    "group": {
        "key": "value"
    }
}
For example: { "title": "Person",
"age": {
"default": 25,
"minimum": 18,
"maximum": 99
},
"favorite_color": {
"default": "#ffa500"
}
}
|
Personalization
To include personalized content in your campaign, use Swrve’s personalization syntax to dynamically insert a user property in your CSV content. For more information, see Personalizing your campaign content.
Error messages
If an error occurs after uploading or when creating the campaign, you might receive one or more of the following types of errors and need to update your CSV to adhere to the requirements.
Campaign detail errors
As previously mentioned, Swrve validates the CSV file on upload. If the file doesn’t meet any of the following campaign-level requirements when you upload the file, an error message is displayed:
Possible error reasons are:
- sequence_number value is not numeric or unique for each campaign
- campaign_name is not unique
- platform_<name> is not set to TRUE (for any platform)
- platform_<name> or deeplink_url_<platform> parameter is present but your app does not support the platform
- variant_index value is not numeric
- variant_index does not include a language with the All Languages value
Campaign content errors
For any campaigns that are not successfully created, the Results section displays a list of those campaigns and the failure reason.
Reasons campaign creation might fail include:
- campaign_name is already in use by another push notification campaign
- language value could not be found
- button_n_title is present but button_n_action is missing, or vice versa
- button_n_action is open_url, but button_n_deeplink_url is missing for one or more platforms
Next steps
- Set custom goals to measure the success of your campaign. For more information, see Campaign goals.
- Define your campaign audience. For more information, see Targeting campaign audiences.
- Schedule and launch your campaign. For more information, see Scheduling your campaign.
- Review your campaign results. For more information, see Campaign reports.


