How do I target users based on their in-app preferences?
At times, you may want to send different kinds of push notifications to your users depending on their in-app notification settings. You can often group notifications into specific categories, as the following examples show.
A banking app may have different types of notifications:
- Statement-related notifications, such as informing users of a low balance or notifying users their monthly statement is available.
- Marketing notifications, such as informing users about new features or that they qualify for a bank loan or line of credit.
- Security notifications, such as informing users they need to update their password or there’s been a fraud detection on their account.
A simple news app may allow users to subscribe to certain categories of news:
- Local news
- Weather
- Finance
- Politics
Swrve lets you enforce these categories and ensure that users only receive the notifications they have requested.
There are two main steps involved in managing user preference-based notifications:
- Configuring your app to send user notification settings to Swrve.
- Targeting users in your campaigns based on their notification settings.
Configuring your app to send notification settings
To configure your app to send notification settings to Swrve, first integrate the Swrve SDK, including push notifications (for more information, see the platform-related SDK integration guide). Ensure you choose a meaningful location to prompt users to agree to push notifications.
For a simple solution on iOS and Android, use a Swrve in-app message to request push notification permission and explain what the notifications are used for. Since iOS and Android use different mechanisms for requesting permissions, you must create a platform-specific campaign to enable the permissions request options. For more information on creating an in-app message campaign, see Creating in-app message campaigns.
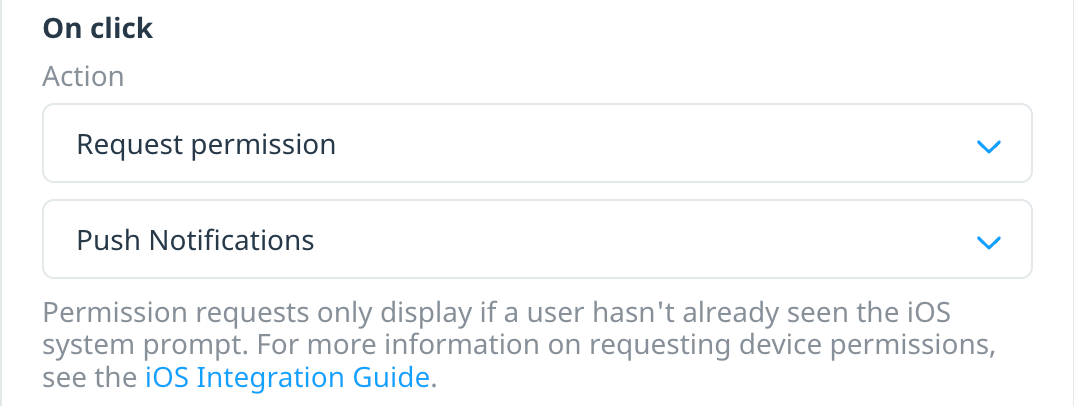
On the in-app content screen, add a button to your message and for the On click action, select Request Permission. Then select the relevant permission capability based on the platform:
- Android: Select Notifications
- iOS: Select Push Notifications
Once a user gives permission to receive push notifications, you can gather more detail on the type of notifications the user is interested in receiving using the app’s built-in settings page. Many apps have a notification settings menu that controls communication preferences by category (for example, likes, comments, contact updates, follow requests, direct messages). For each category, send a custom user property to Swrve. See the examples code snippets below.
iOS
[SwrveSDK userUpdate:@{
    @"Push_LocalNews": @"true",
    @"Push_Sports": @"true",
}];
Android
Map<String, String> attributes = new HashMap<String, String>();
attributes.put("Push_LocalNews", "true");
attributes.put("Push_Sports", "true");
SwrveSDK.userUpdate(attributes);
Targeting users by notification settings
After your development team implements category-based custom user properties, you can then use them in your campaigns to target specific groups by their preference type. On the Set Target screen of the campaign workflow, under Define Target Audience, select the desired property and enter a value of true.
For any ongoing campaigns, you can select the desired notification category user property to ensure you’re targeting the right users for marketing.

