Campaign overview and channels
Swrve’s consolidated campaign workflow turns concepts into communications. Create and manage your campaigns using our simplified, streamlined campaign builder.
Create, customize, and launch your campaigns in a single workflow using Swrve’s Campaign builder. Use the campaign building blocks to localize and A/B test your content, set goals for your campaign, refine the target audience, QA test the content and triggers, and then schedule and launch your campaign without leaving the page.
Create a new campaign
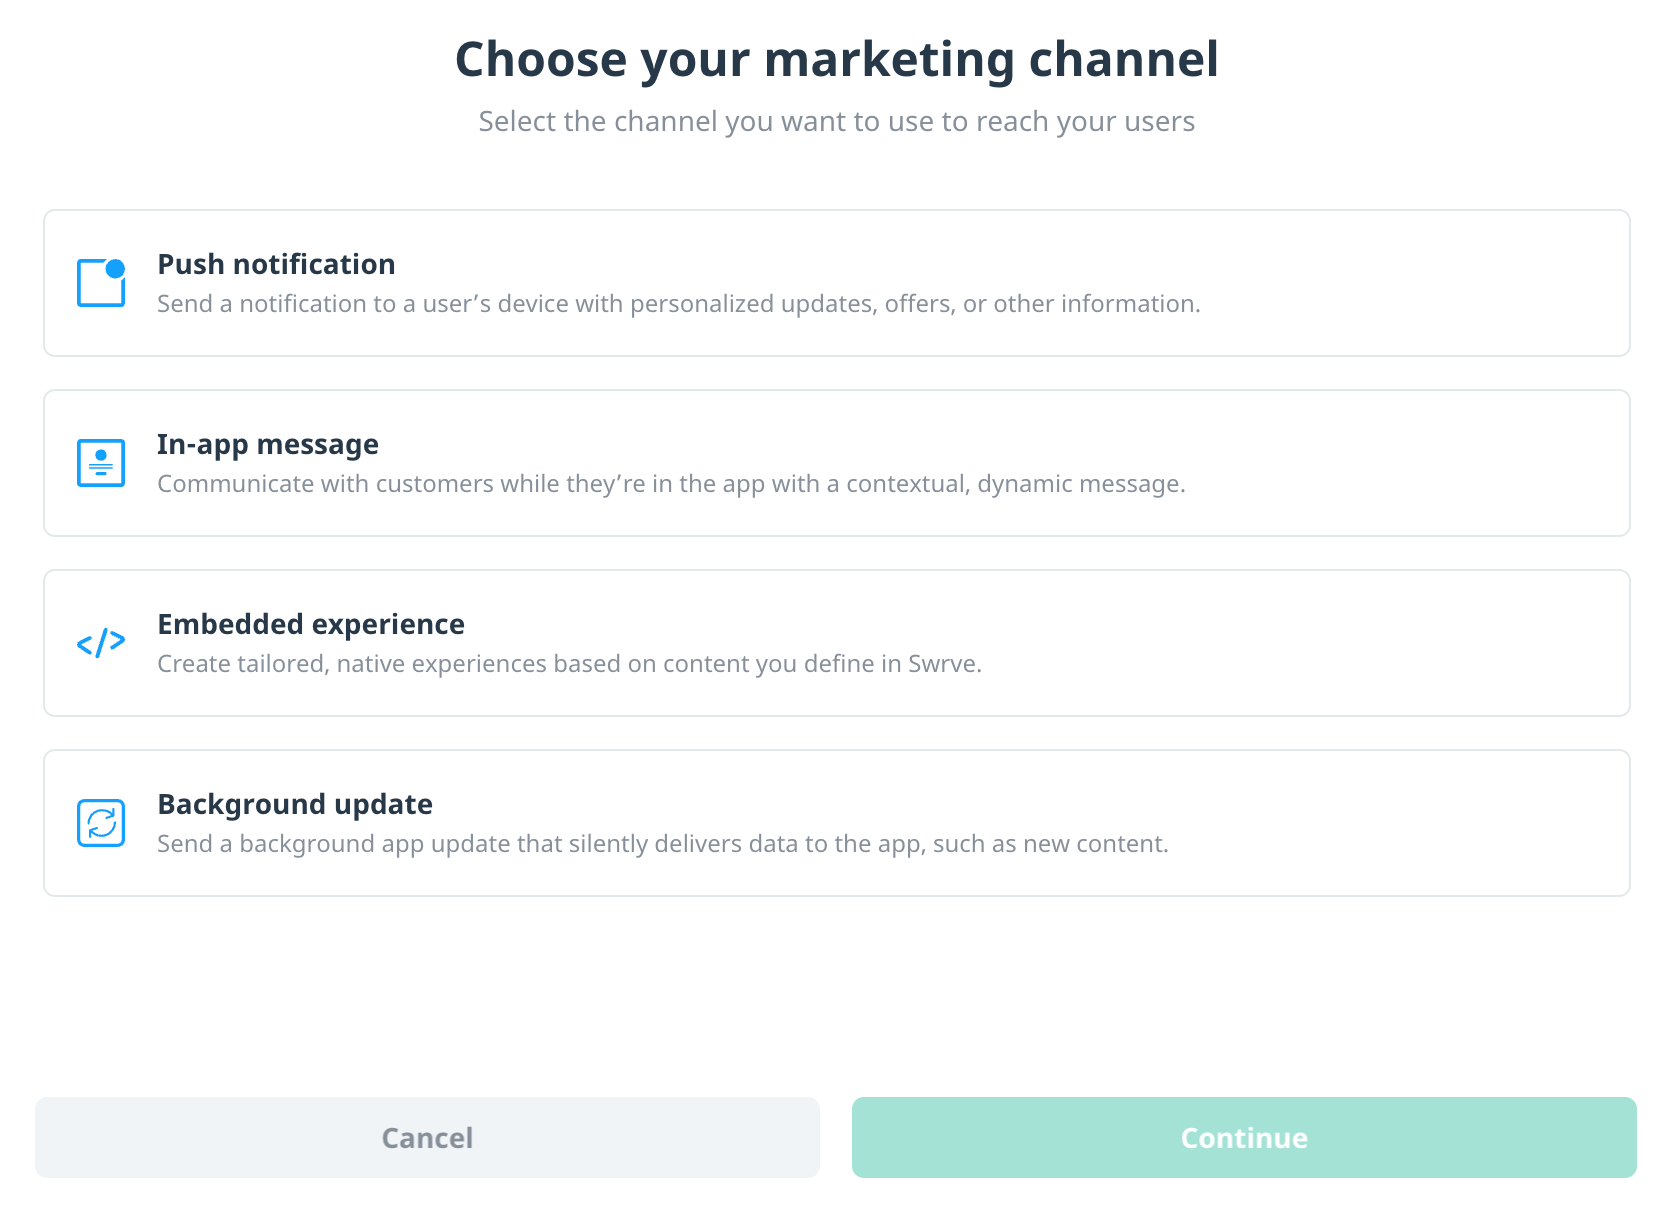
The initial steps for creating a campaign are the same for all channels.
- To create a new campaign from your Campaigns center, select Create campaign.
- Push notification: Select the push notification type – Scheduled push, Triggered push, Push via API, Geo push, or Quick push. For scheduled push, triggered push, and push via API, you then have the option to send the notification to all platforms or specific platform. Leave as All platform/Any or select the specific platform as required.
- In-app message and Embedded experience: For in-app messages, select the message type – Classic or Story. If you want the campaign to display only on specific device type or platform, select the specific device or platform as required.
- Background update: Select the update type – Scheduled or via API.
- On the Campaign overview screen, enter a name, description, and tags for the campaign.

- To save the campaign as a draft and go to the campaign builder, select Save.
Build your campaign
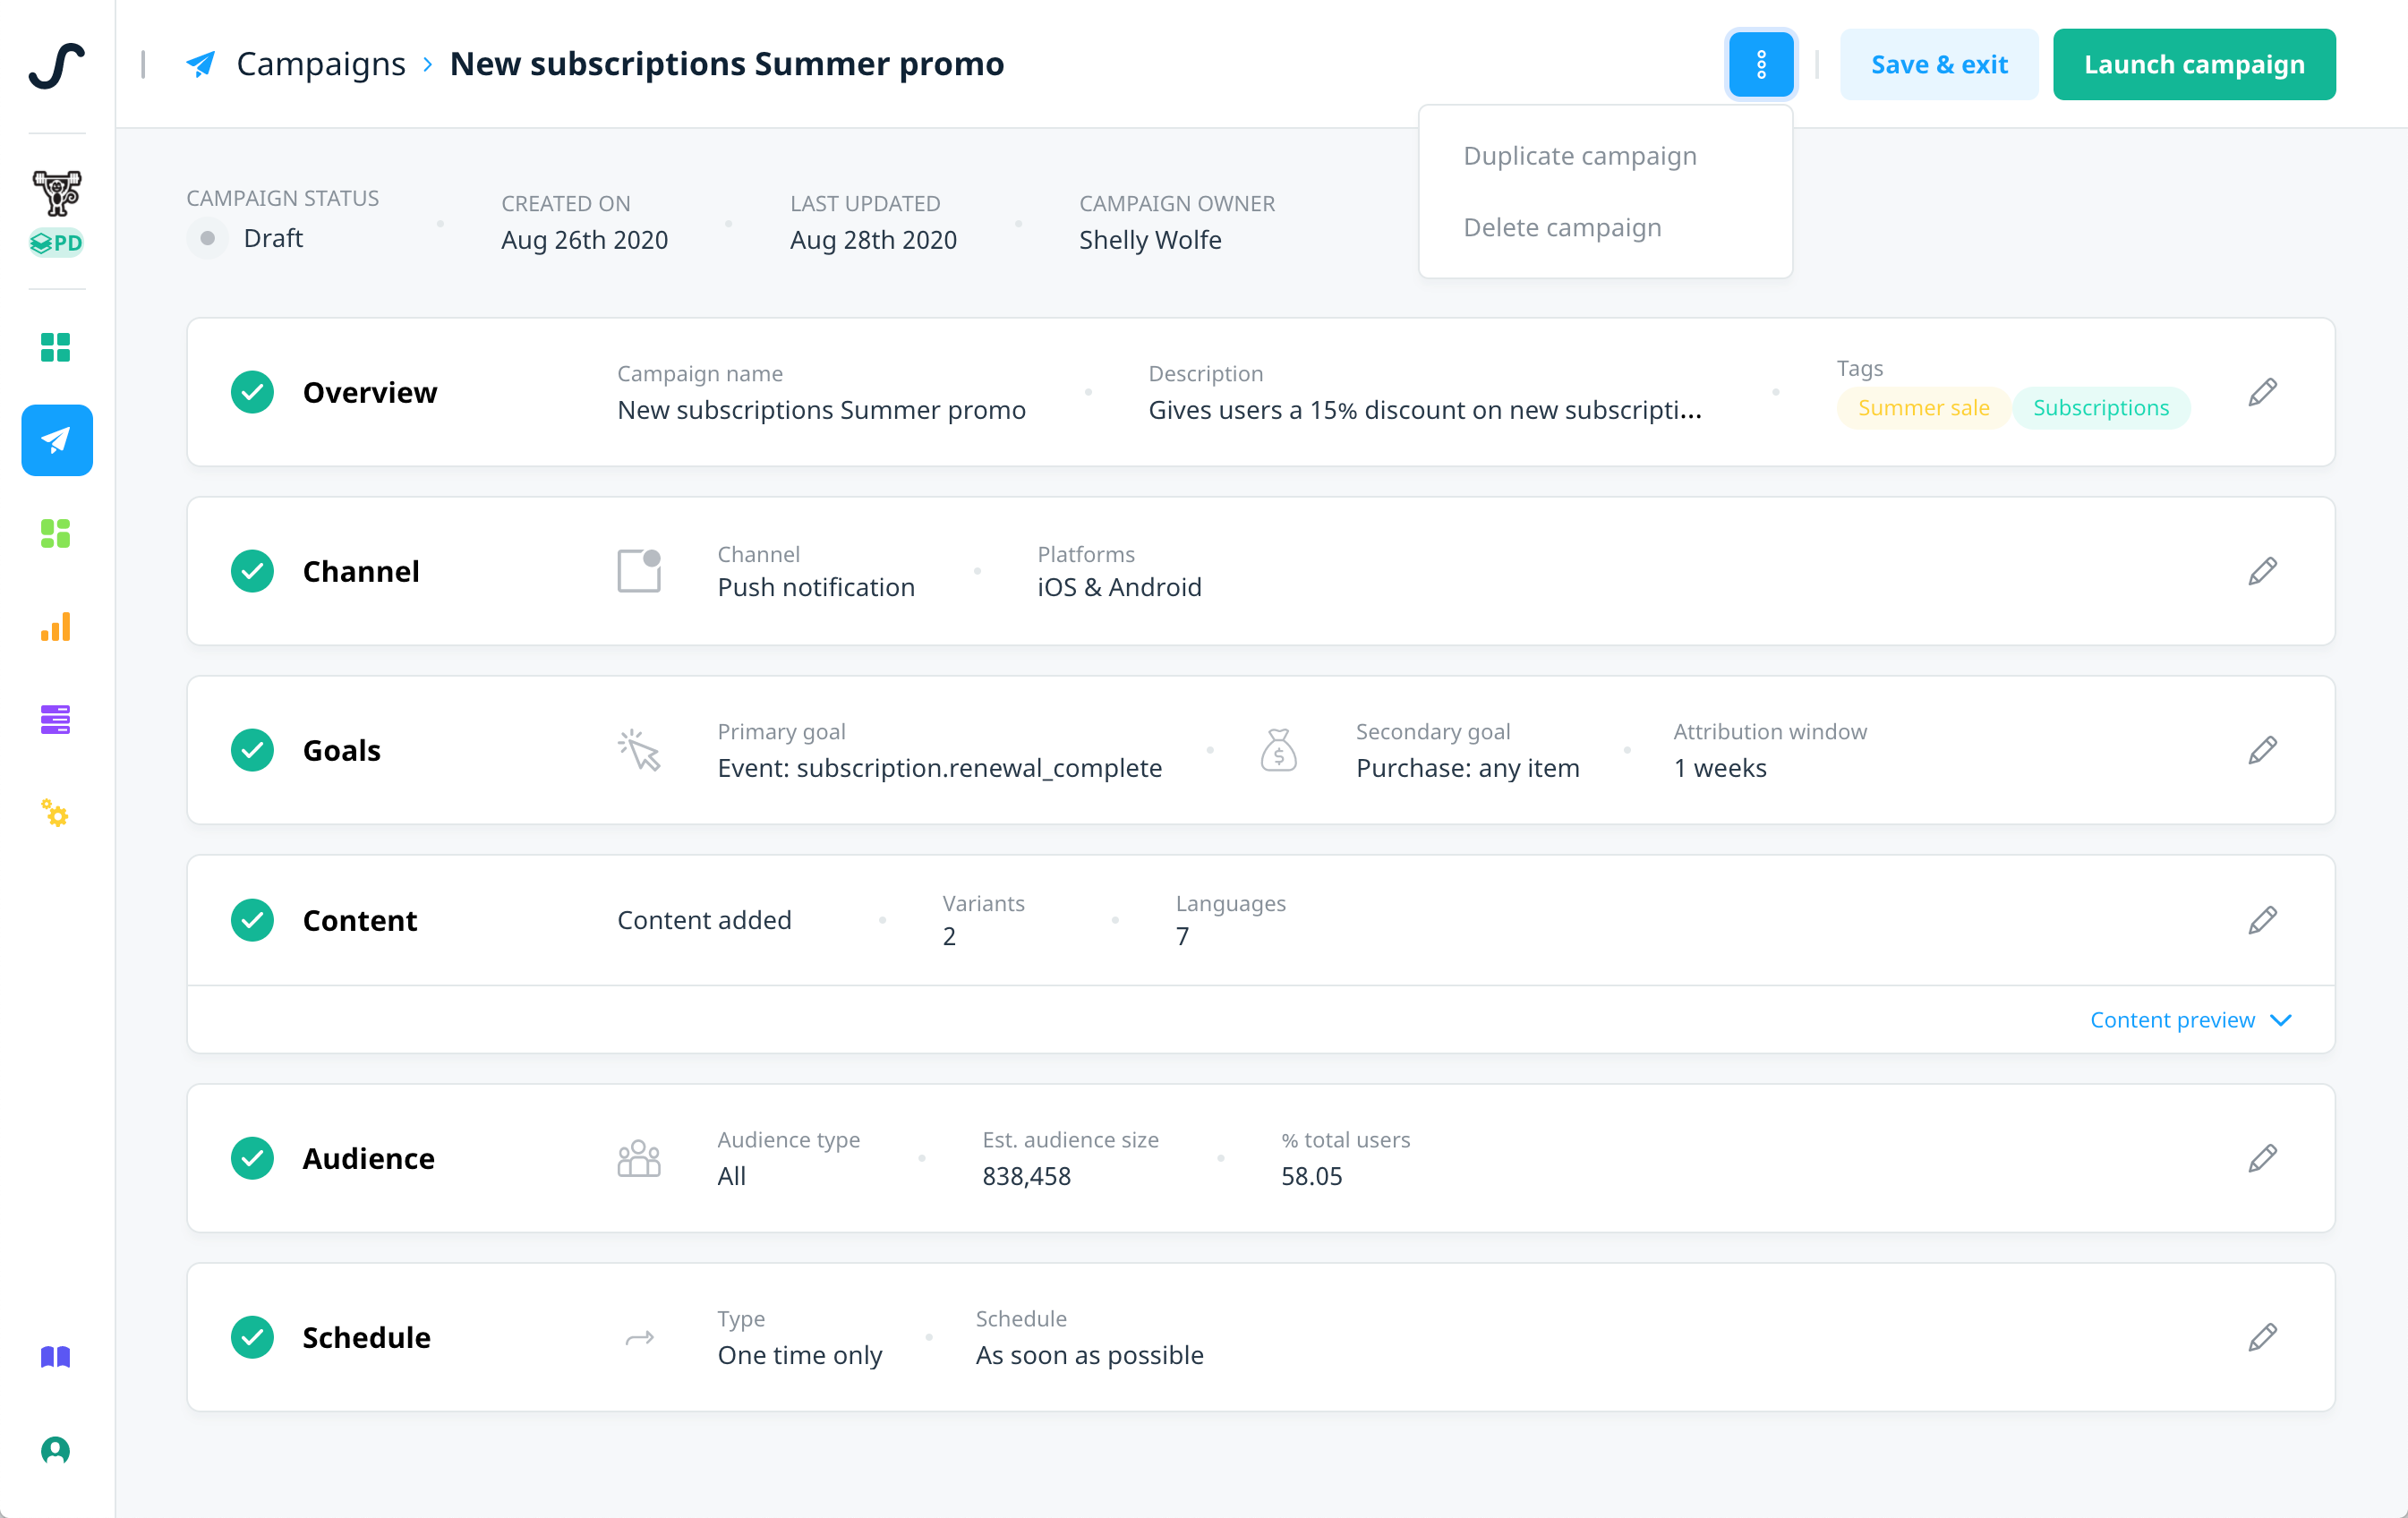
The Campaigns page displays your draft campaign with channel-specific blocks:
- Overview: Displays some basic information about the campaign. Select this block to edit the campaign name, description, or tags.
- Channel: Displays the channel you selected for your campaign, and if relevant, the service provider. For example, if you selected push notification for your campaign, it displays the platforms you selected for the campaign. For multi-platform campaigns (scheduled push, triggered push, push via API, background update), select this block to edit the platforms you want to send the campaign to.
- Goals: Set up custom goals to measure the success of your campaign.
- Content: Add your campaign content, such as the message copy, media, personalization, additional languages, or multiple variants. Select the Content preview link to preview your campaign content.
- Audience: Define your audience filters and highly customize the targeting of your campaign.
- Schedule, Schedule & triggers, or Schedule & display: Set the delivery date, time, frequency, and, if relevant, triggers for your campaign.
- API: For Push via API or Background update via API campaigns, displays the campaign-specific push API key and URL.
- QA: For in-app message and embedded campaigns, displays any QA users that you’ve added to a draft or inactive (paused) campaign.
Manage your campaigns
From the campaign builder, use the following options to manage your campaigns:
- Actions menu:
- Archive campaign: Archive a finished or inactive campaign.
- Duplicate campaign: Create a copy of an existing campaign.
- Delete campaign: Delete a draft campaign.
- Save & exit: For draft campaigns, save your work and return to the Campaigns center.
- View report: For active, inactive, or finished campaigns, view the campaign report.
- Launch, Activate, Schedule, or Reactivate campaign: Select if you’ve finished setting up your campaign and are ready to launch it, or you want to relaunch an inactive (paused) campaign.
- Block actions:
- Add +: Select to configure your campaign goals, content, target audience, or QA users.
- Edit : Select to edit block details of draft campaigns.
- View : Select to view block details of active, finished, inactive, or archived campaigns.
Alternatively, to return to the Campaigns center when reviewing any of your campaigns, select the Campaigns header.
Next steps
- Set custom goals and measure the success of your campaign.
- Add your campaign content:
- Localize your campaign content so customers receive the message in their own language.
- Create variants of your campaign content to compare how customers respond to different message styles.
- Define your campaign audience.
- QA test an in-app message or embedded campaign.
- Schedule and launch your campaign.
- Manage and apply campaign tags to help organize your campaigns.

