Intro to Conversations
Conversation campaigns are currently deprecated and support will be discontinued on December 31, 2024. For more information, see Migrating from Conversations to In-app messages.
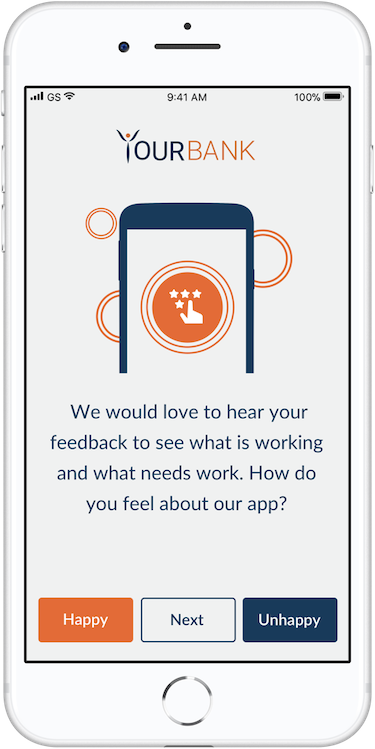
Swrve Conversation campaigns provide a rich media editor to help you create and deliver interactive in-app messages using any combination of text, images, video, surveys, or rich button actions. This flexible in-app campaign channel comes with a default set of customizable templates for the most common scenarios. Or use the Conversations editor to build completely customized messages, including custom font and text styling, that give your customers a recognizable, brand-specific experience.
 Use Swrve’s Conversations to:
- Increase customer engagement – Create personal, interactive messages for your customers and measure their responses.
- Assist users with onboarding or new features – Use the rich media options to create onboarding or video tutorials to assist new users or to explain a new feature to existing customers.
- Request customer feedback – Use the survey options to request feedback from your users.
- Run opt-in campaigns – Use predefined templates to run campaigns requesting various user permissions, for example, push notifications, access to contacts, camera, or photos, or to use location services.
- Cross-promote – Generate additional downloads or subscriptions through cross-promotion of similar products using audience targeting. You can link your call-to-action to any desired location, such as a website, social network, or other title in your portfolio.
The Conversations service integrates with all existing Swrve analytic capabilities. Before you launch a Conversation (and even after you have launched it), Swrve enables you to QA test alternative messages to identify what works and what doesn’t. In addition, Swrve enables you to specify the precise points at which Conversations are displayed and limit message frequency and repetition.
Conversations vs. push notifications
The focus of Conversations is communication with users who already have your app open on their device. If you want to communicate with your customers while they’re outside of your app, use Swrve’s push notification service. For more information about this service, see Intro to push notifications.
Conversations vs. in-app messages
Conversations use a rich media editor in the browser to build interactive, multi-page messages with text, images, video, surveys, and rich actions. In contrast, in-app messages use the display of image-based messages that have been designed elsewhere and are optimized for displaying interstitials that are blended to appear as part of the app flow. For more information, see Intro to in-app messages.
Conversations prerequisites
Before you can create your first Conversation, your development team must complete the following tasks:
- Update your app with the latest SDK – Your development team must update your app with the latest Swrve SDK that supports Conversations. For more information about integrating the SDK, see the platform-specific Integration guide.
- Configure deeplinks for custom actions – If you want to be able to configure custom actions for your message buttons, your development team must configure deeplinks during the integration process. For more information, see the platform-specific Integration guide.
- Custom text styling – To include custom fonts in your Conversations, your app must be using Swrve SDK version 4.8 or later. Users on pre-4.8 versions of your app will not receive Conversations that include custom fonts. Fonts must be in OTF or TTF format.
- Test Conversations in the Swrve service – We recommend testing Conversations on your QA devices before you begin your first campaign, using the Preview and Test screen in the campaign workflow. For more information, see QA testing conversations.
Message style defaults and custom fonts
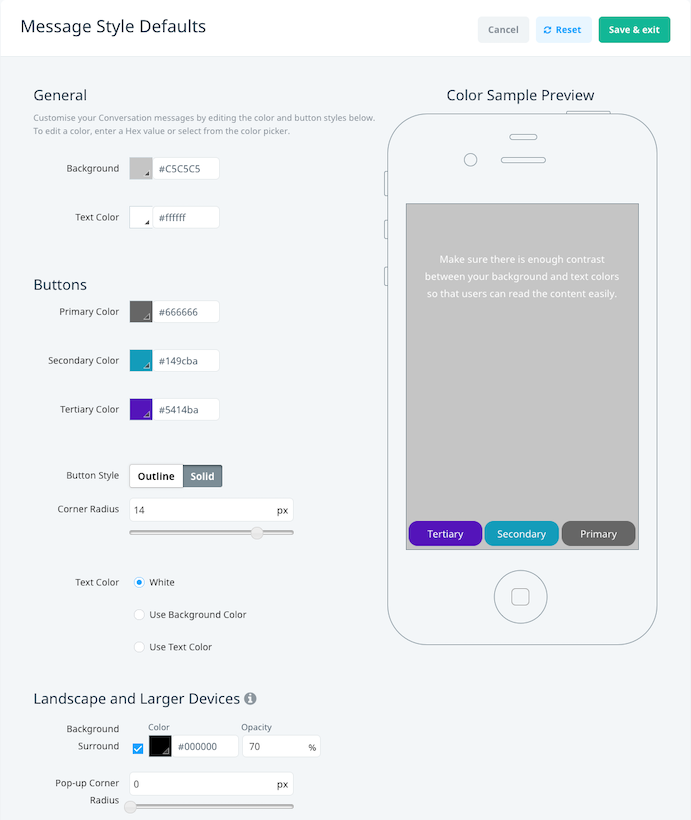
Use the Message Style Defaults screen to set app-level default settings for message styles—for example, background, text color, and button style. Or upload custom fonts to apply brand-specific styles to the text elements of a Conversation.
To access the Message Style Defaults screen, on the Settings menu, select Conversation style settings.
Setting message style defaults
Step 1: In the General section, set the default Conversation Background and Text Color. If specifying a color, you can enter the Hex value or select the color swatch to use the color picker tool.
Step 2: In the Buttons section, set the following options for your Conversation buttons:
- Primary Color – sets the primary button color.
- Secondary Color – sets the secondary button color.
- Tertiary Color – sets the tertiary button color.
- Button style – sets the button style:
- Outline – displays buttons as an outline, with the option to set the Fill as Transparent or solid White.
- Solid – displays buttons with a solid background, with the option to set the Button Text Color as White, or to use the same color as the general Background Color or Text Color.
- Corner Radius – sets the radius curvature of the buttons in pixels, from sharp corners to fully rounded.
Step 3: On larger devices, such as tablets, the message is displayed in a centred pop-up view with the option of a semi-transparent background surround. In the Landscape and Larger Devices section, select Background Surround if desired, and set the Color, Opacity, and Pop-up Corner Radius, as required.
Step 4: To save your message style defaults, select Save & exit.
Uploading custom fonts
The Fonts section displays the fonts you have already uploaded and indicates which font has been set as the default. If a font has not been used yet in a Conversation, the Delete icon is available if you need to delete the font. As soon as a font is used in an active Conversation, it is no longer available to delete.
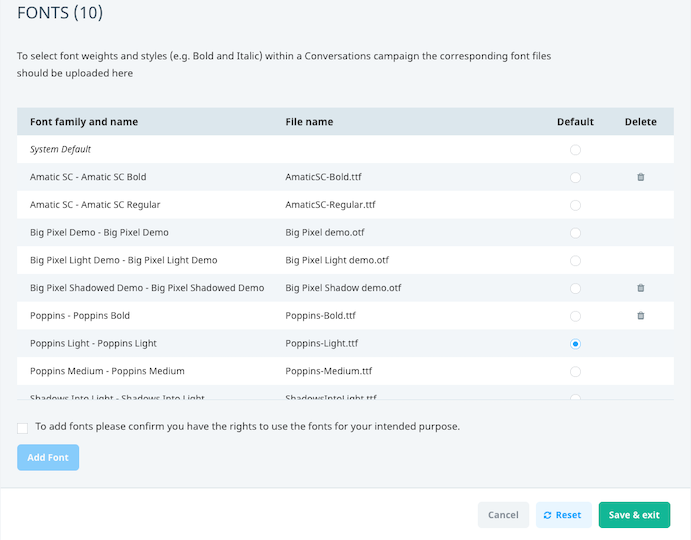
Step 1: To enable the Add Font button, confirm you have permission to use the fonts by selecting the check box.
Step 2: Select Add Font. The Font Upload section is displayed.
Step 3: Drag the TTF or OTF file you want to upload into the Font Upload section, or select choose files to select and upload the files. A status bar shows the progress of your upload and you can upload multiple files at the same time.
Step 4: After the upload is complete, the font is displayed in the list of fonts and is available to use in all of your Conversations campaigns, across all of your company’s apps.
To set a font as the default, select the Default radio button in the appropriate row. Any new Conversations will use the default font for all text blocks, but you can also set the font in the text editor from the list of uploaded fonts. For more information see Creating Conversations.
If you want to use different styles or weights of the same font family (for example, regular, bold, italics), you must upload each font style as a separate file.
Messaging display rules
The Messaging Display Rules screen enables you to set app-level settings that define the display rules for all your messaging, both in-app messages and Conversations. For example, you can specify a delay before the message displays, restrict the number of messages displayed per session, or limit the frequency of messages.
Configuring conversation display rules
Step 1: To display the Messaging Display Rules screen, on the Settings menu, select IAM/Conversation display settings.
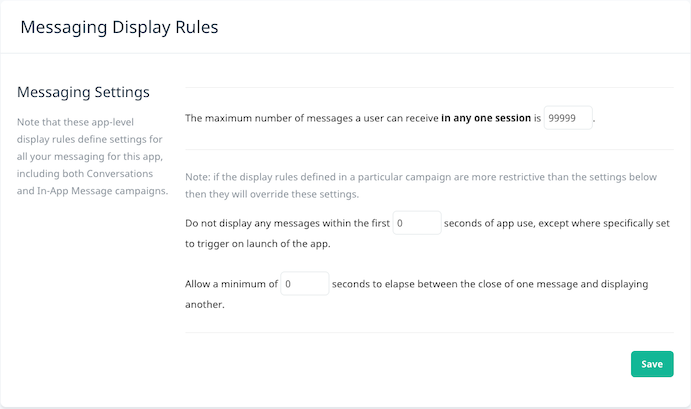
Step 2: In the first statement, enter the maximum number of messages a user can receive in any one session.
Step 3: In the second statement, enter the number of seconds after app start-up that must elapse before the user receives a Conversation. Note that this rule is ignored for any Conversations that you configure to be deliverable when targeted users start an app session (that is, if you select the When the user launches the app check box on the Set Display Triggers step of the campaign workflow).
Step 4: In the third statement, enter the number of seconds that must elapse between Conversations.
Step 5: Select Save.
Next steps
- View Conversation best practices before you create your Conversation. For more information, see Conversation best practices.
- Create a new Conversation. For more information, see Creating Conversations.
- Edit the content of a new or existing Conversation. For more information, see Editing Conversations.
- QA test a new or existing Conversation. For more information, see QA testing Conversations.
- View results and reports for your Conversations or change the status. For more information, see Managing Conversations.